

This recipe was first recommended to me by my sister Natalie, via my mom; the cupcakes themselves were later recommended, via Katie, by Chris Parnell and Andy Samberg (watch the video here), and rapturously enjoyed by the Bolsover potluck crowd. You can find the actual recipe here (the icing recipe is toward the bottom). They're very easy to make, and turn out great. I started off by preparing the cupcake cups: I bought these colorful silicone cups (at left--they also come in pastels) at Sur la Table a couple of months ago and have been eager to use them--you just put them on a baking sheet, fill, and bake as usual. Then the cupcakes just pop out, nice and easy. Since the recipe makes 24 cupcakes, I also used a regular muffin tin with traditional paper liners.
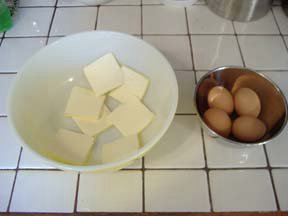 The butter and eggs, coming to room temperature. I sliced up the butter to help it along (as any physicist worth her salt will tell you, a large surface area to volume ratio makes for faster heat conduction, even in an insulator like butter).
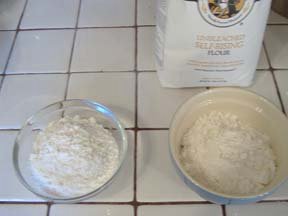 The two kinds of flour, all-purpose (left) and self-rising (right, with the bag above), measured out and ready to go. The recipe gave quantities in terms of volume, rather than weight, which didn't seem to be a problem. My sister says that she had success substituting cake flour for the self-rising (they didn't have any in the house), although I have to imagine that that would have made for a slightly denser cupcake.
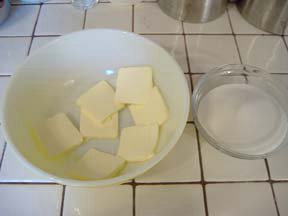
The softened butter and sugar (granulated), ready to be creamed.
The butter and sugar, creamed, ready for the eggs. The butter-sugar mixture, after all the eggs have been added; to the left are the two flours, combined, and the milk and vanilla. The process of adding the eggs one at a time and mixing well after each addition makes for a lighter, fluffier cake batter (and therefore lighter, fluffier cupcakes). So, I believe, does the process of adding the wet and dry ingredients alternately to the butter mixture. I hear that finishing with the dry results in a better cake, but I haven't confirmed this theory with a side-by-side comparison.
The completed batter. It's delicious--I highly recommend licking the bowl, beaters, spatulas, and so on.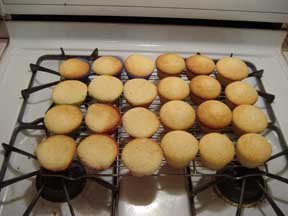 The cupcakes, fresh out of the oven. It's hard to tell in this picture, but the silicone cups resulted in cupcakes that had concave tops and that had spilled over the side--all to the same side, which makes me think that perhaps the shelf, or my baking sheet, is not entirely level. They also had slightly well-done bottoms (not burned, but browner than the rest of the cupcake). This may have resulted from that sheet being toward the bottom of the oven, much closer to the heat. I will say, though, that the cupcakes were very easy to remove from the little silicone cups--minimal stickage. The cupcakes in the lined muffin tin turned out more or less perfect-looking.
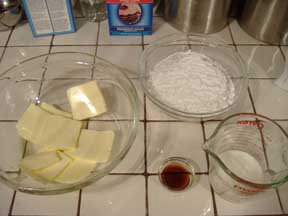
The icing ingredients: softened butter, lots of powdered sugar, milk, and vanilla.
The icing: at left, its natural color; at right, with some purple food coloring. The iced cupcakes. I used a pastry bag fitted with a plain 1/2" round tip to pipe the icing. It was a pain to wash the pastry bag between icings so that the white and purple wouldn't mix, but I think the effect is worth it.
 These are the tools I used to make the marzipan flowers. Using my Roul'pat, I was able to do this on my dining room table. The knife is a craft knife, not a kitchen knife, because it has a thinner (and often sharper) blade that is more suited to precision cutting. The tools are actually ceramics tools that I bought at a local art supply store. They are the same material and shapes as marzipan tools, but much cheaper. I also bought the tiny cookie cutters at the art store.
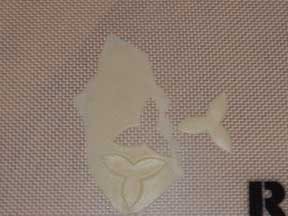 Working with marzipan is mostly straightforward, but a little tricky, as the marzipan tends to stick to pretty much everything (even my silicone mat). To make the flowers, I simply rolled out pieces of marzipan (using a sheet of silicone-coated parchment paper on top to avoid getting marzipan all over my wood rolling pin) and used the cookie cutter as you would when cutting out regular cookies. Lifting the flowers up off the mat was difficult at first, but became easier once I figured out the optimum marzipan thickness and the right tool to use.
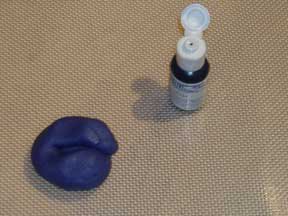 To make the purple flowers, I just put a drop or two of the coloring gel (the same one I used for the icing) onto a chunk of marzipan and kneaded it in my hands for a while. It took a few minutes to get the color to look homogeneous--I found that rolling it into a rope in my hands, folding it in on itself, and repeating several times did the trick.
 The finished cupcakes. At first, I was only going to do a simple white flower on the purple icing, and a purple flower on the white icing, but I decided to make the flowers two-tone by using a smaller flower cutter and making several of each, and then placing the smaller flowers on top of the larger ones, turned 60 degrees (so that the petals were not overlapping). When the flowers were assembled (they get easier to work with as they dry out a bit and become less sticky), I just pressed them gently into the center of the icing.

From My Blogroll
Resource Pantry
Categories
- Breakfast (14)
- CCCP (2)
- Chocolate (15)
- Cleverness with Leftovers (8)
- Condiments (6)
- Cookbooks (2)
- Desserts (49)
- Domestic Delights (5)
- Fast Food (7)
- Foodie Education (2)
- Fruit (22)
- Gadgets (2)
- Grains (7)
- Holidays (21)
- Kitchen tips (4)
- Locavore living (22)
- Make-Ahead (13)
- Meat (11)
- Miscellaneous (17)
- Pastas (6)
- PSA (7)
- Recipes (101)
- Restaurants (12)
- Salads (4)
- Soups (4)
- Travel (7)
- Vegetables (29)
- Vegetarian (26)
Past Posts
It's not nice to steal. Please don't republish what you find here unless you have my express permission.
In other words: unless otherwise noted, images and text © Anne Sandman 2005-2010. All rights reserved.
Thursday, January 19, 2006
Subscribe to:
Post Comments (Atom)
1 comments:
Wow. I want to cook with you someday.
Post a Comment