Showing posts with label Holidays. Show all posts
Saturday, December 25, 2010

Merry Christmas!

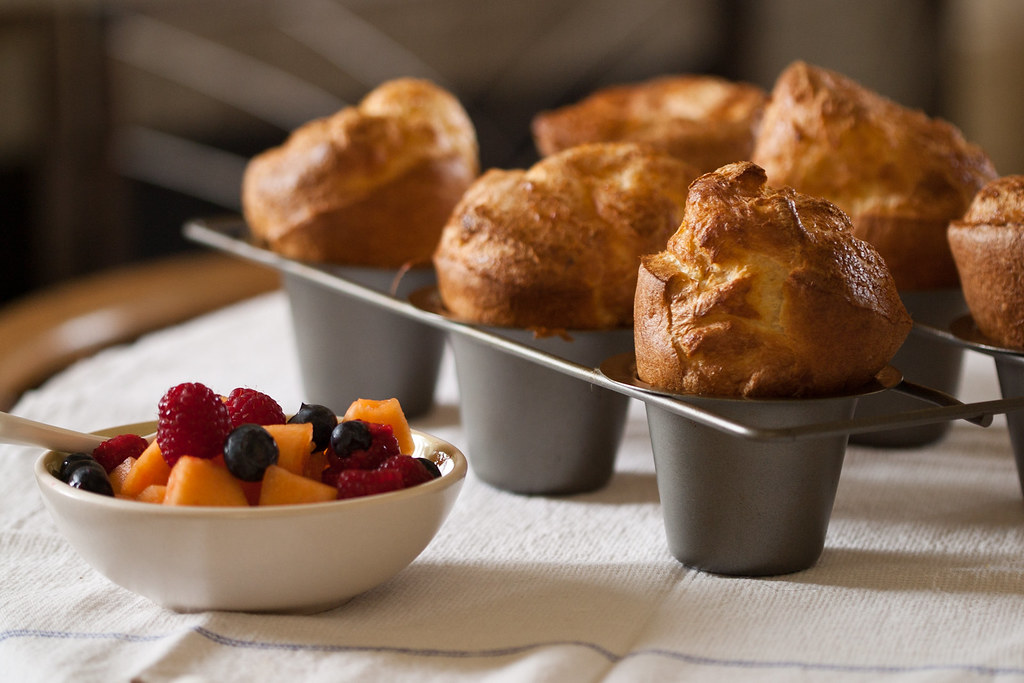
Christmas breakfast

We're having a quiet Christmas this year. S had hip surgery #2 on Monday, and so far things are going splendidly, but we're keeping the activity level to a minimum. I'll take the pup to the dog park while S blows up Nazi zombies from the comfort of a recliner (and underneath a pile of cats). Today's menu is traditional for our family: popovers, fruit, and homemade jam for breakfast (above), homemade soup and bread for lunch, and roast beef with Yorkshire pudding for dinner. For those of you who celebrate Christmas, do you have traditional family recipes or menus?

Whatever your plans are today, I wish you a day full of peace, joy, and love. I'll have another recipe up shortly, but in the meantime, safe travels and good eats!

Merry Woofmas!

There's more...

Friday, December 24, 2010

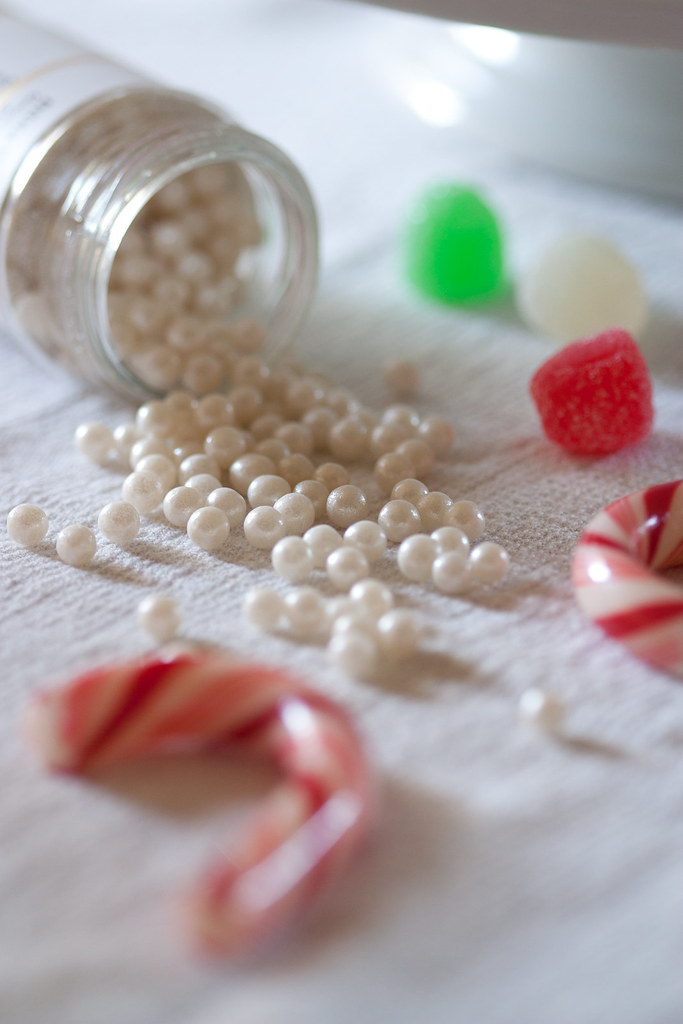
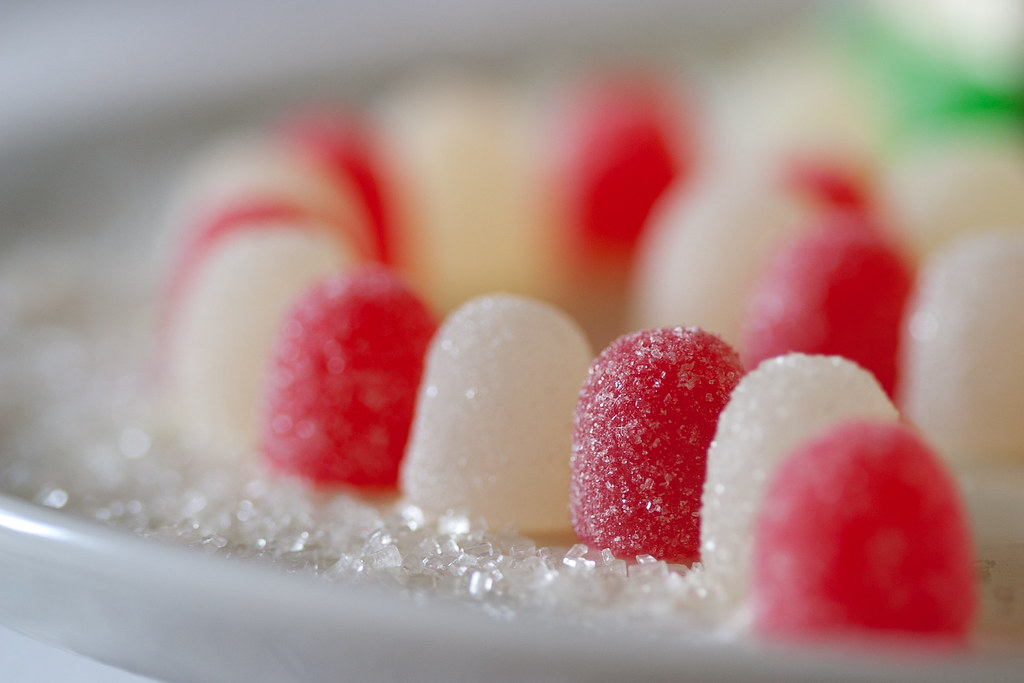
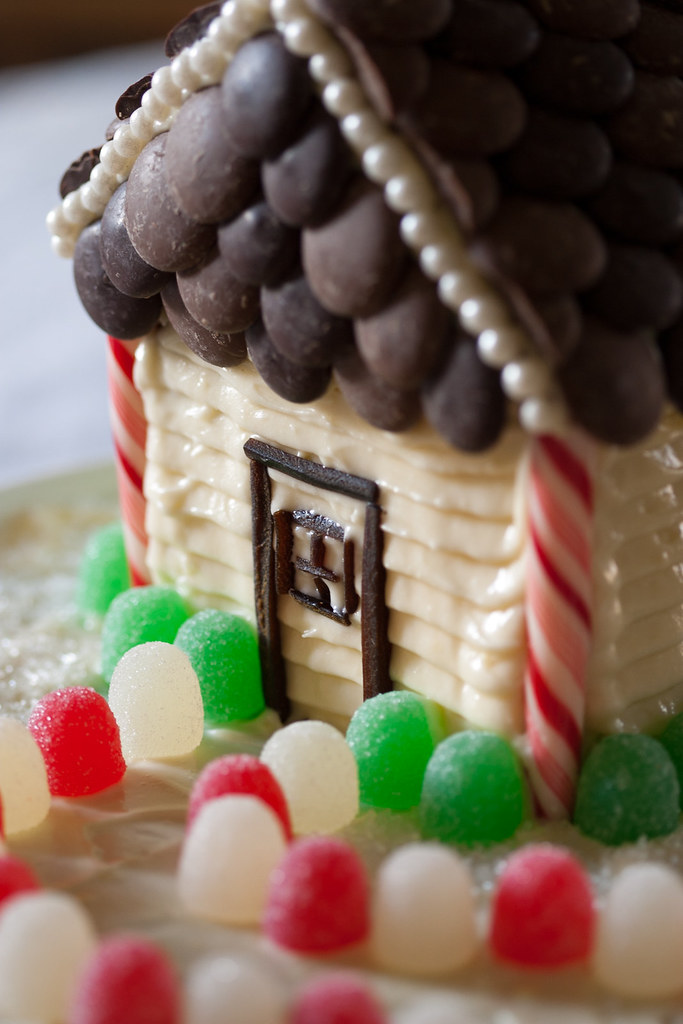
A different kind of gingerbread house

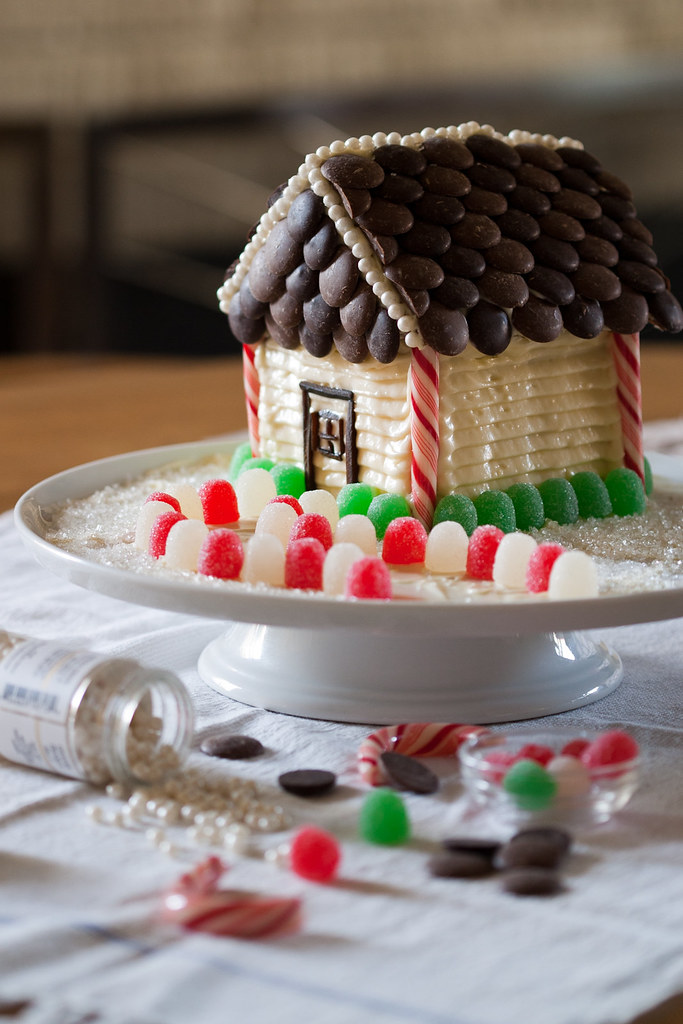
Gingerbread house

Gingerbread houses: the baking, the building, the decorating. Ordinarily I'd say, what's not to love? The thing is, there is something not to love, and that's the gingerbread. Frankly, I'm not all that fond of the sturdy (ahem) gingerbread that's typically used in gingerbread houses. Perhaps some people are content with the only fun part being the decorating, and perhaps some people actually like the traditional gingerbread, but I'm not one of those people--I want to play with my food, but I also want to eat it. Fortunately there's a different way. If you ask me, it's a better way.

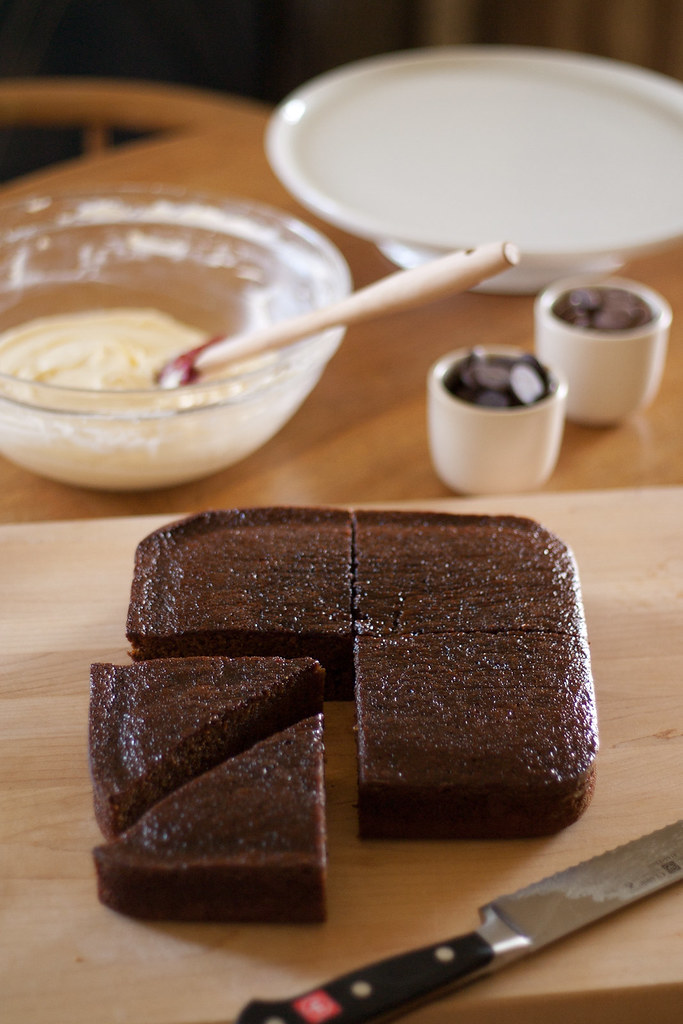
Construction begins

Years ago I happened on a Martha Stewart gingerbread house recipe that used not the hard, unappetizing type of gingerbread, but gingerbread cake. I can't for the life of me find the recipe, and I don't even remember if the cake was anything special. The key thing was the concept. If you make a gingerbread house using cake, your problem will be keeping yourself from eating all your construction materials before you even start building, rather than the guilt over throwing out something you baked but can't bring yourself to eat.

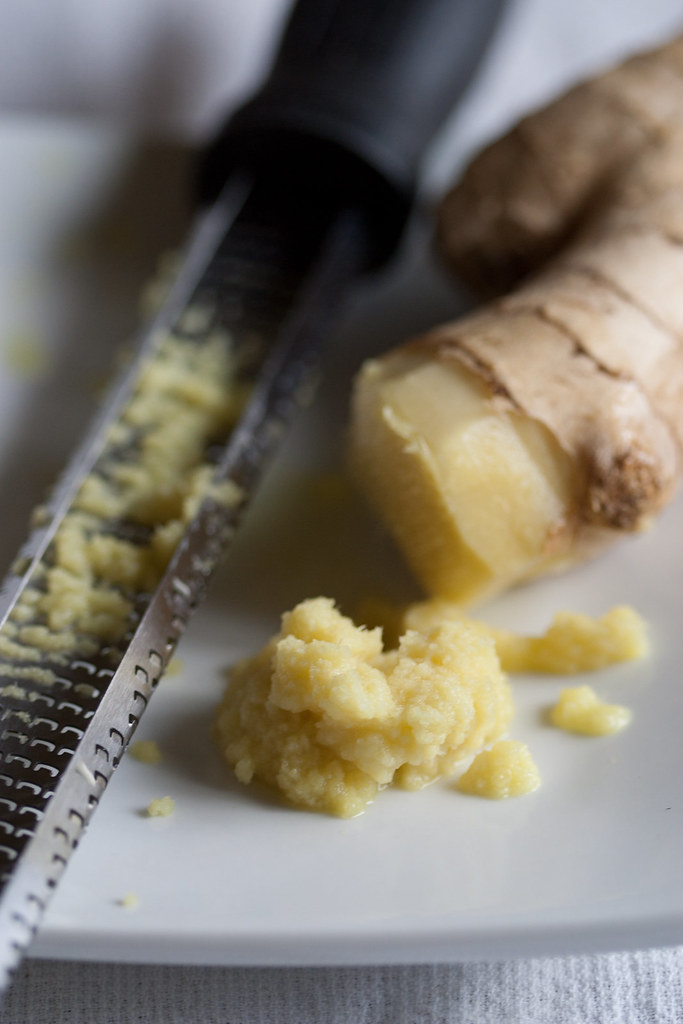
Grating gingerDecorations
Gumdrop path

This cake is a ginger-lover's cake. Indeed, with two tablespoons (!!) of ground ginger and a tablespoon of fresh ginger, it might even be too strong for people whose feelings toward ginger don't rise to the level of fervent admiration. Again, I'm not one of those people. I've tried other gingerbread cakes before, ones that gave a cursory nod to the ginger flavor but ultimately left me wanting more. Not this one. Here the warm, spicy ginger flavor comes through beautifully against the hearty, stout-enriched cake. I enjoyed building and decorating my little house, but for once I think I might have even more fun eating it.

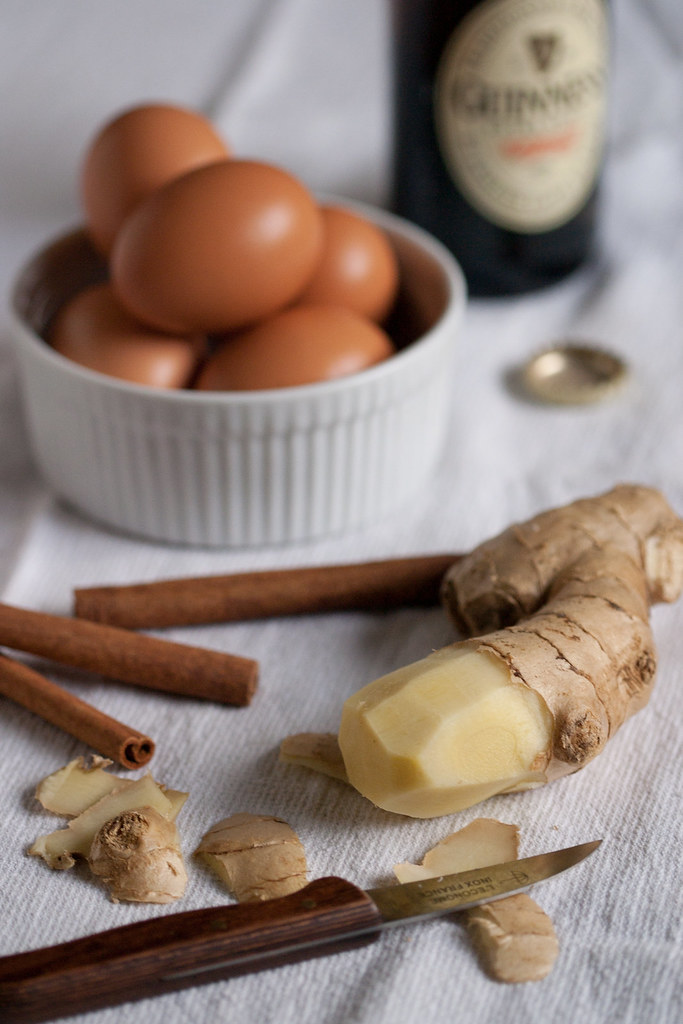
Gingerbread ingredients

Gingerbread Cake

Adapted from Cook's Illustrated, January & February 2011
Makes one 8-inch square cake.

Ingredients

  • 3/4 cup dark stout, such as Guinness
  • 1/2 teaspoon baking soda
  • 2/3 cup molasses
  • 3/4 cup (5 1/4 ounces) packed brown sugar
  • 1/4 cup (1 3/4 ounces) granulated sugar
  • 1 1/2 cups (7 1/2 ounces) unbleached all-purpose flour, plus some for dusting the pan
  • 2 tablespoons ground ginger
  • 1/2 teaspoon baking powder
  • 1/2 teaspoon salt
  • 1/4 teaspoon ground cinnamon
  • 1/4 teaspoon finely ground black pepper
  • 2 large eggs
  • 1/3 cup vegetable oil
  • 1 tablespoon finely grated fresh ginger

Directions

  1. Place an oven rack in the middle position, and preheat the oven to 350 degrees. Oil an 8-inch square baking pan (preferably glass or ceramic, see note), dust it with flour, and set aside.
  2. Place the stout in a medium saucepan (at least 1 1/2 quarts, trust me) over medium heat. When it comes to a boil, remove it from the heat and stir in the baking soda. Don't be alarmed when it produces a copious amount of foam.
  3. Let the foam subside, then stir in the molasses and sugars until they're dissolved. Set the mixture aside and let cool slightly while you prepare the dry ingredients.
  4. In a medium bowl, whisk together the flour, ground ginger (not fresh), baking powder, salt, cinnamon, and pepper. Set aside.
  5. When the stout mixture has cooled somewhat (should be warm to the touch, but not hot), whisk in the eggs, oil, and fresh ginger.
  6. Add the wet ingredients to the dry ingredients in three parts, whisking vigorously (yes, really) after each addition. The batter should be completely smooth before you proceed with subsequent additions.
  7. Pour the batter into the prepared pan, and tap the pan against the counter (gently!) in order to release any large air bubbles in the batter. Bake for 35-45 minutes, or until a toothpick inserted into the center of the cake comes out clean, and the top is just firm to touch. Be patient--unless you know that your oven tends to rush things (or the cake appears to be burning), try not to open the oven door until at least 35 minutes have passed. Cool the cake in the pan on a rack for at least 1 1/2 hours, and serve either warm or at room temperature.

Notes

  • If you only have a thin-walled (metal) pan, the folks at Cook's Illustrated recommend using cake strips to insulate the cake and prevent the edges from burning.
  • The cake can be stored, wrapped tightly in plastic and kept at room temperature, for two days.
  • The original recipe recommends serving it with whipped cream, but for construction purposes I recommend something more substantial, like cream cheese frosting. Cream cheese frosting is simply two parts cream cheese, one part butter, plus vanilla extract and powdered sugar to taste--1/2 teaspoon vanilla and 1 cup powdered sugar are a good starting point for 8 ounces of cream cheese.

Front door

There's more...

Thursday, April 22, 2010

Earth Day link farm

Dewy grass

I'll have a lovely, spring-green recipe coming your way soon, but in the meantime, let's take a quick look at a different kind of green. In celebration of Earth Day, here are some links to help you get your earth love on. Happy browsing!

KQED's Bay Area Bites has a list of things you can do to make your kitchen a little less wasteful and a little more environmentally friendly. If you're already doing most (or all) of the things on the list, give yourself a pat on the back. If not, perhaps you'll learn something new. Everybody wins!

iPhone-wielding fans of the Monterey Bay Aquarium's Seafood Watch now have a handy way of keeping Seafood Watch's sustainable seafood recommendations handy: a free iPhone app with region-specific seafood information determined by your phone's GPS function.

If you haven't seen Food, Inc., do. Seriously. It's an eye-opening, heart-breaking, blood-pressure-raising 90 minutes chock full of information on where our food originates. Netflix account holders can have it streamed to their tv or computer.

I doubt that anyone reading this blog doesn't know where to find locally grown produce, but just in case, U.S. readers can find a wealth of local market and producer information through Local Harvest.

This isn't food-related, but NASA/Goddard's Flickr photostream has some pretty neat images of this blue planet of ours.

And finally, also not food-related but filed under "neato," some awe-inspiring new images of the star that makes it all possible: our sun.

Anything to add? Drop your links in comments. Happy Earth Day!

There's more...

Monday, March 15, 2010

Chocolate cream pies for Pi Day

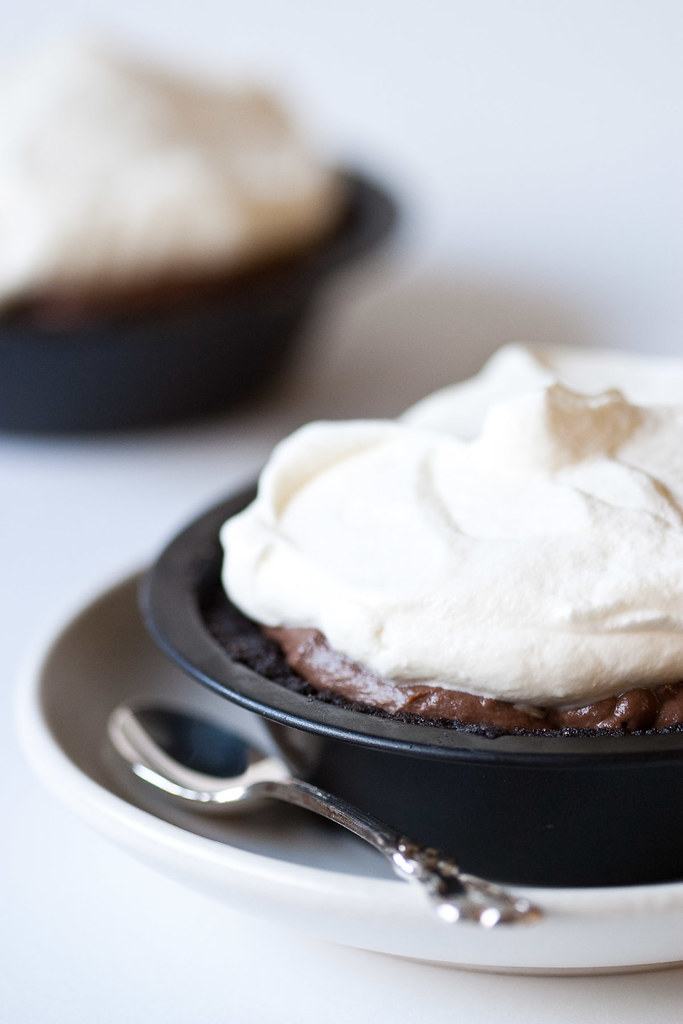
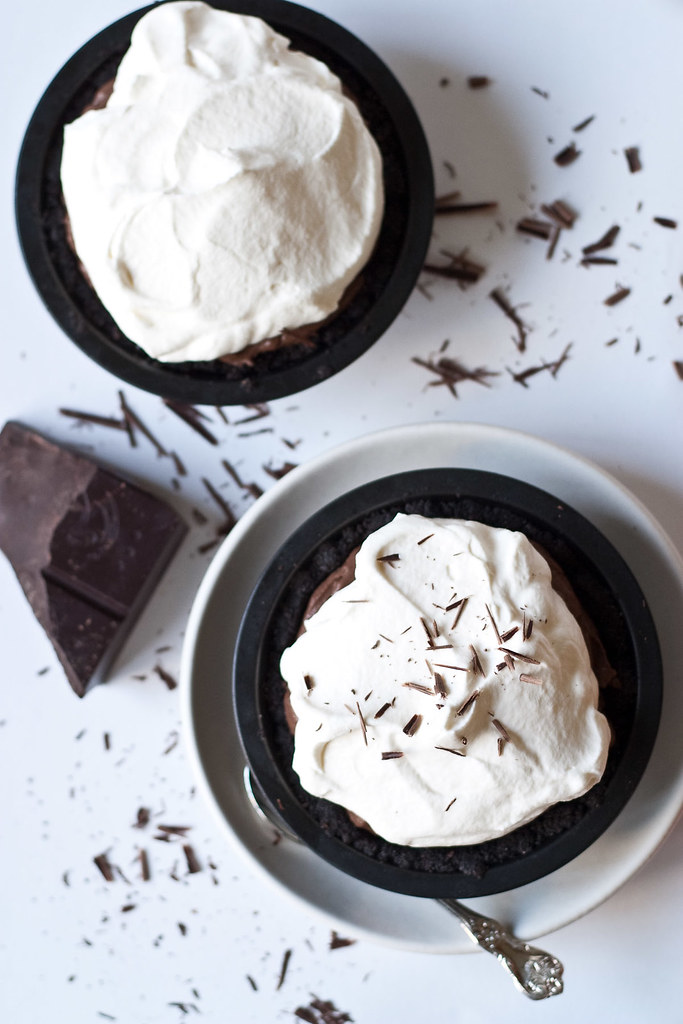
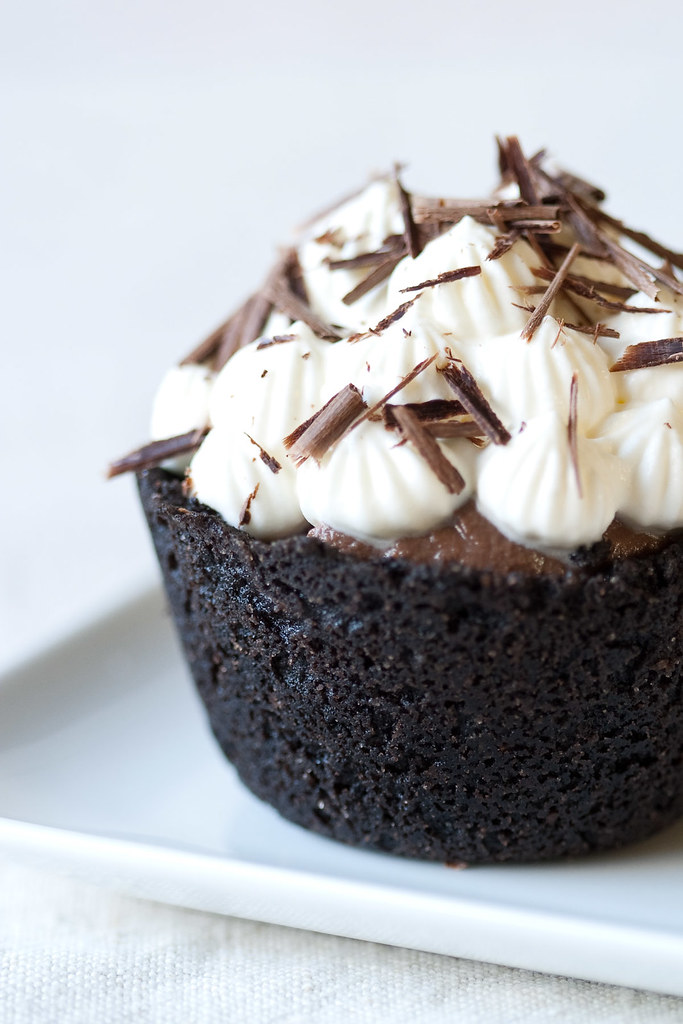
Miniature chocolate cream pies

Please allow me to brighten up this historically ill-fated day for you. Chocolate! Cream! Pie! Pi!

Wait, what?

Yesterday* was 3/14, Pi Day, that under-appreciated holiday on which we gather together to eat pie and give thanks for our ability to calculate the area of a pie plate. Well, maybe you don't. But even if you don't care much about the math, I think we can all agree that an excuse to eat pie is worth celebrating.

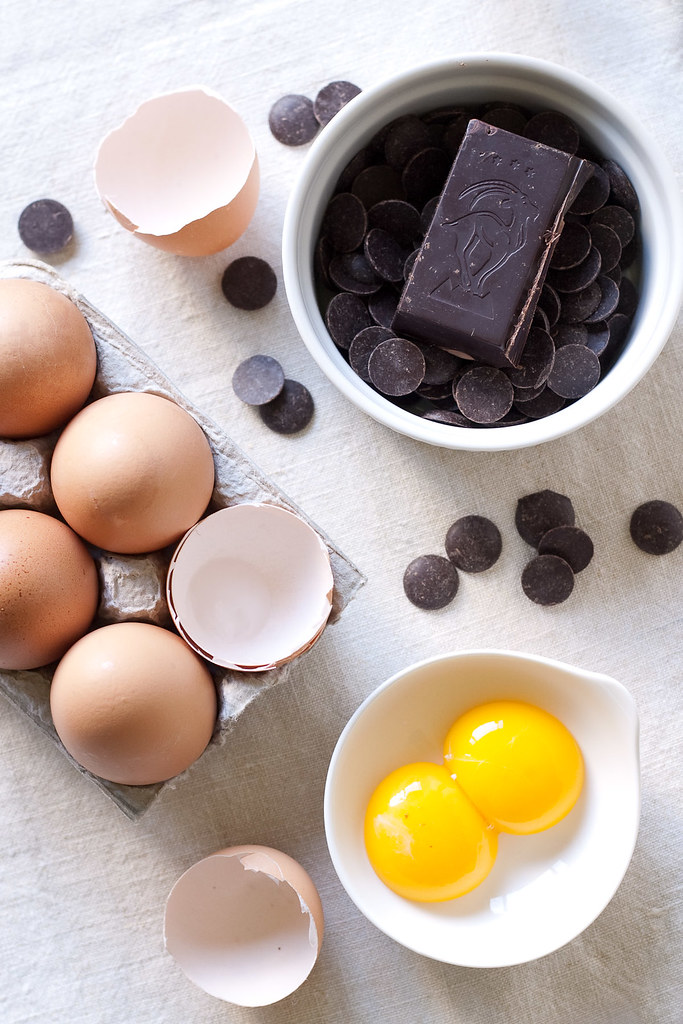
Ingredients

Unlike with some pies, there's really no way to convince myself that chocolate cream pie is good for me. It consists entirely of cookies, butter, pudding, and cream, so there's no getting around it: this is one of those desserts you can't justify making for anything other than a special occasion. I've been waiting months for a good excuse to make it, so when someone reminded me that Pi Day was coming up, it didn't take me long to decide. Chocolate cream pie was the one.

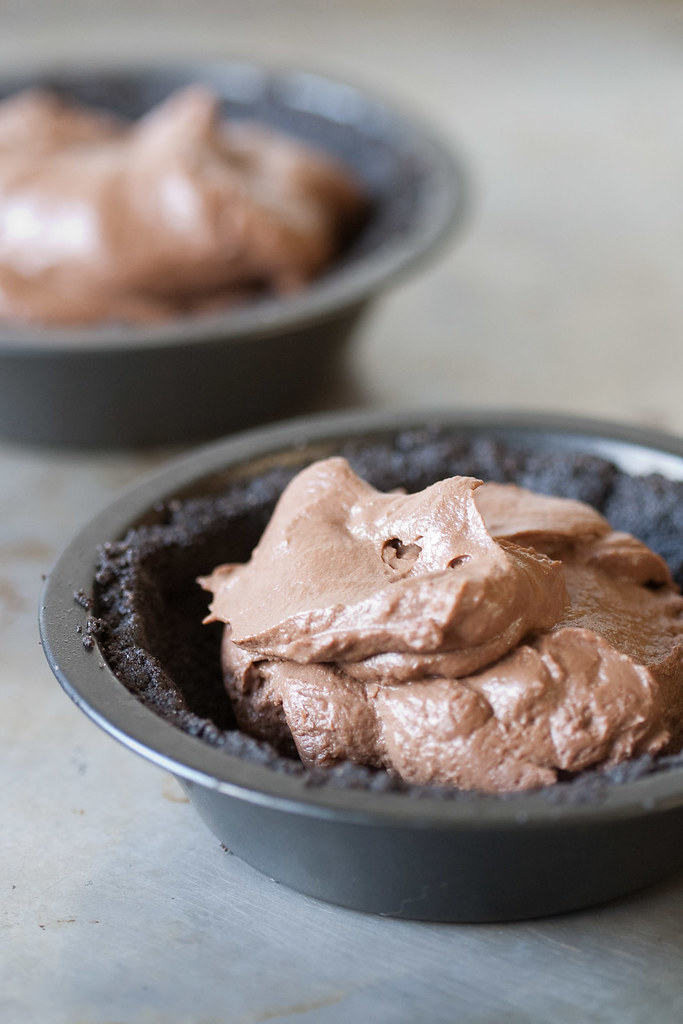
Filling

And what a pie it is. A pulverized chocolate cookie crust, chocolate pudding for filling, and whipped cream to top it all off. What's not to love? No doubt about it, this pie will turn your frown upside down.

Even the preparation will elicit a smile, especially from those for whom success with traditional pie crusts remains elusive. You'd have to try hard in order to overwork this crust, which comes together quickly and is simply pressed into place. The only aspect of the pie that might give one pause is the pudding. To that I say: arm yourself with a whisk and a sieve, and all will be well. By the time you've finished, you'll realize that the hardest part is being patient enough to let it chill for six hours before you dive in.

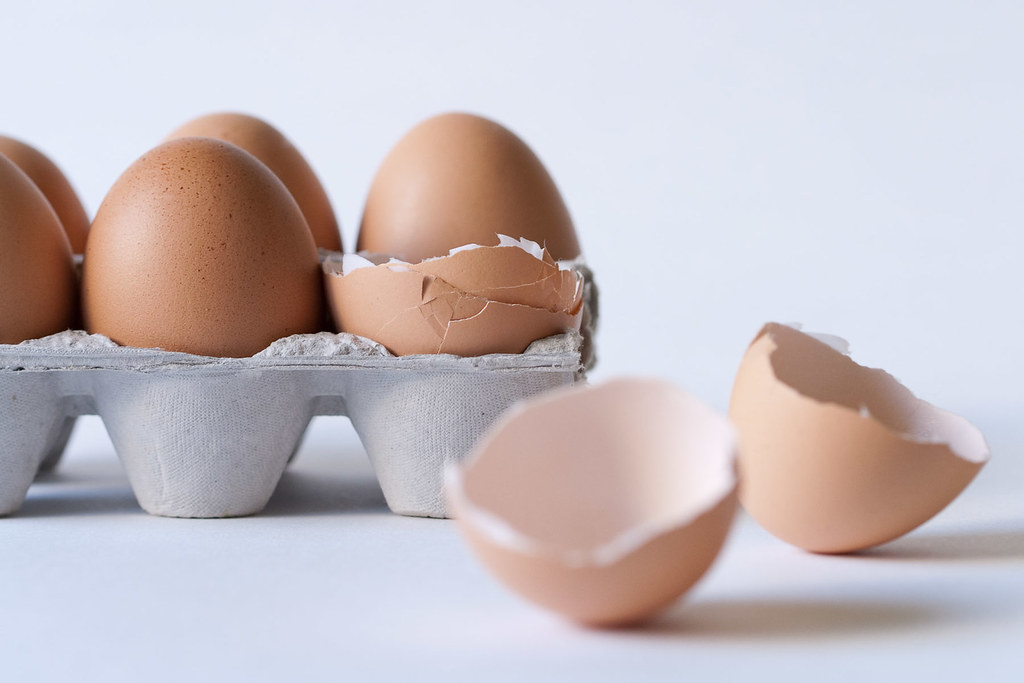
Eggs and shells

Hungry for more Pi Day fun? Head on over to Amy's, where fall flavors made a guest appearance for this late winter celebration. Did you make a pie for Pi Day? Please share with us in comments!

Chocolate cream pies for Pi DayMicro-mini pie

Chocolate Cream Pie

Makes one 9-inch pie, or a few smaller ones

Ingredients

For the crust:
  • 1 1/3 cups chocolate wafer crumbs
  • 5 tablespoons unsalted butter, melted
  • 1/4 cup sugar
  • Dash of cinnamon (optional)
For the filling:
  • 2/3 cup sugar
  • 1/4 cup cornstarch
  • 1/2 teaspoon salt
  • 4 large egg yolks
  • 3 cups whole milk
  • 5 ounces bittersweet chocolate (not unsweetened)
  • 2 ounces unsweetened chocolate
  • 2 tablespoons unsalted butter, softened
  • 1 teaspoon vanilla
For the topping:
  • 3/4 cup heavy cream, cold from the fridge
  • 1 tablespoon sugar

Directions

  1. Place an oven rack in the middle position, and preheat the oven to 350/175C.
  2. Combine the cookie crumbs, butter, sugar, and ground cinnamon (if using) in a bowl and stir until uniformly mixed. Pour the mixture into a 9-inch pie plate, pressing on the bottom and sides of the dish to compact the mixture into an even crust. Bake the crust for about 15 minutes, or until crisp, then set on a rack to cool.
  3. Meanwhile, place the two chocolates in a large, heatproof bowl and place over a pan of barely simmering water (the bowl should not touch the water). Stir the chocolate continually until it is melted and smooth. Remove the bowl from the heat, place a fine mesh sieve over the bowl, and set aside.
  4. In a medium bowl, whisk together the egg yolks, sugar, cornstarch, and salt until thick.
  5. Heat the milk in a heavy 3-quart saucepan until just simmering. Ladle some of the milk into the egg mixture, whisking vigorously, to temper the yolks. Once the tempered mixture is smooth, pour it into the pot with the rest of the milk, whisking as you go.
  6. Cook the custard, whisking constantly, until it thickens and reaches reaches a boil. Turn the heat down slightly and cook, still whisking, for another minute.
  7. Pour the thickened custard through the sieve into the chocolate. You might need to help it along with a spatula. Whisk the chocolate and custard together until they're evenly mixed, then add the vanilla and the softened butter, and whisk to incorporate. Butter a piece of waxed paper and place it, buttered side down, on the surface of the custard. Let cool completely, roughly 2 hours.
  8. Spoon the chilled filling into the prepared crust, then loosely cover the pie and place it in the fridge to chill for at least 6 hours, or up to 1 day.
  9. Just prior to serving, place the cream and sugar in a large bowl and beat just until the stiff peak stage. Spoon the whipped cream on top of the pie, and serve.

Notes

  • Make-ahead: as noted in the recipe, the pie can be made and filled (but not topped) up to 1 day ahead.
  • If you'd like to reduce the amount of sugar in the filling, go ahead. I wouldn't cut it by more than half, though.

* Yes, I'm a day late with this, and here's why. I dare you to be annoyed with that face.

There's more...

Sunday, December 27, 2009

Not your typical holiday post

stocking_iv.jpg

Well. This is not the holiday post that I was planning to write. I had intended to post on home-baked gifts, Big Sur Bakery stollen, Christmas cookies, wishing everyone a peaceful and joyous holiday, and so on; but none of that happened. Instead, I wound up under the care of the good people at Stanford hospital. Twice.

A few weeks ago, I started experiencing some mild shortness of breath and chest pain. I felt like the world's biggest hypochondriac--the symptoms were quite mild--but a week later, at the urging of both the Suitor and my mother, I went to my local urgent care center. After a few tests, they referred me to the ER, where a CT scan showed multiple small pulmonary embolisms in both of my lungs. Turns out I wasn't being such a hypochondriac after all. A night in the ER and a day in the hospital later, I went home with an arsenal of anticoagulants and instructions to take it easy.

And take it easy I did until a several days later, when the combination of my feeling gradually better, the purchase of Michael Ruhlman's Ratio app for the iPhone, and above all the Suitor's mind-blowingly awesome Christmas gift* tempted me to sneak into the kitchen and bake a pound cake. Personally, I'm not at all convinced that this ordinary act of baking was detrimental to my health. The Suitor (only half-jokingly) begs to differ.

Either way, the following evening I was back in urgent care, and then the ER (where another CT showed three new clots), and then the hospital for a few more days. Fortunately I have family nearby, and the Suitor (bless him) barely left my room except to go home and sleep, so spending Christmas in the hospital wasn't nearly as depressing as it might have been.

I'm home now, though we still don't have any answers as to why a 27 year-old with no family history and no risk factors** wound up with lungs that looked like they'd been sprayed with bird shot. Even more puzzling is the fact that I threw additional clots despite being on anticoagulation therapy. None of the labs has come back with anything interesting, so the investigation continues. For now, I'm continuing my regime of blood thinners and intensive couch-sitting (meaning, sadly, no baking).

Now, you might be wondering, is there anything in here about food? I was going to write a post poking fun at the awful hospital food, but as it turns out, it's not that bad--some of it, that is. Most of it is indeed awful: in the post I started writing, I joked that to make up for my not being able go out and exercise, the chefs were making sure I get my strength and endurance workouts trying to chew their meat. And don't get me started on the "fresh vegetable medley."

Fear not, though, foodies! Way over on the other end of the spectrum is a not-entirely-secret, but to my knowledge little-known alternative to the regular offerings: the Farm Fresh program. These menus include seasonal, organic, often locally grown ingredients and, in my limited experience, are prepared with much more care and skill than the default menus. It's not a three-star restaurant, but it's not half bad. In fact, it's actually pretty good.

As an example: for one of my meals I had butternut squash and coconut milk soup, roasted potatoes and carrots with some diced poached chicken, a cup of what looked like braised chard (which I'm not allowed to eat at the moment, but oh well), a piece of surprisingly good whole grain bread, and a baked apple with raisins and brown sugar. Another meal included some of the same items as well as house-made chicken noodle soup and a salad with locally grown organic greens.

Presumably--hopefully--I'm done with my stays at Stanford Hospital. But if I do have to go back for any length of time, at least I know I won't be going hungry. In the meantime, I hope everyone has indeed been enjoying that peaceful and joyous holiday season I meant to wish you all earlier this month. From the Beyond Ramen household to yours, wishing you good eats, safe travels, and beloved company.


* Hint: it has a 6-quart bowl, a 575-watt motor, and a gorgeous coat of red paint. And it creams butter and sugar like you would not believe.

** The Suitor maintains that my burgeoning love of kale is in fact a risk factor, but the doctors assure me otherwise.

There's more...

Thursday, November 26, 2009

Happy Thanksgiving!

Apple pie

I'm spending Thanksgiving on the road this year, and not in a way that's conducive to cooking. I'm afraid I don't have any tantalizing hints about what I'm bringing to my holiday table. Nevertheless, from the Beyond Ramen household to yours--wherever that might be--have a very happy Thanksgiving. May your table be full of good food and surrounded by good friends!

There's more...

Saturday, July 4, 2009

Happy birthday, America!

4th of July tart (top)

I hope that everyone has had a happy, safe, festive Fourth--and one full of good food, at that. I spent lunch with my extended family over in Santa Cruz--taking some brownies and chocolate crinkle cookies with me--and returned home to make another mess in the kitchen. First up, a berry tart, then some pesto potato salad with green beans, then some lemony herb chicken on the grill. We took the potato salad, the chicken, and some of last night's spicy buttered corn and had a picnic at a nearby park.

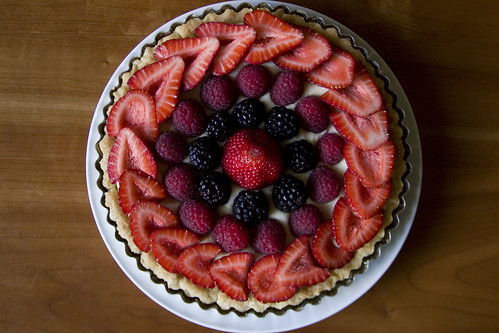
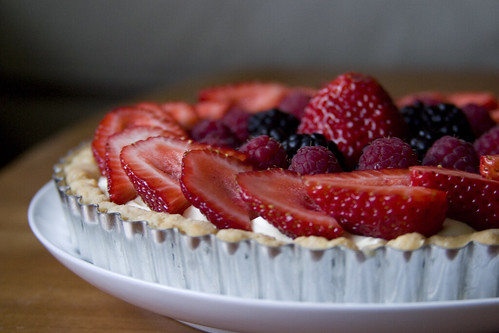
The tart was for my parents, both as a "happy Fourth!" gift and in belated thanks for my mom's taking care of the kittehs while the Suitor and I were on travel in Boulder. The strawberries and blackberries are from my CSA share. The crust is a fascinating recipe that I have been meaning to write up and post, so I'll save that for later. The filling underneath the berries is a lemon- and vanilla-scented pastry cream lightened by a bit of whipped cream. It is, though I say it myself, a perfect summer dessert. Our dessert... well, I'll say nothing about it at the moment, save that it's something inspired by my trip to Scotland. Guesses, anyone?

4th of July tart (side)

There's more...

Sunday, May 10, 2009

Happy Mother's Day!

Mother's Day cake

To all the mothers out there, here's to a wonderful day for you!

There's more...

Friday, December 26, 2008

In which I get my baking groove on

Last weekend, despite the fact that I had work to do and Christmas travel to prepare for, I baked. A lot. I had been tired and stressed out for weeks, with no time to do much of anything Christmassy, and damn it, I wanted some Christmas spirit! So I put on some nostalgia-rich holiday music and donned my apron, and set about making goodies for everyone and no one in particular. The Suitor took it upon himself to document much of the baking with the camera on his phone, with the happy consequence that he spent more time in the kitchen and took more interest in my baking than he has, well, ever.

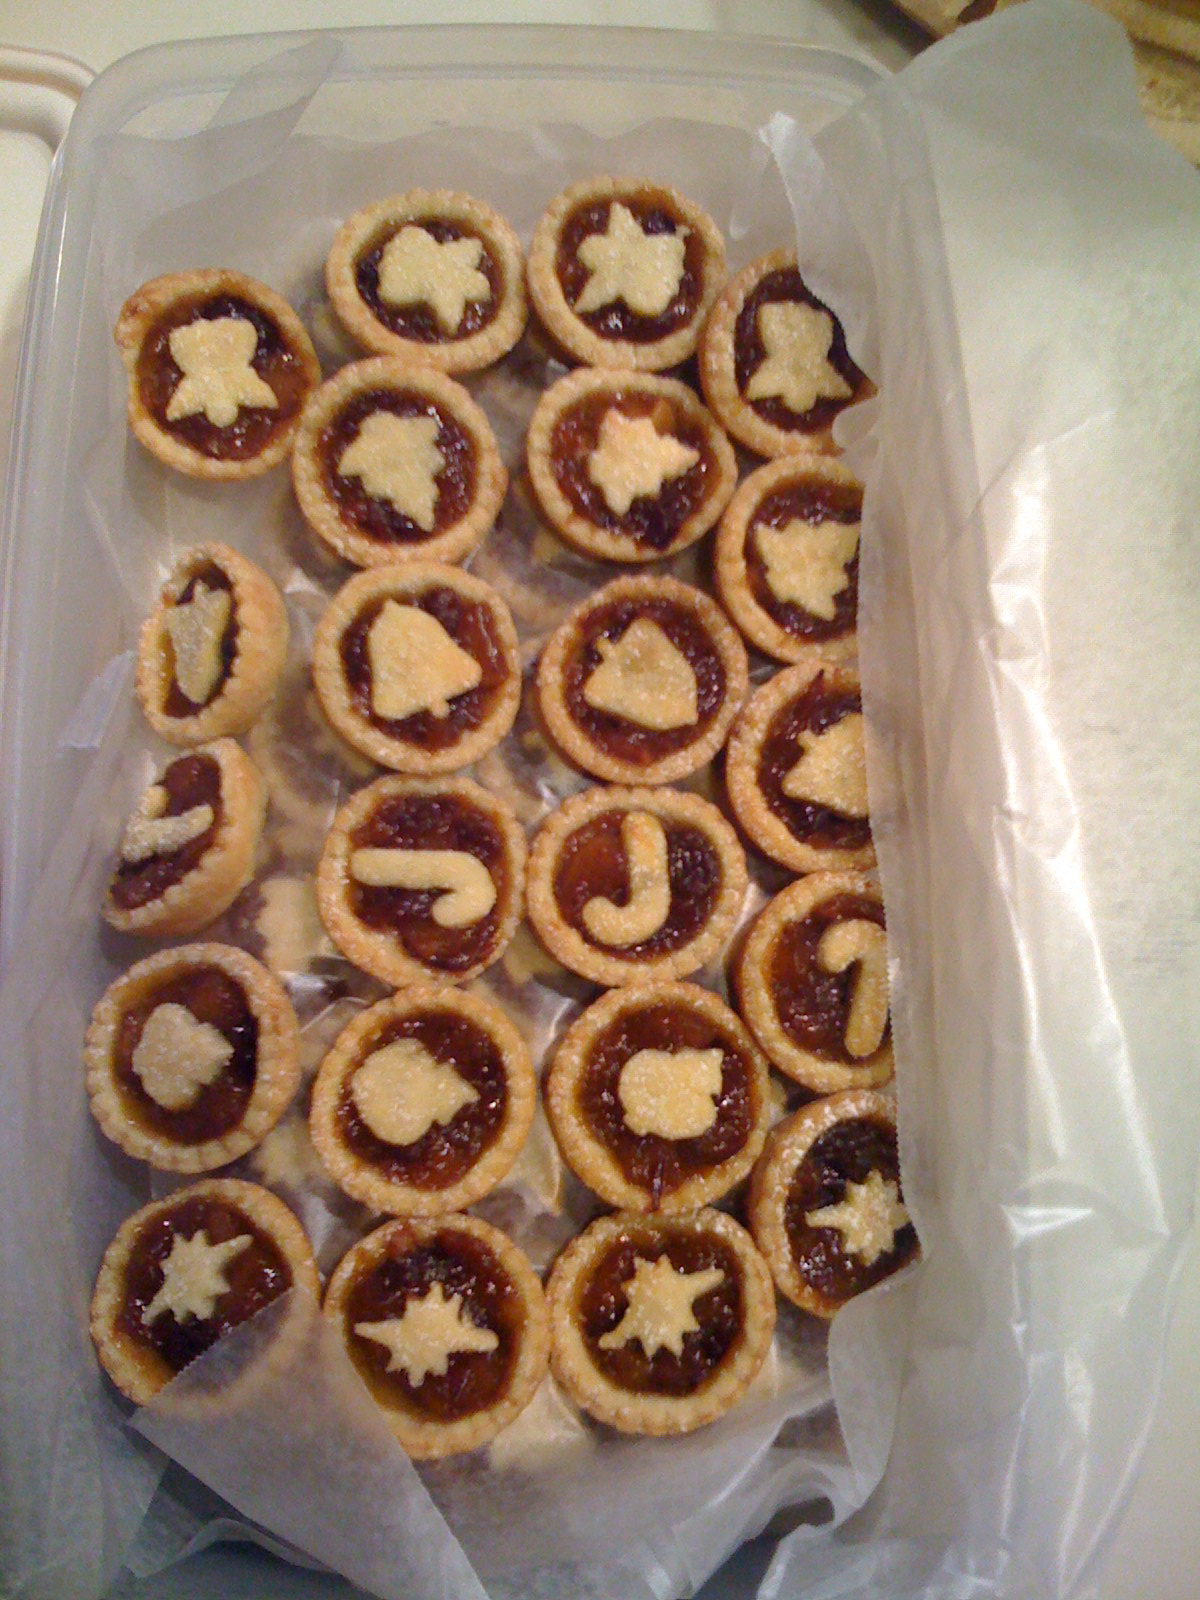
I started with mince pies (inspired by Bee), and the Linzer cookie cutter set that I'd purchased a few days earlier came in handy when cutting out the little fluted rounds of pastry for the crusts and the shapes of pastry for the tops. Like Bee, I did mine in a mini muffin tin. I used Bee's pastry recipe, but I branched out a bit with the mince itself and did a cooked version with apples instead of pears (since I had loads of apples to use up anyway), raisins, dried cranberries for enhanced seasonal goodness, minced dried apricots for some local flavor, minced crystallized ginger, ground ginger, ground cinnamon, ground cloves, butter, brown sugar, orange juice, and calvados. It's quite tasty. I have no idea if it tastes like what mince should taste like, as I've never actually had the stuff before, but people seem to like it.

IMG_0204.JPG
Mince pies packed up and ready for gifting...

Next up: Linzer cookies. I used Cook's Illustrated's multi-purpose holiday cookie dough (subscription required), and they're delicious. I filled them with homemade raspberry jam.

Dizzy_Cookies.JPG
Linzer cookie halves cooling as Dizzy investigates...


AnneCookies_01.JPG
The Suitor felt he had to get an action shot of me filling the cookies...


SnowyCookies_01.JPG
Linzer cookies: filled and dusted with confectioner's sugar...


Finally, rugelach. I don't really associate them with the holidays, but they're delicious and they use things that seem suitable for this time of year: brown sugar, dried fruit, preserves, and nuts. And they're very tasty, so why not use the holidays as an excuse to make some? This is one of Ina Garten's recipes, which I saw her make on an episode of Barefoot Contessa:

Rugeli.JPG
Rugelach...

They turned out a bit oozy and runny, but the brown sugar and apricot jam (homemade, natch) caramelized and turned into some gorgeously good nibblings.

And that was it--for my pre-Christmas baking, anyway. I have no doubt that I'll be back in the kitchen and back in my apron after we get back from our holiday travels... assuming that we don't get stuck here or in our connecting city on the return flight! I hope that everyone who's traveling this week does so delay-free and, if possible, hassle-free!

There's more...

Merry Christmas to all!

It's Boxing Day, but the spirit remains: here's hoping that everyone is having a healthy, peaceful, and merry holiday season. The Suitor and I are spending a few days with his family in the snowy Midwest, but before we left, I caught Dusty lazing about underneath the tree:

IMG_0207.JPG


More pictures to come shortly, but of a slightly different variety. Mmm, holiday baking...

There's more...

Friday, December 12, 2008

Truffles! (Virtual candy exchange)

Work has been terribly busy of late, so I've barely had time to cook dinner, let alone get started on holiday baking. But today I return at least to the idea of holiday baking. Bee has graciously invited me to join her virtual candy exchange for Christmas, and I am only too happy to participate.

I've made truffles nearly every Christmas for several years now, and for most of those years I've gone from recipe to recipe without being really sold on any of them. The taste was insipid, the texture wasn't quite right, and so on. Then last year I found this recipe. Gingerbread is one of my favorite holiday treats, and although I might not have thought of pairing it with chocolate, these truffles are winners.


As is usually the case with truffles, these take quite a bit of waiting, so I find that it's best to make them on a weekend when you can putter about the house (or wrap gifts) while things chill.

If you have a favorite holiday candy recipe, please share it or drop a link in comments. Happy baking!


Gingerbread Truffles

From: Bon Appetit, December 2005
Yield: Makes about 2 dozen
Holiday spices and molasses give these chocolate truffles seasonal charm.

Ingredients

  1. 3/4 cup whipping cream
  2. 10 whole cloves
  3. 1 tablespoon mild-flavored (light) molasses
  4. 1 1/2 teaspoons grated peeled fresh ginger
  5. 1/2 teaspoon ground cinnamon
  6. Pinch of salt
  7. 7 ounces plus 12 ounces bittersweet (not unsweetened) or semisweet chocolate, chopped
  8. 7 ounces plus 12 ounces high-quality white chocolate (such as Lindt or Perugina), chopped
  9. 1/2 cup chopped crystallized ginger plus additional for garnish

Directions

  1. Bring first 7 ingredients just to boil in heavy medium saucepan; remove from heat and let steep 1 hour.
  2. Combine 7 ounces bittersweet chocolate and 7 ounces white chocolate in large metal bowl set over saucepan of simmering water; stir until chocolate is melted and smooth. Remove bowl from over water. Strain cream mixture into chocolate; stir to blend. Stir in 1/2 cup chopped crystallized ginger. Chill filling until firm, at least 3 hours.
  3. Line baking sheet with parchment. Using 1-inch melon baller, scoop filling and roll between palms to form balls. Place on parchment. Chill truffles at least 2 hours.
  4. Line another sheet with parchment. Place 12 ounces bittersweet chocolate in medium metal bowl set over saucepan of simmering water; stir until chocolate is melted and smooth. Remove bowl from over water. Cool until thermometer inserted into chocolate registers 115°F. Quickly submerge 1 truffle in chocolate. Using fork, lift out truffle and tap fork against side of bowl so excess coating drips off. Using knife, slide truffle off fork and onto prepared sheet. Repeat with remaining truffles. Chill until set.
  5. Line another baking sheet with parchment. Place 12 ounces white chocolate in another medium metal bowl set over saucepan of simmering water; stir until melted and smooth. Remove bowl from over water. Cool until thermometer inserted into chocolate registers 100°F. Hold 1 truffle between thumb and index finger; dip halfway into white chocolate. Place on prepared sheet. Repeat with remaining truffles. If desired, press small pieces of crystallized ginger atop truffles. Chill until firm, about 30 minutes. (Can be made 1 week ahead. Cover; keep chilled.)

There's more...

Saturday, November 22, 2008

Thanksgiving is upon us! (Now with linky goodness!)

I've had a more-or-less finalized Thanksgiving menu for a few days now, but things have been so busy that I haven't had time to post on it. Fortunately I've received a stay of execution with respect to a deadline at work, so now I have more time and energy to focus on Thanksgiving.

Spiced mixed nuts
Assorted cheddar crisps (and maybe parmesan crisps)
Crisp haricots verts* with pine nuts
Spiced yams
Buttermilk biscuits
Salted roast turkey with herb gravy**
Spiced cranberry sauce with zinfandel
Sage dressing
Apple tart
Pumpkin mascarpone pie


I'm cooking for at least seven, possibly eight or nine if some unlikely-but-tentatives show up. I plan to be in the kitchen from just after breakfast right up until dinner, aided by Katie and probably the Suitor's sister. (The rest of the crew will be in the park all day.) We'll see if I actually manage to do any delegating. Fortunately Katie is already in charge of two dishes, the yams and the apple tart, so no one will need to pry them from my grasp. With enough planning and ahead-of-time work, I don't think handling the rest will be too much trouble.

The cooking and baking start this weekend with turkey stock, the gravy base, the dough for the cheddar crisps, whole wheat bread and cornbread for the dressing, and the pie crust. I made the cranberry sauce last night, and as soon as I finish up here at work, I'll go home to start on the turkey stock. First the roasting, then the long simmering. I expect the cats to go nuts during the roasting phase: turkey is their very favorite food. Procurement of non-perishable items took place last night, and tomorrow morning I'll stop by the farmer's market for some apple cider, maybe a few vegetables, and (hopefully) knife sharpening.

We'll drive down to LA on Tuesday and spend the night chez Suitor's brother. Wednesday morning I'll get up bright and early to pick up the turkey and shop for perishables like eggs and butter. Katie and I, and perhaps the Suitor, will drive out to Joshua Tree that morning (hopefully without too much traffic), unload all the food into the kitchen of the house we're renting, and get to work. That afternoon I'll assemble the dressing, start the turkey salting, and maybe bake the pie. By the time Thursday arrives, all that will be left is baking the crisps, roasting the turkey, making the biscuits, doing the vegetables, baking the dressing, and maybe whipping some cream to spoon over the desserts. All of that feels so manageable that I might also put together some baked French toast and a frittata for breakfast. No promises, though.


* I doubt I'll be able to get proper haricots verts at this time of year, so this will probably be downgraded to green beans with pine nuts.

** When making the gravy base I used homemade turkey stock instead of chicken stock. 

There's more...

Wednesday, November 12, 2008

In which I start freaking out. Slightly.

While browsing Serious Eats, I came across this item. Which reminded me that I have not yet finalized my Thanksgiving menu, or even ordered my turkey! Let alone compiled a grocery list...

But tonight! Tonight I will draft a menu and grocery list, and hopefully a schedule for what I'm going to make and when. Surely I can manage to stay at least somewhat organized about Thanksgiving while also juggling everything that's going on at work. I'll post the menu when I've finished it.

There's more...

Sunday, March 23, 2008

Happy Easter!

I hope everyone is having a wonderful day full of delicious food. Tell us all about it!

There's more...

Thursday, March 20, 2008

Easter potatoes

At least three of us here--and I'd be willing to wager more than that--love us some scalloped potatoes. I've done some digging, and I think I found the potato gratin recipe that I've used with the most success. Brave Sir Robin (and perhaps others) will not be at all surprised that it's the recipe from Mastering the Art of French Cooking. It uses milk instead of cream, and is the fundamental recipe to which you can add all sorts of different things: ham (or bacon), leeks, artichokes, or what have you.

Sometimes, though, creamy potatoes aren't quite what you're looking for: either you want something a bit lighter, or the cream just doesn't go with the other dishes you're serving. In the hopes of covering all the Easter potato bases, I'll put up three versions of a basic scalloped potato dish: gratin dauphinois (milk and cheese), gratin savoyard (using stock instead of milk), and pommes Anna (no liquid). The first two are from Mastering... Volume I, and the third is from Volume II.

A note on the type of potatoes to use: for scalloped potatoes, you want a potato that will hold its shape when cooked--you don't want the potatoes to fall apart. Most recipes recommend "boiling potatoes" for this sort of dish, as they hold their shape nicely, whereas "baking potatoes" disintegrate and are more suitable for mashing. While cooks in different regions will have different potato varieties available to them, everyone reading this will probably be able to find boiling potatoes.

Gratin dauphinois
Serves 6

Julia gives the following preamble:

There are as many "authentic" versions of gratin dauphinois as there are of bouillabaisse. Of them all, we prefer this one because it is fast, simple, and savory. It goes with roast or broiled chicken, turkey, and veal. With roast beef, pork, lamb, steaks, and chops you may prefer the gratin savoyard which follows, since it is cooked with stock rather than milk. Although some authorities on le vrai gratin dauphinois would violently disagree, you may omit the cheese. If you do so, add 2 more tablespoons of butter.
2 pounds "boiling" potatoes (6 to 7 cups when sliced)
1/2 clove unpeeled garlic
4 tablespoons butter
1 teaspoon salt
1/8 teaspoon pepper
1 cup (4 ounces) grated Swiss cheese
1 cup boiling milk

Preheat oven to 425F and set a rack such that a dish may be placed in the upper third of the oven. Peel the potatoes and slice them 1/8" thick. Place in a basin of cold water and drain when ready to use.

Rub the inside of a fireproof baking-serving dish (2" deep and 10" in diameter) with the cut garlic. Smear the inside of the dish with 1 tablespoon of the butter. Drain the potatoes and dry them on a towel. Spread half of them in the bottom of the dish. Divide over them half of the salt, pepper, cheese, and remaining butter. Arrange the remaining potatoes over the first layer, and season them. Spread on the rest of the cheese and divide the butter over it. Pour on the boiling milk. Set baking dish over heat and when simmering, set in upper third of preheated oven. Bake for 20 to 30 minutes or until potatoes are tender, milk has been absorbed, and top is nicely browned. (As the oven is hot, and the dish shallow, the potatoes cook quickly.)


Gratin savoyard
Serves 6

Ingredients for the preceding gratin dauphinois with the following exceptions:
1 cup brown stock or canned beef bouillon instead of milk
6 rather than 4 tablespoons butter

Follow the recipe for gratin dauphinois, but substitute stock for milk, and increase the butter proportions as indicated above.


Pommes Anna
Serves 6

For this one, Julia gives what probably qualifies as more of a preface:
Pommes Anna looks like a brown cake 6 to 8 inches in diameter and 2 inches high, and it smells marvelously of potatoes and butter. That, in effect, is all it is: thinly sliced potatoes packed in layers in a heavy pan, bathed in clarified butter, and baked in a very hot oven so that the outside crusts enough for the potatoes to be unmolded without collapsing. The contrast of crusty exterior and tender, buttery interior is quite unlike anything else in potato cookery, and to many pommes Anna is the supreme potato recipe of all time. It was created during the era of Napoleon III and named, as were many culinary triumphs in those days, after one of the grandes cocottes of the period. Whether it was Anna Deslions, an Anna Judic, or simply Anna Untel, she has also immortalized the special baking dish itself, la cocotte à pommes Anna, which is still being made and which you can still buy at a fancy price. It is of heavy copper.

A thick, flameproof baking dish of some sort is actually one of the keys to pommes Anna, because it must be an excellent heat conductor. Although the copper cocotte Anna is a beautiful object, its absolutely vertical sides, 3-inch depth, and frequent tendency to sticky-bottom troubles make it less easy to use than other possibilities.

The familiar American cast-iron frying pan with its fairly vertical sides and short, straight handle is actually the best of all for pommes Anna. The potatoes are easier to unmold from this than from the French type of iron frying pan with its sloping sides and long handle. However, either will do, as will a thick, flameproof, ceramic baking dish or a thick cast-aluminum one with no-stick interior. The essential is to have a material that will get thoroughly hot all over, to brown and crust the outside of the potatoes.

Having furnished yourself with the right pan, you then want to make sure the potato slices will not stick to it, because you must be able to unmold them at the end of the cooking. Therefore, use clarified butter, dry the potatoes thoroughly before the cooking begins, and finish the cooking once you have begun it, or else the potatoes will exude moisture and stick to the pan. As you will note in the recipe, cooking begins at once, on the stove as you are arranging the potatoes in the pan; this is to dry the bottom layers and start the brown crust forming. In the classic recipe you then finish teh cooking in a hot oven, which usually gives a more professional result, but you may complete the cooking on top of the stove, as suggested in the cheese variation following the Master Recipe. [I will note this method in brackets in this recipe, rather than writing out the cheese variation.]

Pommes Anna and its variations go especially well with roast saddle of lamb, leg of lamb, roast beef, chops, sautéed chicken, plain or fancy steaks, and roast game. Your object, in arranging the sliced potatoes in their dish for this very special recipe, is not only to fill the dish but to make a reasonably neat design in the bottom and around the sides so that when the potatoes are unmolded they will present a handsome exterior. For the sides you may either arrange an edging of overlapping upright slices braced by horizontal interior layers, or build up a wall of evenly spaced horizontal slices as you fill the pan. We have suggested the latter, simpler, system here.
That said, you will need:

1/2 pound (2 sticks) butter
3 pounds "boiling" potatoes (about 8 cups of sliced potatoes, more if needed)
Paper towels
Salt and freshly ground pepper

1) Preliminaries

Preheat oven to 450F. Set one rack in very bottom level, and another just above it. Clarify the butter: melt it, skim off the scum, and spoon the clear liquid butter off the milky residue. Peel the potatoes, trim into cylinders about 1 1/4" in diameter so that you will have uniform slices, then slice cylinders into even rounds 1/8 inch thick. You should have about 8 cups. Dry thoroughly in paper towels. (Do not wash potatoes after peeling, because you want the starch to remain in, so potatoes will mass more easily into a cake.)

2) Arranging the potatoes in the dish

Pour 1/4 inch of the clarified butter into the pan and set over moderate heat. When hot, start rapidly arranging the first layer of potatoes in the bottom of the pan as follows.

Arrange one potato slice in the center of the pan. Overlap a circle of potato slices around it. Overlapping in the opposite (counter-clockwise) direction rapidly arrange a second circle around the first and continue with another (clockwise) overlapping circle if necessary, to rim the edge of the pan. Pour on a spoonful of the clarified butter.

Reversing direction again, rapidly arrange an evenly overlapping layer of potatoes around circumference of pan, fill in the center with more potatoes, and baste with another spoonful of butter. Shake pan not too roughly by handle to be sure potatoes are not sticking, and sprinkle on salt and pepper.

Continue filling the pan with layers of potatoes basted with butter and seasoned with salt and pepper, always being sure that the layer around the circumference of the pan is evenly spaced. Remember, also, to shake the pan by its handle from time to time, to be sure potatoes are not sticking. Fill the pan completely, allowing potatoes to form a 1/4- to 1/2-inch dome in the center; they will sink during cooking. You should have added enough butter so that you can see it bubbling up the sides of the pan; excess will be poured out after cooking.

3) Baking

Butter bottom of a heavy, 7-inch bottom diameter saucepan (or whatever will fit into the potato pan) and press it down hard on the potatoes, forcing the layers together. Butter underside of a heavy, close-fitting cover for the potato pan, place it on the potato pan set on upper of the two oven racks. Set a roasting pan under the potatoes, on rack below, to catch bubblings-up of butter (which could otherwise set fire to your oven).

Bake for 20 minutes. Uncover, press potatoes down hard again with bottom of saucepan, and continue baking 20 to 25 minutes more, uncovered. (If baked all the time with cover on, potatoes tend to pick up an off taste.) Press down potatoes again before end of baking. Gently draw an edge of the potatoes away from side of dish: potatoes are done if brown and crusty. Bake 5 minutes or so more if necessary.

[If cooking the potatoes entirely on the stovetop: rather than placing the potatoes in the oven, cook over a low flame. Be sure the heat is not too high, or the bottom will brown too much. All other cooking and serving directions should still be applicable.]

4) Unmolding and serving

When potatoes are done, place cover slightly askew on pan and drain out excess butter, which may be used again in other cooking. Run spatula around edge of pan. Shake pan, and if potatoes have stuck to bottom, run spatula carefully under potatoes to loosen them, but disturb them as little as possible. If you feel it will be easier to unmold them first onto a (lightly buttered) baking sheet and slide them onto a serving dish, do so; otherwise invert the serving dish (which should be lightly buttered) over the potato pan, reverse the two, and potatoes will drop onto the dish. They should look like a brown cake.

Unmolding troubles: You should have no trouble, but if some potatoes do stick to pan, scrape them off and put them in place on the potato cake. If you have had trouble and the potatoes look messy or pale, simply push or mound them into a reasonable shape, sprinkle with cheese or bread crumbs, drizzle on a little butter, and brown briefly under the broiler.

Ahead-of-time note: After unmolding the potatoes, cover loosely with foil and set in a warming oven (120F), or on an electric hot-tray, or over simmering water. They will keep nicely for half an hour at least as long as they are warm and have a little circulation of air.

There's more...

Friday, March 14, 2008

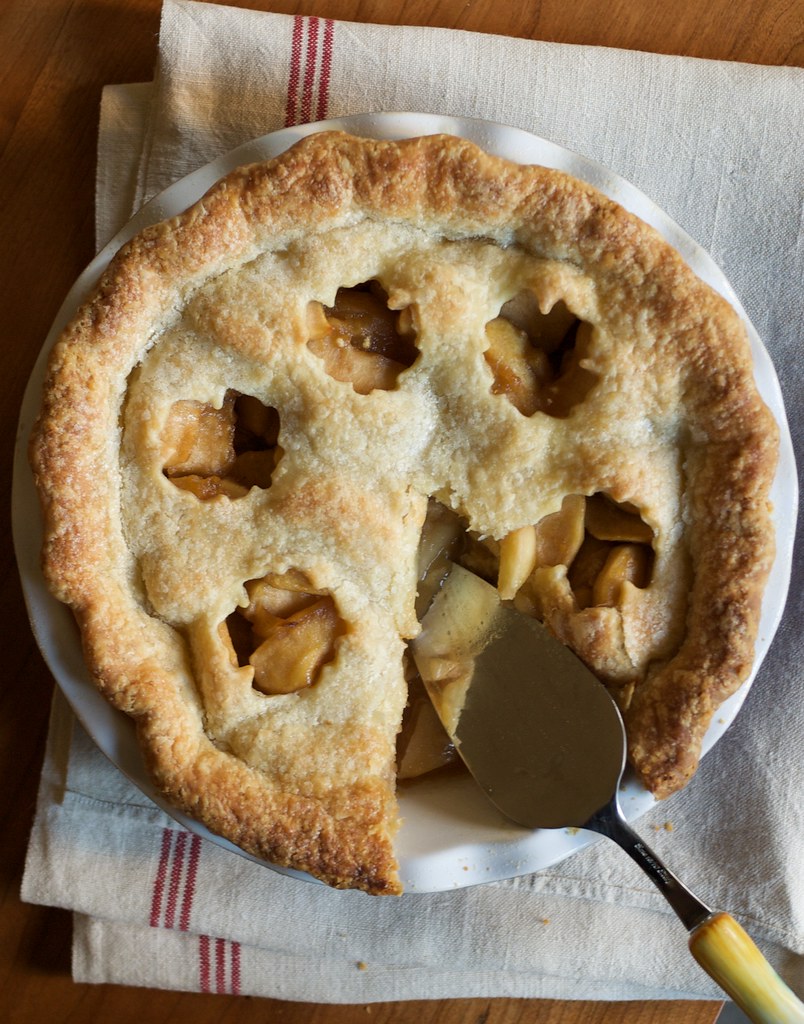
Apple Pie for Pi Day

I've been meaning for ages to try out a couple of pie-related recipe bits I saw in Cook's Illustrated a few months ago. One has to do with the crust, the other with the filling. Now, my favorite apple pie recipe is the one I grew up with (from the Fannie Farmer Cookbook), and I didn't want to mess too much with the seasonings. But I felt it might be acceptable to tinker with the crust recipe (apologies to my great-grandmother) and the method of cooking the apples. In the end, the recipe as written here is a slightly tweaked combination of three recipes: the crust from the November/December 2007 Cook's Illustrated, the apple pie method from the Cook's Illustrated special Holiday Baking 2007, and--to a certain extent--the apple pie recipe from the Fannie Farmer Cookbook.

As with all Cook's Illustrated recipes, there is method to whatever madness you might perceive in the recipe. Since it might not be immediately apparent from the recipe itself, I'll summarize some of the key points before diving into the recipe:

1) Liquid. One of the tricky things about pie dough is getting it to come together without encouraging the flour and water to form gluten. But not all liquids are created equal: unlike water, ethanol (i.e. alcohol) doesn't allow gluten to form. Using part water and part alcohol, then, lets you bring the dough together and roll it out easily without having to worry as much about the crust becoming tough. And of course, the alcohol evaporates in the oven.

2) Fat. An all-butter crust tastes great, but contains water (again, the gluten) and can turn leathery. An all-shortening crust is tender, but doesn't taste so good. This recipe uses a 3:2 ratio of butter to shortening for maximum taste and tenderness, and minimal toughness.

3) Flour-fat incorporation method. If you've made pie dough before, you've probably noticed that from crust to crust, the amount of liquid you need to bring the dough together can vary quite a bit. As it turns out, that variability has more to do with the consistency of flour-fat incorporation than the humidity of the kitchen where you're making the crust. The solution: blend only some of the flour with the fat, and then add more flour once you've got the first portion well incorporated.

4) Fill factor and soggy crust. Two problems solved with a single trick. First, the gap between the cooked-down apples and the top crust; second, the sogginess of the bottom crust that results from the liquid released by the apples during the in-oven cooking. By pre-cooking the apples--gently, mind, you don't want the apple slices to lose their shape--you allow them to release their liquid ahead of time and shrink down, so that the filling in the finished pie stays snug up against the top crust.

5) Filling flavor. I am partial to the flavor of Gravenstein apples for baking, but this apple pie recipe recommends a combination of sweet and tart apples for optimum pie flavor. The sweet apples they recommend: Golden Delicious, Braeburn, and Jonagold. The tart ones: Granny Smith, Empire, and Cortland.

A note of caution about these last two points: the recipe's instructions say to cook the apples in one large pot, but depending on the apples you use, I might suggest that you split the filling ingredients and cook the apples separately in two batches. When I was preparing my filling, the sweet apples were on the verge of mushiness before the tart ones had softened appreciably,
and the tart ones didn't soften much more in the oven. As a result, my pie has a frustratingly inconsistent texture. So, while I see the rationale behind using two kinds of apples, I do recommend that when you pre-cook the slices, you cook the two kinds separately.

I'm of two minds about this: I try to be efficient in my cooking, in that I often try to minimize the number of dishes (particularly large pots) I get dirty, and you might feel the same way. I'm going to write the recipe such that the apples are cooked in two separate pots, but if you're confident about the cooking times of the two different apple types, you're welcome to start the longer-cooking ones in the pot (with all of the sugar and other seasonings) and simply add the other ones when you feel that the remaining cooking time will result in evenly textured apples. Personally, I don't have that confidence in my knowledge of apples, so I'm going to go against my usual "don't get a pot dirty if you don't have to" philosophy and write the recipe for two separate pots.

And now, at last, the recipe:


Pi Day Apple Pie
Makes 1 9"-diameter pie, with extra scraps of dough for munching

For the crust:

3 3/4 cups (18 3/4 ounces) unbleached all-purpose flour
1 1/2 teaspoon table salt
3 tablespoons sugar
18 tablespoons (2 1/4 sticks, 9 ounces) cold unsalted butter, cut into 1/4" slices
3/4 cup cold vegetable shortening, cut into 4 pieces
1/4 cup + 2 tablespoons cold vodka
1/4 cup + 2 tablespoons cold water

Measure out 2 1/4 cups flour and set aside remaining 1 1/2 cup flour. Process 2 1/2 cups flour, salt, and sugar in food processor until combined, about 2 one-second pulses. Add butter and shortening and process until homogeneous dough just starts to collect in uneven clumps, about 15 seconds. The dough will resemble cottage cheese curds and should have no uncoated flour. Scrape down bowl with rubber spatula and redistribute dough evenly around processor blade. Add remaining 1 1/2 cup flour and pulse until mixture is evenly distributed around bowl and the mass of dough has been broken up, 4-6 quick pulses.

Empty mixture into medium bowl. Sprinkle vodka and water over mixture. With rubber spatula, use folding motion to mix, pressing down on dough until dough is slightly tacky and sticks together. Divide dough into two even balls and flatten each into 6" disk. Wrap each disk in plastic wrap and refrigerate for at least 45 minutes and up to 2 days.

For the filling:

1/2 cup (3 1/2 ounces) + 1 teaspooon granulated sugar
1/4 cup (1 3/4 ounces) packed light brown sugar
1 tablespoon juice and 1/2 teaspoon grated zest from 1 lemon
1/4 teaspoon salt
1/2 teaspoon ground cinnamon
1/4 teaspoon freshly grated nutmeg
1/4 teaspoon ground cloves
2 1/2 pounds tart apples, peeled, cored, and cut into 1/4"-thick slices
2 1/2 pounds sweet apples, peeled, cored, and cut into 1/4"-thick slices
1 egg white, lightly beaten

While the dough chills, place tart apples in one bowl and sweet apples in another. Combine 1/2 cup granulated sugar, brown sugar, zest, salt, and spices in a small bowl. Sprinkle half of mixture over one bowl of apples, stir to combine, and dump into a large pot; repeat for other bowl of apples and another pot. (Don't worry too much about dividing the mixture evenly between the bowls--it will all get tossed together in the end.) Do not wash either bowl just yet. Cover both pots and cook over medium heat, stirring frequently, until apples are tender when poked with a fork but still hold their shape, 15-20 minutes, or longer for very firm apples. (Apples and juices should simmer gently during cooking.) When tender, remove from heat and allow to cool to room temperature. While apples cool, adjust oven racks so that you have one in the lowest position, and another one right above it. Place an empty rimmed baking sheet on the lowest rack, and preheat oven to 425F.

Remove 1 disk of dough from refrigerator and roll out between two large sheets of parchment paper (or plastic wrap) to a circle about 1/8" thick. If dough becomes too soft or sticky, return it to the fridge to firm up again. Remove one sheet of parchment and roll the crust up on your rolling pin while removing the other parchment sheet, then unroll crust into pie plate (or use your preferred method of placing dough into plate). Working around plate circumference, ease dough into plate by gently lifting edge of dough with one hand while pressing into plate bottom with other hand. Leave dough that overhangs plate in place; refrigerate crust until firm, about 30 minutes. Roll second disk of dough between two sheets of parchment (or plastic) until ~1/8" thick. Refrigerate, leaving dough between parchment sheets, until firm, about 30 minutes.

Set a large colander over one of the bowls used to mix the apples with the sugars and spices. Transfer cooled apples (from both pots) to colander. Shake colander to drain off as much juice as possible; discard juice. Transfer drained apples to other apple mixing bowl and stir to mix the two apple varieties together. Mound apples carefully in dough-lined pie plate and sprinkle with lemon juice. Brush edge of crust with beaten egg white.

Remove one parchment sheet from one side of dough circle, roll dough onto rolling pin while removing remaining parchment sheet, and unroll crust over the top of the pie. Press down firmly on edges of pie crust, trim excess crust, and crimp/flute edges as desired. Cut four 2" slits in top of dough. Brush surface of pie with beaten egg white and sprinkle evenly with remaining teaspoon sugar. Place pie in preheated oven on rack set over baking sheet; bake until crust is dark golden brown, 45-55 minutes. Transfer pie to wire rack and cool at least 1 1/2 hours. Cut into wedges and serve with ice cream or cheese, or other preferred accompaniment.

There's more...

Happy Pi Day!

Brave Sir Robin reminded me that today is Pi Day! I hope you're able to celebrate with some pie, whether at 1:59pm (or, if you want to be precise, 1:59 am) or any other time of day.

I think I shall make a pie, either apple or pumpkin. No, it's not Thanksgiving, but pumpkin pie is soft and good for a sore throat. Not that apple isn't, but whatever. Anyway, until I can post a recipe and/or picture of the actual pie, I'll re-post my pumpkin pi from Halloween 2007:

There's more...

Thursday, February 14, 2008

Happy Valentine's Day!

Hope that whatever you're doing involves something delicious. Chocolate if that's your scene, and/or whatever else floats your culinary boat.

This month the budget is a little too tight for me to do what I'd like to do for the Suitor, which is to cook him a really tasty meal, but hopefully he knows that a) I love him even if I can't cook for him today, and b) I'll cook him something yummy when I can.

Have a lovely, delicious day.

There's more...

Saturday, February 2, 2008

Joyeux chandaleur!

Today is la chandaleur, or crêpe day! Make yourself some delicious French pancakes! I am enjoying mine with a squeeze of Meyer lemon juice and a sprinkling of sugar. Later this evening, if there are any left over (which is by no means a sure thing) I might splurge a bit with some banana and Nutella. To inspire you (as if you needed any more inspiration than the thought of warm, delicious crêpe goodness) I give you the following fun little video. It's Scottish rather than French pancakes, but I'm sure they taste good just the same.

There's more...

Thursday, January 3, 2008

Thanksgiving--finally

I've been a bad food blogger. Here, finally, are links to the recipes I used, and brief reviews of the dishes I cooked (the Suitor's sister did the yams and green beans, and my mom contributed the mixed nuts):

Cranberry-maple cornbread: A pleasant twist on regular cranberry bread (or cornbread, for that matter), but I think I still prefer my traditional cranberry-orange bread.

Bibb lettuce with persimmons and candied pecans: Easy to make (especially when the dressing is made ahead of time), and the persimmons were great. It was nice to have something light and fresh-tasting to balance all of the other (rather heavy) dishes.

Potato whole wheat dinner rolls: I was not terribly impressed with this recipe, and I think next time I want a potato bread I'll use a recipe that Katie's mom gave me. These were fine: they got the job done, and people were amazed that I actually. made. bread?!? (honestly, people) but they weren't very special.

Butternut squash, corn, and lemongrass soup: A delicious, very easy soup that Katie's mom happened to be making one evening when I was over there, and I liked it so much that I decided to make some myself. It's very easy, very healthy, and very tasty. I have to say, though, I'd recommend using an immersion blender rather than a countertop blender. If you do use the latter, make sure you keep the lid on tight, or you will end up with soup all over your kitchen. I speak from experience. I know good corn is hard to find at this time of year, but if you can get some, this soup is well worth the effort.

Herb-butter turkey (with gravy): What a delicious bird this was. But as good as the turkey was, it can't compare to the gravy. Holy pure delicious turkey goodness, Batman! Other than turning out a bit thin (more roux next time, I think), it was spectacular. I followed the recipe fairly closely (especially the part about whisking the roux over heat until it turned a nice golden brown), as it was my first time making gravy. Not bad for a first try! The recipe's instruction to use some chicken stock in the gravy base felt like a cheat, but I did it anyway. I might try it without next time, but I'm reluctant to mess with something so delicious. I'm not usually a gravy person, but this was incredible.

Spiced cranberry sauce with zinfandel: This has become something of a tradition for me, inasmuch something can be a tradition after only six years. It's also pretty much the only time I'll do anything with zinfandel. And I love things that involve cloves, allspice, and cinnamon.

Cornbread stuffing with ham and chestnuts: Good, but not spectacular, although some in the party really enjoyed it. Maybe it would be better with a different base cornbread recipe?

Pumpkin mascarpone pie: Yummy. Got rave reviews from the group. I wasn't impressed with the crust, but I was having food processor issues. (I don't usually use a food processor for crusts, but I was pressed for time and making an attempt to follow the recipe.)

Spiced apple cake with eggnog sauce: They aren't kidding when they say in the introduction that "it keeps for days," but they left out the part where it actually gets better after two or three days. If you do serve it with eggnog as a sauce, I recommend Straus Family Creamery's eggnog (if you can get it).

There's more...