

Once upon a time*, in a land called California, there lived a young girl who didn't eat her vegetables. Oh, I suppose she ate some vegetables, but at most green things (and yellow, and red, and orange things, or at least vegetables in those colors) she wrinkled her nose and cried, "eww!" She was, to put it mildly, a very picky eater. The only vegetables that she would eat without a fuss were green beans and, most improbably, broccoli.
As you might have guessed, that young girl who didn't eat her vegetables grew up to have a blog called Beyond Ramen. Yes, internets, I was once a terribly picky eater. Surprised? I suppose it's not uncommon for us to have awfully narrow tastes as a child, and then to grow up and out of that narrowness. Still, I feel like my transition from closed-minded food hermit to adventurous, "I'll try anything at least once" foodie is... unlikely. 
And as surprised as readers might be to hear that I was such a picky eater, I imagine that my parents are perhaps even more so to hear and read about the sort of things that I now cook (and write about) without hesitation. Butternut squash soup? Chickpea salad? Pastry cream**? Aromatic baby food?? It would have floored them to see me eating such food, let alone voluntarily whipping them up for myself and then writing to tell the world about how delicious I thought they were.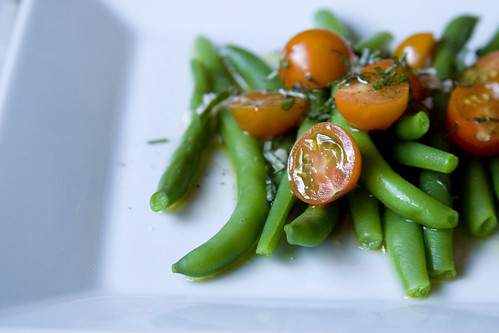
In a strange way, I think that that unlikely (and ongoing) transformation is part of why I blog about food in the first place. In addition to my love of sharing good food with people, there's a sense that if even I like it, it must be good, so I must share it with the world! Perhaps in the process I'll show some kale hater (or squash hater, or what have you) that you can like these things under the right circumstances, and I've found that that's especially the case when you cook it yourself. I'm certain that the broadening of my tastes owes a great deal to my starting to cook for myself regularly about eight (!) years ago.
But I've digressed a bit--or quite a lot, actually. Anyway, green beans. Because green beans were the one veg that my parents could reliably get me to eat, we ate a ton of them, typically steamed and plain. Given my propensity to turn up my nose at anything unfamiliar or "interesting," I don't know if I would have gone for them any other way, so the ubiquity of the steaming method was likely born of necessity rather than a preference on my parents' part. Fortunately my parents, unlike the antagonists of the vegetable horror stories they told me about vegetables cooked into drab, limp oblivion, ably steamed our green beans--and broccoli--until they were tender, but retained a fresh taste and color, and still held their shape nicely. 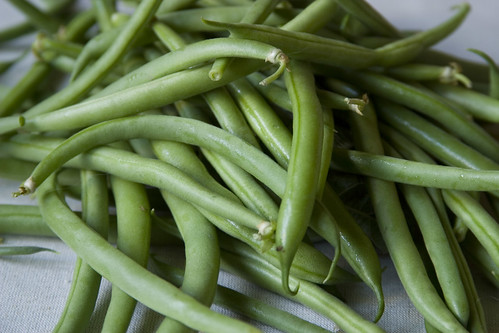
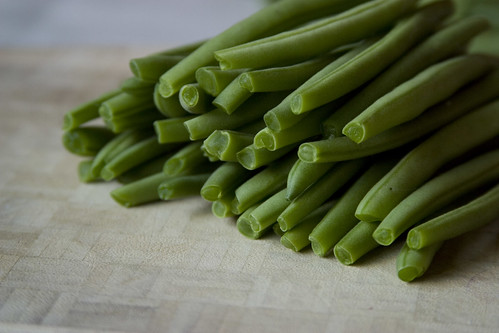
I still love them that way, steamed or boiled and plain, but as with anything good, one can reach a point of too much. I needed something different. Of course, because plain was more or less the only way I had ever had them, other than the occasional stir-fry, I was not exactly flush with ideas. Eventually I started putting them in salads, with some tomato and some lemon juice and olive oil. Then I added toasted nuts. Then mustard. Then garlic and herbs.
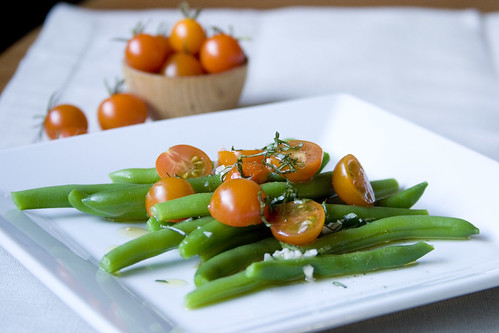
At this point I had myself a smart little side dish: crisp, tender green beans with tomato, a hint of garlic, a lemony-mustardy vinaigrette, perhaps some salad greens, and some fresh herbs. This alternative was quickly assembled--as quickly as the plain green beans, since the water still had to come to a boil--but it felt like a more grown-up version of the old stand-by. My green beans had grown up. 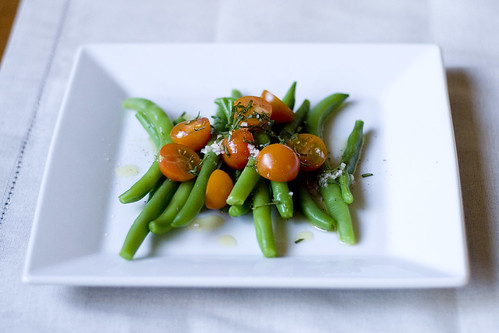
There are plenty of ways to make this dish, of course--I've listed only the ingredients that I choose most often. Sometimes I substitute red wine vinegar for the lemon juice, or omit the herbs or garlic, or whatever I feel like. In these pictures, I've left out the greens and the nuts, and it worked beautifully. It's really one of those "make it your own" dishes, and I encourage you to play around with it so that it suits you. Green Beans and Tomatoes with Mustard Vinaigrette
Ingredients
Directions
Notes
* Anyone else out there hear or read those words and immediately, in your mind's ear, hear an orchestra strike up with the music from Into the Woods? "I wish!"
** Yes, there really was a time when I wouldn't eat pastry cream. It was a texture thing: I thought puddingy/custardy things were icky, and only copious amounts of chocolate could convince me otherwise.

Subscribe to Beyond Ramen

 Posts
All Comments
Posts
All Comments
It's not nice to steal. Please don't republish what you find here unless you have my express permission.
In other words: unless otherwise noted, images and text © Anne Sandman 2005-2010. All rights reserved.
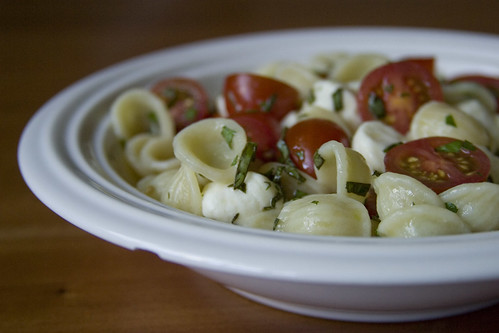
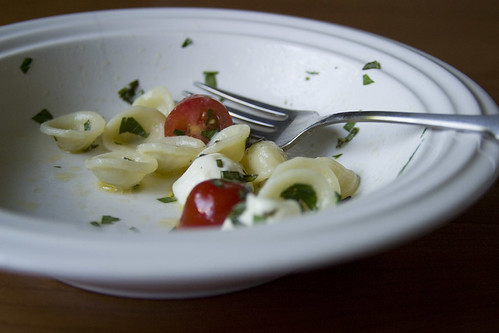
What you see in that picture there is my new favorite summer dish. It is a dish for those evenings when it's too hot to cook something really warm, but when, after weeks of hot weather, you're growing tired of eating only chilled or room-temperature foods. The pasta has a bit of warmth to it, which takes the chill off the cheese and makes it melt ever so slightly; it gives an illusion of warmth and heartiness without making you feel like you need to put a cool cloth to your forehead. At the same time, the tomatoes and herbs go in off the heat, so that what little cooking happens does so only with the leftover heat of the pasta. As a result, the flavors stay fresh and light in a way that's well suited to a summer afternoon or evening, but you also get just a hint of a rib-sticking feeling from the pasta and warm cheese.
This is also one of those dishes that's great for a weeknight, when you get home later than expected and just want to get something tasty on the table (and in your belly) without resorting to takeout. All of the prep can be done in the time between putting the water on to boil and taking it off to drain the pasta. The only dishes you'll dirty are a pot, a colander, a cutting board, and a knife, plus the bowl and fork you'll use to eat the pasta--you can even eliminate the bowl if you'd rather eat straight from the pot--so cleanup is quick.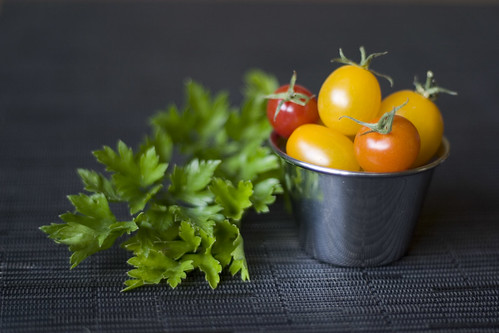
What's more, it's easy. You boil some water and cook some pasta; you cut up some cheese and tomatoes; and you chop some herbs (you could even do the herbs in a food processor if you aren't all that confident with a chef's knife). And when the pasta's done, you essentially throw it all together in the same pot you used to cook the pasta, with a touch of olive oil and a squeeze of lemon juice or vinegar. There's little or no measuring required (I've provided measurements as a guide, but pretty much everything should be "to taste"), nothing to burn, and really very little you can do to screw it up, short of forgetting about the pasta for half an hour and letting it cook into mushy oblivion. Of all the recipes I've posted in recent memory, this is probably the easiest and most satisfying, and the one I'd most recommend to trepidatious newbie cooks.
And right now, as the first tiny tomatoes are starting to appear at the market, is a great time to make this recipe part of your collection. Cherry, pear, or grape tomatoes; one color or many colors; it doesn't matter: they all taste great in this dish. You could substitute pieces of a larger tomato, and I'm sure that it would be good, but I think that there's something about the flavor of cherry tomatoes that really works well here and is refreshingly different from standard pasta + fresh tomato fare. Use whatever herbs you have available, and/or whatever you think would taste good. I've had success with parsley + basil and parsley + mint, and the original recipe calls for oregano and garlic chives (or regular chives). My version is below the fold. Orecchiette with Tomatoes and Mozzarella
Ingredients
Directions
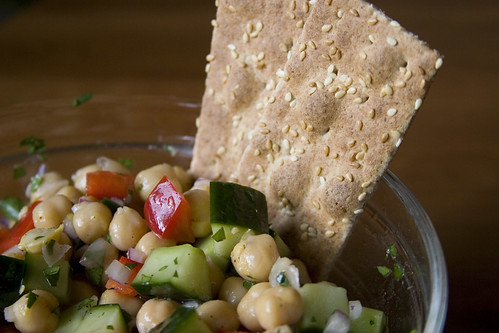
There's something about air travel, particularly rather extended periods of air travel, that makes me crave fresh, clean, un-fussed-about-with food. It's not just the airline food (although I'm sure that has something to do with it), as I feel this way even after flights on which I've either eaten nothing or brought my own food. And it's not just the dehydration, although I'm sure that has something to do with it as well. Perhaps it's a rebellion against hours upon hours spent confined in such a soulless and (metaphorically) sterile steel and concrete environment, cut off from any kind of connection to the earth and to real food.
Whatever it is, I get off of a plane (or a series of planes) and for the next few days, all I want is vegetables*. Crisp, fresh vegetables that give a satisfying rustle (if they're leafy) or snap (if they're succulent) when you take a bite. And I don't want them to be cooked into melting oblivion--soup is not what I'm looking for here. In fact, I tend to go mostly for raw things. And fortunately for me, the timing of this particular glut of travel was such that my favorite vegetables for reviving myself are kicking into high gear: cucumbers, peppers, and tomatoes. 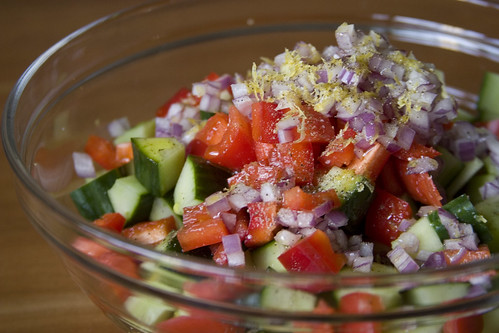
I find these veggies refreshing on ordinary days, but when I've barely slept in days and still, even after one or two showers, feel like I haven't rid my body of that "planed" feeling, their powers of revival seem to be heightened. Add the bite of some onion and the brightness of some lemon and red wine vinegar, and you have a bowl of food that will, if not cure jet lag, at least soothe your body into not hating you quite as much (temporarily, of course).
Also on the list of this dish's virtues: it's easy to make while you're in that post-flight stupor--provided you're not so much of a zombie that you're a danger to yourself and others if you get near a sharp knife. Assuming that you've got the knife safety part covered, then, there's nothing to burn if you fall asleep in the middle of making this dish, nothing in the ingredient list that might make you very ill if you don't cook it thoroughly, and generally no way that it will fail in spectacular fallen-souffle fashion.
I've gone a relatively simple route with the seasonings: salt, pepper, lemon, and parsley. Some ground cumin or cayenne would not be out of place here, and you could substitute vinegar (I'd go with the red wine variety) if you don't have or don't care for lemon. Shallot instead of red onion, black beans instead of chickpeas, add some tomatoes, and so on. You could serve it with pita bread, with crackers, with couscous, in a wrap or just plain. It's one of those endlessly variable recipes that tastes good almost no matter how you make it, which is part of why it's perfect for this not-so-with-it state I'm in. Recipe, such as it is, below the fold.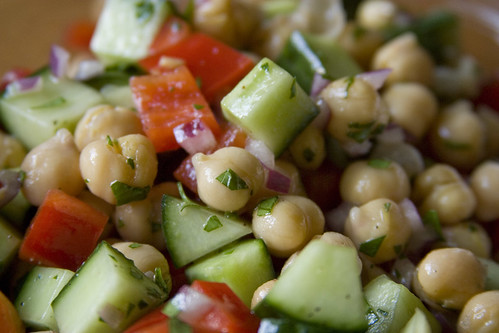
Chickpea and Vegetable Salad
Ingredients
Directions
* This craving is strong, but not strong enough to keep me from getting right to work on some baking this morning.
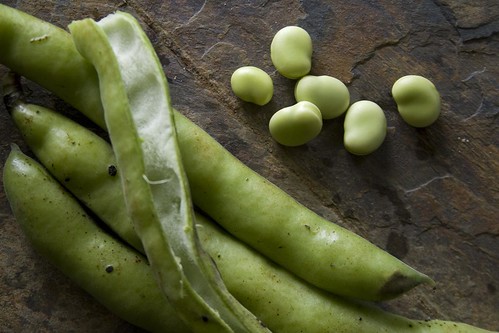
I will probably lose some foodie cred for this, but up until quite recently, I had never cooked with fava beans. I'm not sure that I had even tasted them. Part of what put me off, and I think I'm not alone in this, is the work involved: first the shelling, then the blanching, then the peeling. Or the peeling sans blanching, which I'm told is more difficult. As there are plenty of other delicious green veggies in the garden, especially in springtime, I've cruised along year after year without giving fava beans much thought.
This year was different: I got fava pods in my CSA box, which made them impossible to ignore. Fortunately for us fava bean novices, they started us off gently with baby fava pods. Fun fava fact: the young ones, no thicker than your finger, can be eaten pods and all just like string beans. They're surprisingly good cut into pieces and sauteed in some butter with a bit of salt and pepper, with a deeper, richer flavor than that of string beans. And so my introduction to fava beans was an easy one.
But young things grow up, even fava beans, and before long the pods had gotten too big to be eaten. It was time to shell and peel. Thanks to a nudge from Smitten Kitchen, peeled favas and I got off to a good start with this recipe from Bon Appetit. It was good, and definitely something I'll make again, but the favas' flavor didn't exactly play a starring role. I wanted to make something that really centered on the beans themselves and showcased their brilliant color, which I think is perfect for springtime.
I didn't expect to find that recipe in a parenting magazine, but there it was on Epicurious, exactly what I was looking for: something quick and easy for a weeknight (as quick and easy as favas ever are), and something in which the beans are front and center. But, a parenting magazine? Really? Not that good recipes can't come from parenting magazines, but fava beans? There are plenty of fresh vegetables that I can imagine preparing for a toddler. Fava beans are not among them. I have this mental image of a harried parent working furiously to peel the beans while a tired, hungry, and therefore cranky child does tired, hungry, and cranky child things.
If I ever have kids, and if they ever read this: kids, if I never make fava bean mash for you, it's not because I don't love you. It's because I love you enough to want you to have a sane mother.
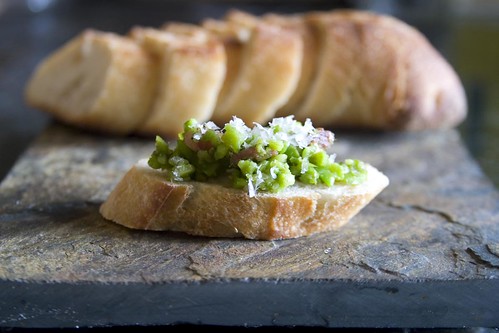
And yes, you read that correctly, this is a recipe for fava bean mash. Wrinkling your nose? I suppose I don't blame you, but I'm actually a big fan of mashed or pureed beans. Refried beans, pureed black bean soup, garlicky white bean puree on toast, and so on. This recipe is in the same vein. And as with many other bean dishes, this one starts out with some bits of cured pork (pancetta, in this case) for flavor. 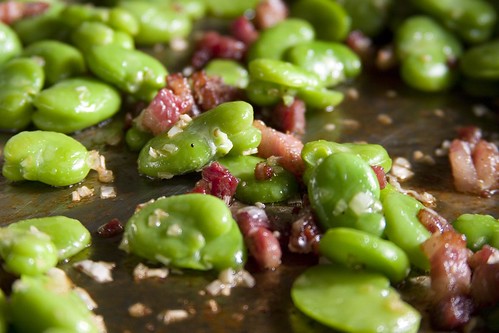
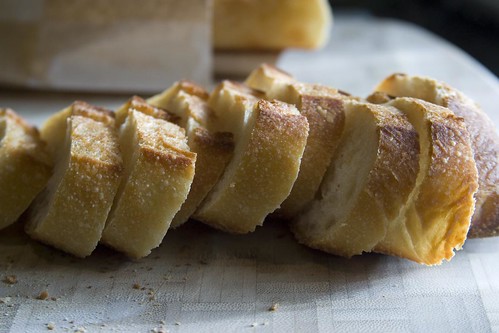
Some good, crusty bread--toasted, brushed with oil, and rubbed with fresh garlic--provides a nice vehicle and a bit of crunch to offset the mushiness. I think it's a great recipe if you need a relatively easy hors d'oeuvre for a get-together; but if you're in a simple mood, as I was this evening, it's also a fine, satisfying meal by itself. And I like the idea of appropriating a recipe intended for kids as a pleasant, even comforting meal for adults. Get some water boiling and have a colander at the ready, and follow me below for the recipe.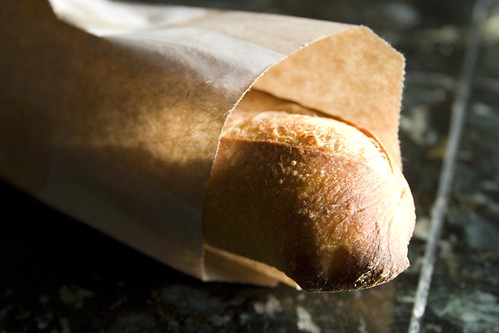
Fava Beans and Pancetta
Ingredients
Directions
I haven't been doing a ton of cooking lately. A nasty and persistent ear infection has made me frequently dizzy and queasy, which doesn't lend itself well to doing much of anything other than lying on the couch and watching mindless television. Dizzy can hardly believe her luck, and has spent nearly all day every day curled up in my lap. I like to think that all the purring I'm being exposed to must be good for my health.
Fortunately the dizziness and queasiness are intermittent, and I have windows of opportunity for activity in the kitchen. We've had blueberry muffins (a delicious recipe* in the upcoming May issue of Cook's Illustrated), brownies (Cook's Illustrated's triple chocolate brownies*: good, not great--better, oddly enough, frozen and then thawed for 5-10 minutes), and macaroni and cheese with leeks and aged cheddar (which I'm considering writing up).
But over the last few weeks most of my cooking inspiration has come from the New York Times' "Minimalist," Mark Bittman--primarily from his blog, Bitten. If Bitten isn't already on your regular reading list, I recommend it. The recipes are simple, and usually relatively quick from start to finish, which I find makes them great for weeknight dinners. Spoiled as I am with such a wealth of excellent produce available to me, it's easy to rely on a few quality ingredients to produce a quick, easy, and delicious meal.
A recent favorite is a fresh, Italian version of colcannon: green mashed potatoes. Bittman makes them with dandelion greens, but any greens will do; I had great success with chard. Something I particularly like about this dish is the use of olive oil, rather than butter or cream, to moisten the potatoes. It probably goes without saying, but use a really good olive oil.
I also owe a debt of gratitude to Bittman for this post, which prompted me to tackle a head of red cabbage that's been sitting in my fridge for a couple of weeks, taunting me and daring me to do something with it already. Armed with half an onion, some sesame oil-laced brown rice, and an alarmingly large chunk of fresh ginger, I turned that stubborn cabbage (okay, half of it--I'm only one person, after all) into a delicious "fried rice" that was far more vegetable than rice. The red cabbage turned a gorgeous and very vivid violet when all was said and done, and I felt good about getting such a large dose of the oft-neglected purple area of the vegetable spectrum. (Still, I felt bad about the lack of green and added some frozen petits pois near the end of cooking.)
Now, I'm not saying that more involved dishes don't have their place, or aren't delicious in their own right. They do, and they are. But in all honesty, sometimes I find myself not only tired and hungry, but with complexity overload. I just want something clean-tasting and simple that satisfies those needs while also entertaining my taste buds, and it's recipes like these that fill that niche for me.
* Subscription required.
I never thought I'd say this, but I've started using frozen vegetables. I know--I'm kind of ashamed. But hear me out.
Cooking for one is a balancing act. I love to have fresh veggies around for stir-fries, especially a few different kinds. But more often than not I can't eat them all before they spoil, and I hate letting food go to waste. Plus, after a day at work and an evening workout I just don't want to deal with all the chopping.
From a nutritional standpoint, It turns out that frozen veggies have pretty much all of their vitamin and mineral goodness. In fact, they can actually retain more of that goodness than their fresh counterparts, depending on how long it took the fresh veggies to go from plant to table. And these days there are not only conventionally grown veggies, there are organic ones.
Enter Cascadian Farms' bags of pre-cut frozen vegetables--specifically their Thai and Chinese stir-fry mixes. Awesome! There's no washing, and no cutting, everything's ready to go straight from the freezer. It's a great way to get a colorful mix of veggies in my diet. They don't always turn out as crisp as the fresh ones do in stir-fries, but they do pretty darn well.
And did I mention they're easy?
This recipe has its origins in two recipes, one from an old-school Jamie Oliver TV show (late-night channel surfing yields remarkable results sometimes) and the other from Nigel Slater's awesome cookbook Appetite. It's another "quick and easy weeknight meal," one that can be ready in no more than half an hour, as long as you make the green paste ahead of time. I keep a screwtop jar of it in my fridge, which makes things snap-bang-easy, as long as I have coconut milk on hand. A Cuisinart or blender makes preparation of the green paste sinfully easy, but I'm sure you could also do it with a trusty chef's knife.
For the paste, you'll need:
Cilantro: a substantial handful, well rinsed
Mint leaves: another substantial handful, also well rinsed
A lime or two
Garlic: several cloves, peeled
Ginger: a good-sized piece, say as big as your thumb, cut into pieces
Hot Thai peppers (Serranos work okay if you can't find the Thai ones)
Lemongrass (optional)
Vegetable oil
Salt and pepper
[Note: I'm writing this recipe for Cuisinart users, but it shouldn't be too hard to extrapolate to knife users. Also, a comment on the garlic and ginger: I am a huge fan of both, so my curries tend to be rather ginger-heavy. Feel free to adjust the recipe to cater to your preferences.]
Get all your "hard" ingredients together first: the garlic, the ginger, the lemongrass if you're using it (remove the outer layers and use a finger-length section, cut into pieces), and the zest (or just peel) of about a quarter of the lime. Dump all this into your food processor, and let it whiz away until everything is evenly chopped. Cut off and discard the very bottom of the stems of the cilantro and mint, then dump the cilantro and mint into the food processor (don't bother chopping it up) and pulse until it's well incorporated. You might have to poke the cilantro down if it's avoiding the processor blade.
Cut off the stems of the peppers, and remove their seeds. Chop them roughly, and add them to the food processor, along with the juice from the lime (use two if they're not very juicy), and whiz away again. By this time it should be a thick, bright green paste, and you can add vegetable oil to make it smoother and more workable. Add some salt and pepper to taste. Then what I do is get out a clean screwtop jar and dump the contents of the workbowl into the jar, pouring a thin layer of oil over the top to prevent the green things from oxidizing, and stick it in the fridge. It keeps for a few weeks, but mine usually doesn't last that long.
For the actual dish, you'll need:
Curry paste, above
Chicken--I've never tried tofu, but I'm sure it would be good
Coconut milk
Rice (your favorite kind--basmati, brown, jasmine, etc.)
Peanut oil (for sauteing; you can use vegetable oil, but it might smoke)
Get your rice cooking, either in a rice cooker or on the stove. Cut the chicken into bite-sized pieces or into thin strips, whichever you prefer. Heat a couple of tablespoons of peanut oil in a skillet over high heat. When the oil is shimmering, add the chicken, spread it out in the pan so that it doesn't steam, and let it be for a minute or two. When the chicken has seared nicely and is turning golden brown, stir it and mix it about to turn the chicken pieces. Continue to saute until it's golden on most sides, then add several tablespoons of the curry paste and mix well. Let that cook, stirring occasionally, for a couple of minutes. Keep the heat fairly high, but don't burn the chicken or the paste. When the garlic and ginger in the paste have gotten a chance to cook, and everything is wonderfully fragrant, add some coconut milk (I usually use 1/4 cup for one chicken breast) and mix it all together. Bring it to a boil, scraping up any browned bits on the bottom of the pan, and let it simmer for a few minutes until the chicken is cooked through and the sauce has thickened slightly. Salt to taste, and serve over or alongside rice.
UPDATE: I have since encountered some Thai curry recipes that have you cook the chicken a slightly different way. Basically you put a quarter cup of the coconut milk and your curry paste into the skillet, sans oil, and bring that to a boil, stirring. This gets the paste all mixed into a bit of the coconut milk, loosening it a bit. Then you add your chicken and the rest of the coconut milk and let it simmer until the chicken is cooked through. Seems to work either way, although on some level my heavily Western training likes the richness that comes from browning the chicken first.