Showing posts with label Chocolate. Show all posts
Monday, March 15, 2010

Chocolate cream pies for Pi Day

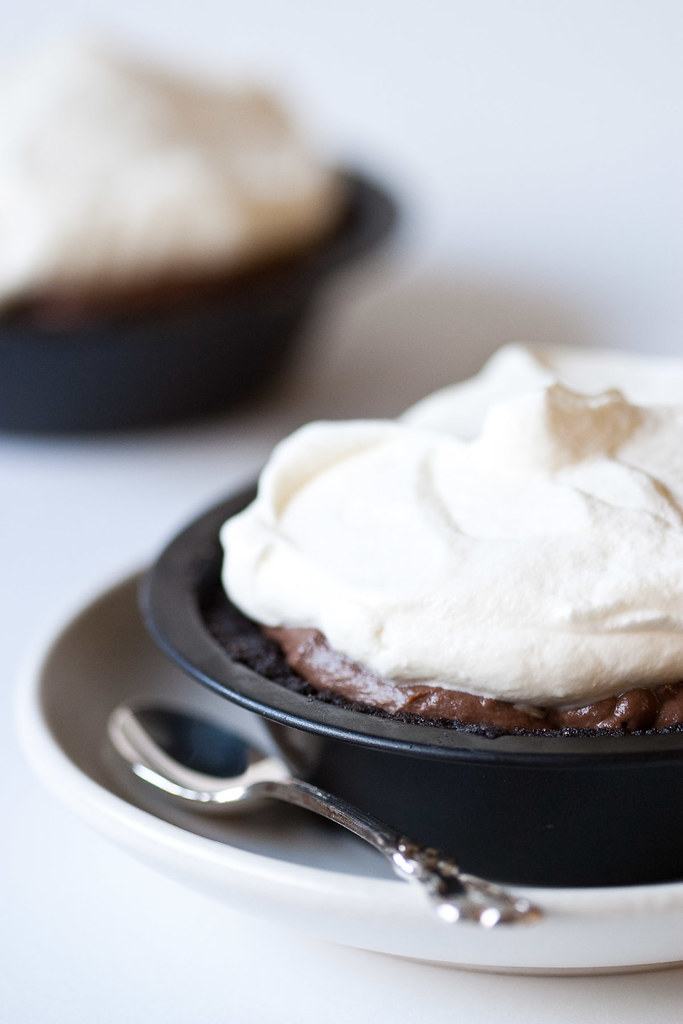
Miniature chocolate cream pies

Please allow me to brighten up this historically ill-fated day for you. Chocolate! Cream! Pie! Pi!

Wait, what?

Yesterday* was 3/14, Pi Day, that under-appreciated holiday on which we gather together to eat pie and give thanks for our ability to calculate the area of a pie plate. Well, maybe you don't. But even if you don't care much about the math, I think we can all agree that an excuse to eat pie is worth celebrating.
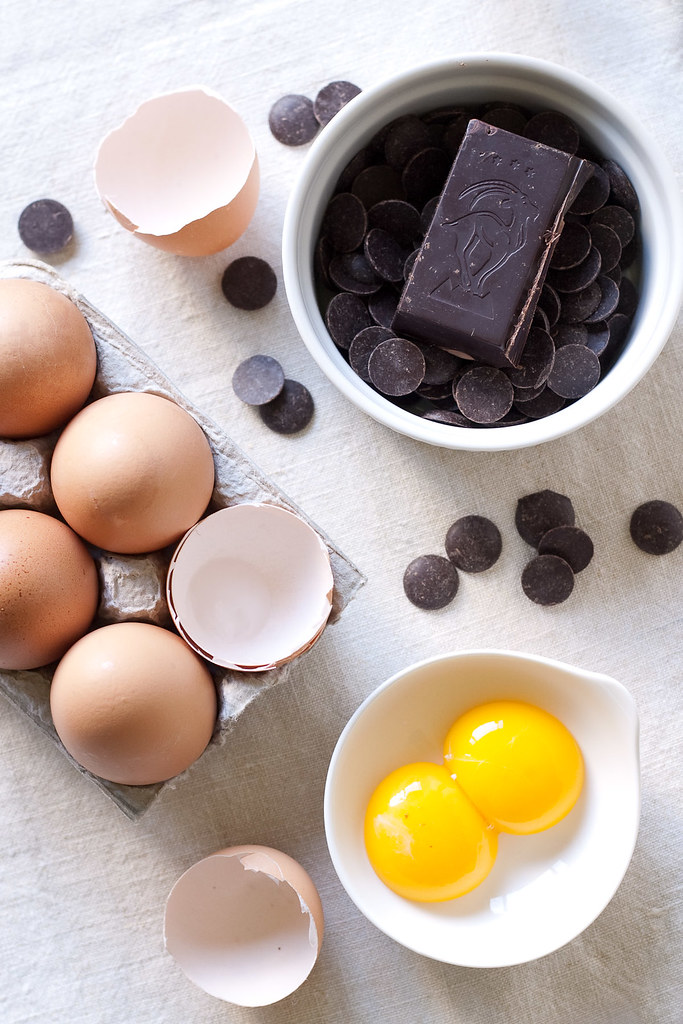
Ingredients

Unlike with some pies, there's really no way to convince myself that chocolate cream pie is good for me. It consists entirely of cookies, butter, pudding, and cream, so there's no getting around it: this is one of those desserts you can't justify making for anything other than a special occasion. I've been waiting months for a good excuse to make it, so when someone reminded me that Pi Day was coming up, it didn't take me long to decide. Chocolate cream pie was the one.
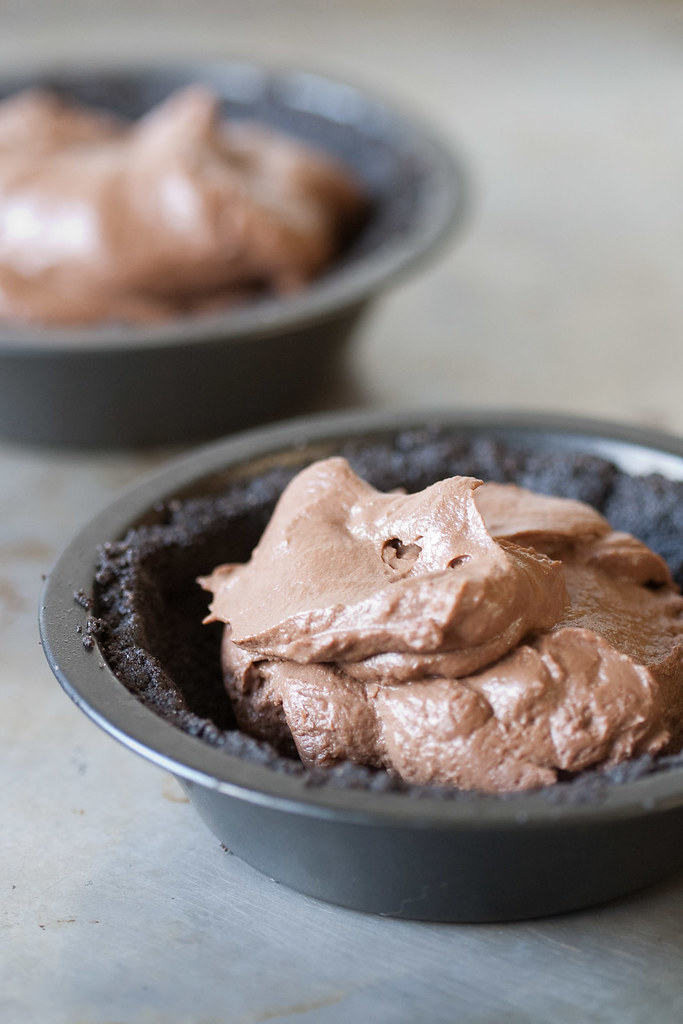
Filling

And what a pie it is. A pulverized chocolate cookie crust, chocolate pudding for filling, and whipped cream to top it all off. What's not to love? No doubt about it, this pie will turn your frown upside down.

Even the preparation will elicit a smile, especially from those for whom success with traditional pie crusts remains elusive. You'd have to try hard in order to overwork this crust, which comes together quickly and is simply pressed into place. The only aspect of the pie that might give one pause is the pudding. To that I say: arm yourself with a whisk and a sieve, and all will be well. By the time you've finished, you'll realize that the hardest part is being patient enough to let it chill for six hours before you dive in.
Eggs and shells

Hungry for more Pi Day fun? Head on over to Amy's, where fall flavors made a guest appearance for this late winter celebration. Did you make a pie for Pi Day? Please share with us in comments!
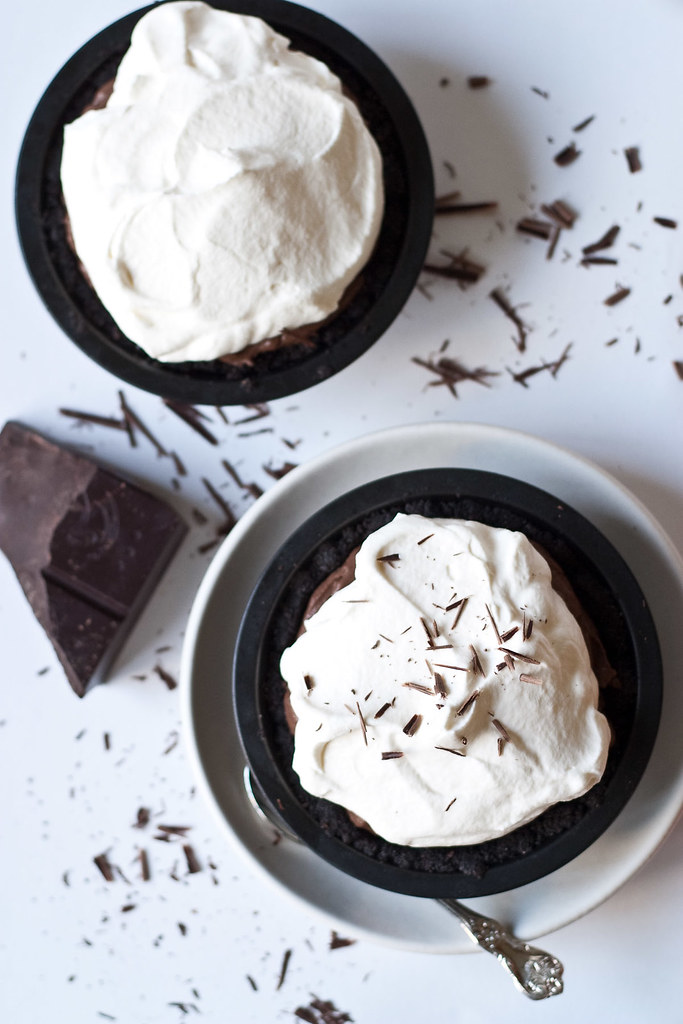
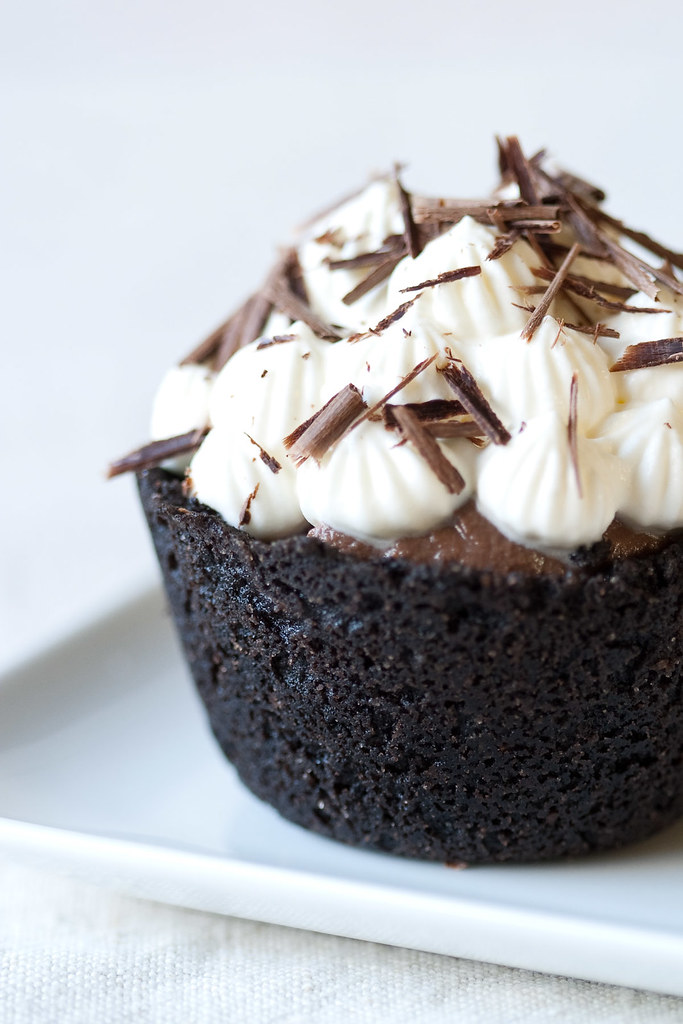
Chocolate cream pies for Pi DayMicro-mini pie

Chocolate Cream Pie

Makes one 9-inch pie, or a few smaller ones

Ingredients

For the crust:
  • 1 1/3 cups chocolate wafer crumbs
  • 5 tablespoons unsalted butter, melted
  • 1/4 cup sugar
  • Dash of cinnamon (optional)
For the filling:
  • 2/3 cup sugar
  • 1/4 cup cornstarch
  • 1/2 teaspoon salt
  • 4 large egg yolks
  • 3 cups whole milk
  • 5 ounces bittersweet chocolate (not unsweetened)
  • 2 ounces unsweetened chocolate
  • 2 tablespoons unsalted butter, softened
  • 1 teaspoon vanilla
For the topping:
  • 3/4 cup heavy cream, cold from the fridge
  • 1 tablespoon sugar

Directions

  1. Place an oven rack in the middle position, and preheat the oven to 350/175C.
  2. Combine the cookie crumbs, butter, sugar, and ground cinnamon (if using) in a bowl and stir until uniformly mixed. Pour the mixture into a 9-inch pie plate, pressing on the bottom and sides of the dish to compact the mixture into an even crust. Bake the crust for about 15 minutes, or until crisp, then set on a rack to cool.
  3. Meanwhile, place the two chocolates in a large, heatproof bowl and place over a pan of barely simmering water (the bowl should not touch the water). Stir the chocolate continually until it is melted and smooth. Remove the bowl from the heat, place a fine mesh sieve over the bowl, and set aside.
  4. In a medium bowl, whisk together the egg yolks, sugar, cornstarch, and salt until thick.
  5. Heat the milk in a heavy 3-quart saucepan until just simmering. Ladle some of the milk into the egg mixture, whisking vigorously, to temper the yolks. Once the tempered mixture is smooth, pour it into the pot with the rest of the milk, whisking as you go.
  6. Cook the custard, whisking constantly, until it thickens and reaches reaches a boil. Turn the heat down slightly and cook, still whisking, for another minute.
  7. Pour the thickened custard through the sieve into the chocolate. You might need to help it along with a spatula. Whisk the chocolate and custard together until they're evenly mixed, then add the vanilla and the softened butter, and whisk to incorporate. Butter a piece of waxed paper and place it, buttered side down, on the surface of the custard. Let cool completely, roughly 2 hours.
  8. Spoon the chilled filling into the prepared crust, then loosely cover the pie and place it in the fridge to chill for at least 6 hours, or up to 1 day.
  9. Just prior to serving, place the cream and sugar in a large bowl and beat just until the stiff peak stage. Spoon the whipped cream on top of the pie, and serve.

Notes

  • Make-ahead: as noted in the recipe, the pie can be made and filled (but not topped) up to 1 day ahead.
  • If you'd like to reduce the amount of sugar in the filling, go ahead. I wouldn't cut it by more than half, though.

* Yes, I'm a day late with this, and here's why. I dare you to be annoyed with that face.
There's more...

Thursday, October 8, 2009

Post-op Pudding

Double chocolate pudding

Tomorrow morning I will finally face the music. I've been listening to it (or rather feeling it) growing louder: six months ago it was pianissimo, but in the last week or so it ramped up to forte. I thought I was done with this particular concerto; but as it turns out, dentists are not infallible, and the two wisdom teeth my dentist said would never even descend did in fact come in. I suppose the technical term is "erupt," but that puts me a little too much in mind of cataclysmic explosions--not exactly what I want to think about on the eve of the surgery to have them out.

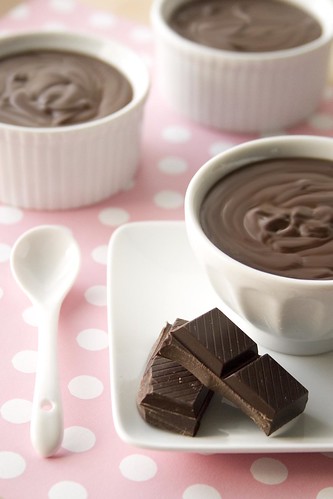
And that's what this is all about, this business of putting up a post about chocolate when I would otherwise be writing about apple muffins. (But fear not! That post is coming, probably next week.) In preparation for having a couple of teeth yanked, I have been all a bustle in the kitchen. Cool, soft food is the order of the day, so in addition to stocking up on ice cream, I've been making applesauce and pudding. Two kinds of pudding, actually: rice pudding and, as is probably obvious from that leading image, chocolate pudding.

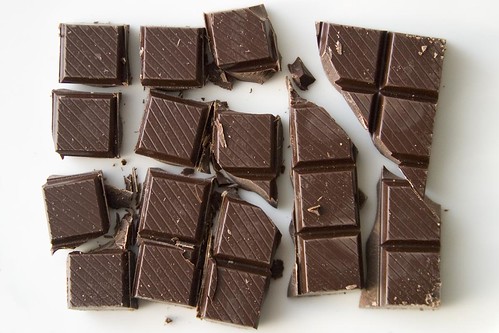
Broken chocolate

I don't recall what made me think of chocolate pudding as good post-op fare; but as soon as it occurred to me, a switch was thrown, and it was all I could do not to rush home from work at that very moment to make it. I hadn't even decided on a recipe yet. I poked around a bit, and there are plenty of chocolate pudding recipes out there, but most of them didn't quite hit the spot. I wanted something creamy, slightly eggy, and richly chocolatey. Eventually I settled on a recipe from Cook's Illustrated that uses not only chocolate, but cocoa powder; not only milk, but cream; and three egg yolks. It sounded like it might fit the bill.

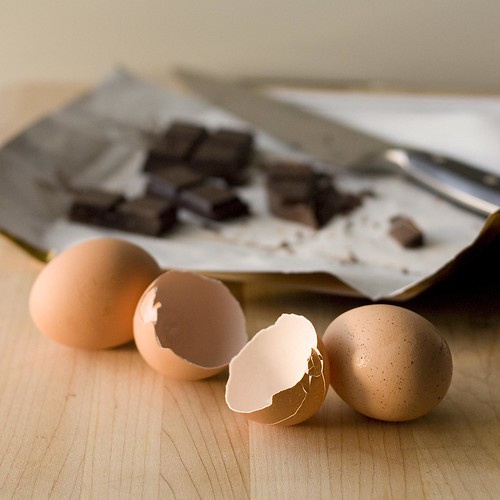
Eggs and chocolate

And indeed, it does fit the bill. Better than that, it's everything I was dreaming of in a chocolate pudding. The knowledge that I would be one very unhappy post-op patient if I ran out of pudding too quickly was the only thing that kept me from inhaling half of the batch before it ever made it into the little ramekins I had set out. I can't say that I'm looking forward to the having those teeth out tomorrow, but at least I'll have chocolate pudding waiting for me afterward.

Chocolate puddings

Double Chocolate Pudding

Adapted from Cook's Illustrated, March 1999
Makes 4-6 servings, depending on how greedy hungry you are

Ingredients

  • 6 ounces bittersweet chocolate, chopped
  • 2 tablespoons Dutch-processed cocoa powder
  • 2 tablespoons cornstarch
  • 2/3 cup granulated sugar
  • 1/8 teaspoon salt
  • 1 cup cream
  • 3 large egg yolks
  • 2 cups whole milk
  • 1 tablespoon unsalted butter, softened
  • 2 teaspoons vanilla extract

Directions

  1. Place your chocolate in a heatproof bowl and set it over a pan of barely simmering water. Stir it periodically until it is nice and smooth, then set aside to cool slightly.
  2. Sift together the cocoa, cornstarch, sugar, and salt, and place the mixture in a medium heavy saucepan. (Sift directly into the pan if you like.)
  3. Add the cream slowly, whisking constantly, and keep whisking until it is smooth. Add the yolks, whisk to combine, then whisk in the chocolate (gradually, if the chocolate is still very warm). Don't worry if the chocolate forms small lumps. They will smooth out as the pudding cooks.
  4. Set the pot over medium heat and cook, whisking constantly and being careful to scrape the bottom and sides of the pot, until the pudding thickens and darkens.
  5. Reduce the heat to medium-low, switch from a whisk to a wooden spoon, and stir the pudding gently as it keeps cooking. When the pudding coats the spoon thickly and reaches 200F/95C, it's done. This should take anywhere from 1 to 2 minutes.
  6. Place a fine mesh sieve over a medium bowl, and pour the pudding through the sieve. Use a rubber spatula to help it along.
  7. Stir in the butter and vanilla until the pudding is smooth. Serve the pudding warm or chilled.

Notes

  • If you chill the pudding, placing a sheet of plastic wrap directly on the surface will help prevent a skin from forming. The skin doesn't change the taste of the pudding, just the texture of the top layer.
  • If you can't find cornstarch, substituting flour should be fine. Just make sure that you cook it thoroughly so that the flour doesn't give the pudding a chalky feel.

There's more...

Monday, July 20, 2009

A Red Velvet Welcome Mat

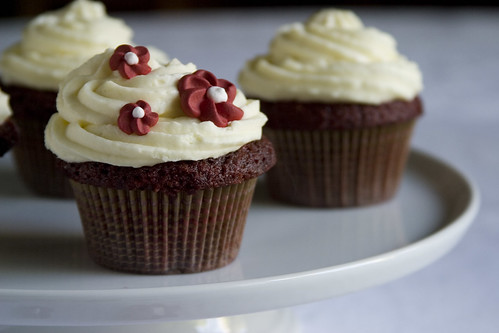
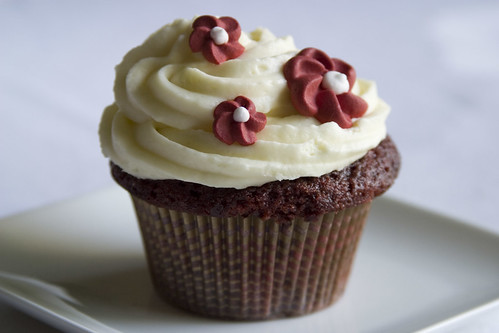
Cupcakes with royal icing flowers

Talk about opportunism. It's not that I wasn't excited to have my youngest sister back in town for a few short weeks, and it's not that I didn't want her to know that we're glad to have her here. It's just that lately I might as well be spring loaded for the speed with which I launch into "bake like there's no tomorrow" mode. If there's an opportunity for me to don my apron and make a mess in the kitchen, I'm there, and making such a mess that it spills out into the living room, with cooling racks on the dining room table and bags of sugar and flour on the table by the front door. Carpe diem indeed. It's more like carpe diem, carpe opportunitatem, and if it's a rather involved project, carpe alterum diem.

But this post isn't about my ever-more-maniacal baking fervor, and it's not a post about Sister #2--who, despite being awesome, is not something you can cook and eat, at least not in what we consider polite society. It's a post about cupcakes. In celebration of her return from Hahvahd Yahd, and in a nod to the fact that she, Sister #1, and I share a passion for cupcakes, I decided to make some for her.

Cupcake closeup

As much as I love full-sized cakes--especially layer cakes, in which you get cake and icing sandwiched together so that each bite sends you undulating from cake to icing to cake and back again... wait, where was I?--there's something fun and, to me, nearly irresistible about cupcakes. They are without question my favorite dessert, and the dessert I have the most difficulty in resisting* should one be placed in front of me--or within a 100 yard radius of me.

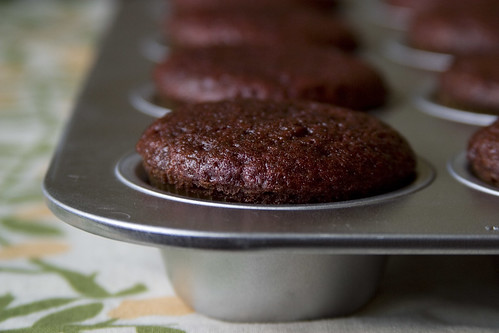
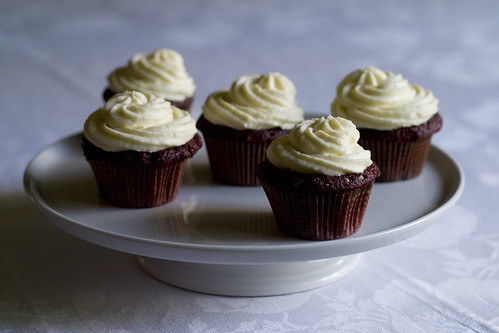
Red velvet cupcakes

First of all, they're cake, which should at least put them in the top five, if not seal the deal altogether. Second, they're miniature versions of their full-sized cousins, often re-imagined and crafted into petite fancies that delight the eyes as well as appealing to the taste buds. Somehow that tiny little canvas lends itself exceptionally well to inventive decoration. Third, they're cake. What's not to love??

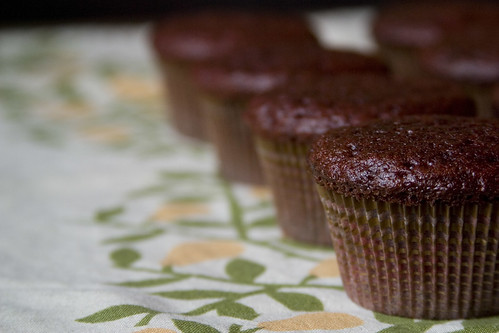
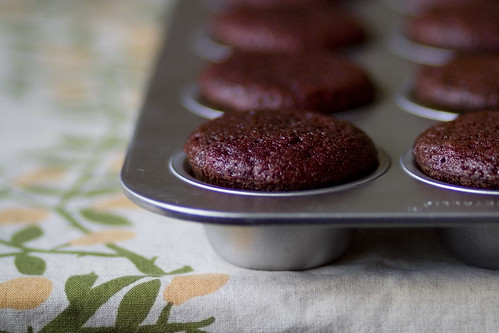
Cupcakes at attentionCupcakes in pan

Having established that cupcakes were the way to go, the only question was what flavor(s). I toyed with the notion of turning my Mother's Day cake into cupcakes, and will probably return to that idea eventually, but it didn't seem quite right. Then it occurred to me that what with Harvard's school colors being red and white--indeed, their mascot is the Crimson--there was only one kind of cake that would be truly appropriate: red velvet.

Red velvet cupcakes (I)

This red velvet cake isn't as strikingly (or shockingly) red as many others out there. It owes its darker mahogany shade to a higher amount of cocoa powder. It's not quite a chocolate cake, though; the flavor dances around in the space between a yellow cake and a chocolate cake, neither plain nor overwhelmingly dark and chocolatey. Its hearty color belies its delicate texture--so delicate that extra care is warranted when handling layers of the stuff, and teeth or a fork sink into the cake with virtually no resistance. Although you'll see red velvet described as "tacky" or "vampy," this particular cake tastes and feels refined.

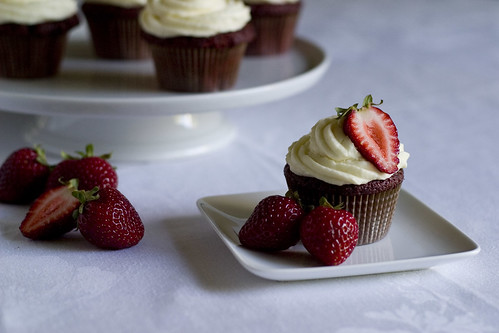
Cupcake with berries

Furthering that refined feeling, the icing takes a traditional cream cheese icing and adds not only mascarpone cheese for richness, but whipped cream for lightness. Icing lovers, rejoice: this one is heaven. I thought that I had found my true love in icing form with Swiss buttercream, and now this mascarpone cream cheese icing just might steal the buttercream's crown. Pipe it atop feather-light and subtly ruddy little cakes like these, and take some to welcome a loved one home. She'll be grinning an icing-laced grin from ear to ear.

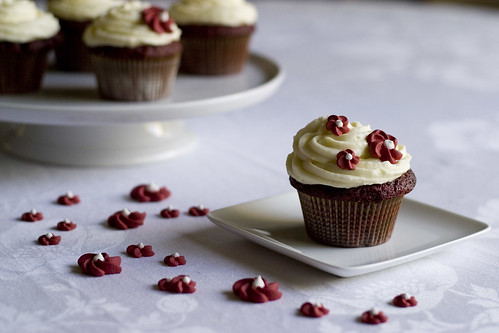
Red velvet cupcake with royal icing flowers

Red Velvet Cake

Adapted from Elisa Strauss's Confetti Cakes Cookbook, via the New York Times
Makes three 9-inch cake layers, or 32-34 regular-sized cupcakes

Ingredients

  • 1 tablespoon unsalted butter, softened (not needed for cupcakes)
  • 3 1/2 cups sifted cake flour
  • 1/2 cup unsweetened cocoa powder (not Dutch process)
  • 1 1/2 teaspoons salt
  • 2 cups canola oil
  • 2 1/4 cups granulated sugar
  • 3 large eggs
  • 6 tablespoons (3 ounces) red liquid food coloring, or 2 teaspoons red gel food coloring
  • 1 1/2 teaspoons vanilla
  • 1 1/4 cup buttermilk
  • 2 teaspoons baking soda
  • 2 1/2 teaspoons white vinegar

Directions

  1. Place racks in the upper and lower thirds of the oven and preheat the oven to 350F/175C.
  2. If making cake layers, butter three 9-inch round cake pans, and line the bottoms of the pans with parchment paper. If making cupcakes, line three muffin tins with paper cups.
  3. Sift together the cake flour, cocoa powder, and salt and set aside.
  4. Combine the oil and sugar in a large bowl and beat at medium speed, using an electric mixer or a whisk, until well blended.
  5. Beat in the eggs one at a time, mixing well after each addition and scraping down the sides of the bowl as needed.
  6. Set the mixer on the lowest speed and gradually add the food coloring. Be careful if using liquid food coloring, as it might splash.
  7. Beat in the vanilla.
  8. Add the flour mixture and buttermilk by turns, beginning and ending with the flour. Scrape down the bowl after each addition, and beat just until the batter is blended.
  9. Mix together the baking soda and vinegar in a small bowl, and with the mixer running (or beating by hand), add the mixture to the batter. Beat for several seconds to blend well.
  10. Divide the batter equally among the pans or muffin cups (each cup should be 2/3 - 3/4 full). Bake until a sharp knife or cake tester inserted into the center comes out clean, about 40 to 45 minutes for cake layers and 20-25 minutes for cupcakes.
  11. Let the cakes (or cupcakes) cool in the pans for 20 minutes. For cakes, invert pans onto cooling racks and peel off the parchment paper; for cupcakes, remove from pans and set to cool on racks. Cool cakes completely before icing them.

Mascarpone Cream Cheese Icing

Adapted from John Doherty's Waldorf-Astoria Cookbook, via the New York Times
Makes enough icing for a 9-inch, 3-layer cake, or to top about 3 dozen cupcakes with some to spare

Ingredients

  • 2 cups heavy cream, chilled
  • 12 ounces cream cheese, room temperature
  • 12 ounces mascarpone cheese, room temperature
  • 1/2 teaspoon vanilla
  • 1 1/2 cups confectioner's sugar, sifted

Directions

  1. Whip the cream, either by hand or with electric mixer, until it holds soft peaks. Cover and chill it while you prepare the rest of the ingredients.
  2. Combine the cream cheese and mascarpone in a large bowl, and beat until smooth and uniform.
  3. Add the vanilla and mix briefly; add the sifted confectioners sugar and beat to blend well.
  4. Stir about a third of the whipped cream into the cream cheese mixture, then gently fold in the remaining whipped cream.
  5. Refrigerate the icing until you are ready to ice the cake(s).

Notes

  • This icing holds its shape nicely when chilled, but true to its ethereal nature, it does not handle heat well: it sags a bit when the mercury rises above warm room temperature. For best results, keep chilled or at cool room temperature. I don't recommend using it for cakes that will be sitting out in hot weather.

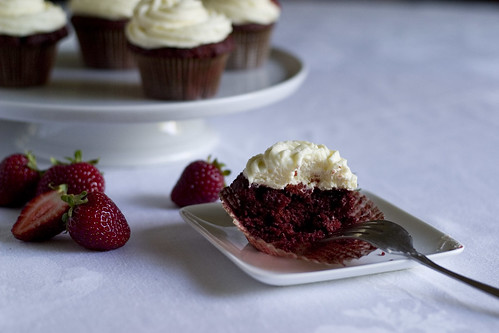
Half-eaten cupcake


Update: fixed the broken link to the original icing recipe.

* Right between my local Sur la Table and the little cantina that sells my favorite chopped salad is a cupcake shop. It's been there for months, and after what seemed like an eternity of "being good," last week I finally caved and bought a vanilla cupcake with chocolate icing. I was psyched, but frankly, and much to my disappointment, it wasn't all that: vaguely stale cake with a not-very-tender crumb and icing that had more acidity than chocolate flavor. Even I can do better than that. Admittedly, one cupcake is a small sample size, but when some two-bit amateur can outdo your professional bake shop, you should probably step it up a notch or two.


There's more...

Thursday, July 2, 2009

Who are those angels, and why are they singing in my kitchen?

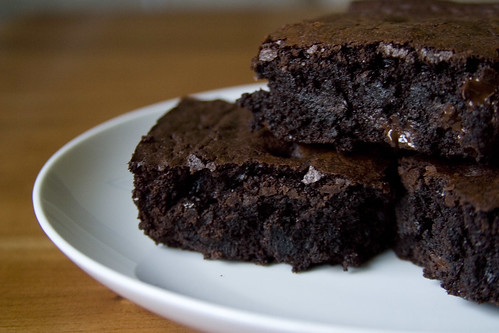
Brownies

It has long been a source of great shame for me that the best brownies I've ever made came from a box. The box in question (Ghirardelli's triple chocolate brownie mix) is no sloucher, mind. But I'm a firm believer in the virtues (and superiority) of baking from scratch, and my inability to craft a brownie that measured up to Ghirardelli's has been a thorn in my side for years.

My quest to find that holy grail of brownie recipes has been complicated by the perpetual lack of consensus over what makes a perfect brownie. Some like them cakey, others like them fudgy, others like them chewy but not too dense, and so on. As a result, I've often gone ahead with a recipe that's guaranteed to be "the best brownies evah!" only to find them lackluster, or at least not at all what I was looking for.

Cleaning the bowl

So when Katie told me that her mom had recently discovered a recipe for "the best brownies she'd ever made," my reaction was mixed. On the one hand, my faith in Katie's mom is such that I trust anything she says about cooking. On the other hand, experience has led me to be skeptical when someone extols the virtues of their favorite brownie recipe.

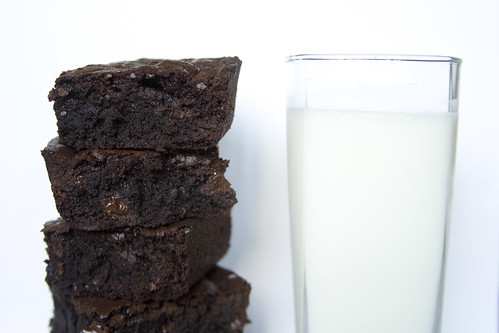
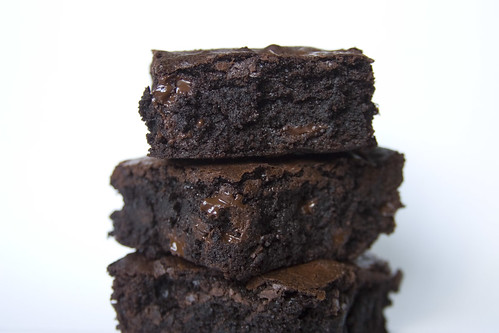
Well, my faith remains intact, for this is indeed the best brownie recipe I've ever made--with or without a box mix. These brownies are dark and moist, with rich chocolate flavor and just the right amount of chew. I won't claim that these are the best brownies you've ever made--for all I know, you might like them cakey--but in my book, they win, so I would be remiss in not sharing the recipe with you. I highly recommend that you give them a try, and of course I also recommend that you have a glass of milk handy when they're done.

Brownies and milk


Fudge Brownies

Adapted from King Arthur Flour
Makes one 9x13" pan of brownies

Ingredients

  • 1 cup (2 sticks, or 1/2 pound) unsalted butter
  • 2 1/4 cups sugar
  • 4 large eggs
  • 1 1/4 cups Dutch-process cocoa
  • 1 teaspoon salt
  • 1 teaspoon baking powder
  • 1 teaspoon espresso powder
  • 1 tablespoon vanilla extract
  • 1 1/2 cups unbleached all-purpose flour
  • 1 cup chocolate chips

Directions

  1. Place oven rack in middle position, and preheat the oven to 350F/175C.
  2. Grease a 9x13-inch baking pan.
  3. In a small saucepan, or in a microwave-safe bowl, melt the butter. When the butter is melted, add the sugar and stir to combine. Heat the mixture until it is very warm (110-120F, or about 45C), but not bubbling. It should look shiny as you stir it.
  4. Meanwhile, in a large bowl, whisk the eggs until lightly beaten. Whisk in the cocoa powder, salt, baking powder, espresso powder, and vanilla. Stir until smooth. The mixture will be quite thick and stiff, so it might take some muscle to make it smooth.
  5. Add the re-warmed butter-sugar mixture, and stir until smooth.
  6. Add the flour and stir just until combined, then gently mix in the chocolate chips. The batter will be thick.
  7. Spoon the batter into the prepared pan. You might have to help it into the corners.
  8. Bake the brownies for 25-30 minutes. They're done when a cake tester or sharp knife inserted into the center comes out with a few crumbs. The brownies will be set on the edges, and moist in the center (but not gooey). Cool completely, if you can manage it, before cutting and serving.

Notes

  • The world won't come crashing down if you use regular (non-Dutch-process) cocoa powder.
  • Add chopped nuts if you like.
Brownie stack

There's more...

Monday, April 27, 2009

Under the weather, but baking up a storm

Good things for a bad cold

I don't know what it is with my family lately, but we're having a tough time keeping ourselves out of the hospital. So far one sister and I have escaped anything serious, but after two (scheduled) cancer surgeries, one case of food poisoning, one almost-tonsillectomy, and one emergency appendectomy in the family, Sister #1 and I are wondering which of the two of us is next. Meanwhile, I'm making up for my avoidance of the emergency room with a series of mild-to-moderate illnesses. They're not awful, but they're keeping me home from work--and keeping Ricola and Vicks in business, not to mention the flower vendors at the farmer's market.

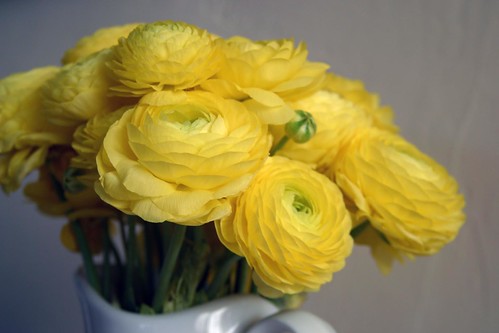
Ranunculus

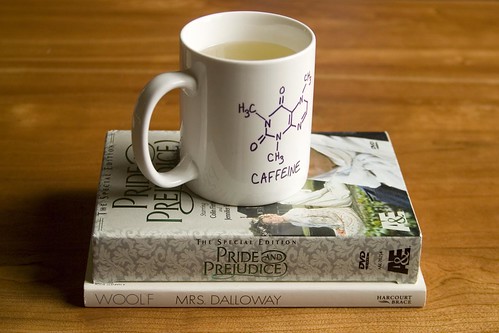
Now, for me, the thing that I most love to do when I'm home ill, aside from reading old favorites and watching the BBC/A&E production of Pride and Prejudice*, is bake. Something about being too ill to go to work but not so ill that I'm completely bed- or couch-ridden gives me a stronger-than-usual urge to bake things. That, and the fact that baked goods make for wonderful comfort food. It's probably not the best of ideas for me to be making food when I'm feeling under the weather, but there's lots of hand-washing in hot, soapy water, and in any case, I'm usually the only one who eats the things I bake at home.

This morning I made yogurt, which doesn't really count as baking, but is a new and interesting bit of kitchen science. I've just placed it in the fridge after its four hours of resting in the oven with the light on, and it seems to have set as advertised. I plan to taste it tomorrow morning, mixed with a bit of the apricot jam I received in my CSA boxes during the winter.

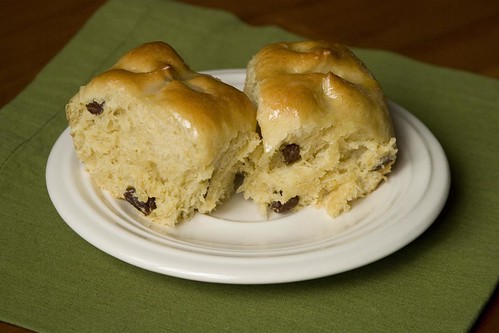
I also made some of Homesick Texan's scrumptious hot cross buns. I love breads studded with dried fruit, whether sweet or savory breads, and these sweet rolls made for some wonderful comfort food. The crosses didn't turn out very distinct, but they sure taste good. I second Homesick Texan's recommendation to put some lemon zest and vanilla in the icing.

Hot cross buns

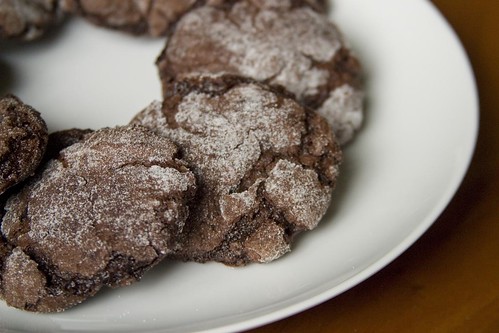
And finally, a batch of chocolate crinkle cookies with a dry, crackly outside and a moist, chewy interior. They have an intense chocolate flavor and happen to be gluten-free. Jump below the fold for the recipe.


Chocolate crinkle cookies

Chocolate Crinkle Cookies

Makes about 2 dozen cookies

Ingredients

  • 2 egg whites, room temperature
  • 1 1/3 cups superfine sugar, divided, plus more for rolling
  • 2/3 cup bittersweet chocolate chips or about 4 ounces chopped bittersweet chocolate, divided
  • 1/3 cup unsweetened cocoa powder
  • 2 teaspoons cornstarch
  • large pinch of salt
  • nonstick vegetable oil spray

Directions

  1. Place oven rack in middle position and preheat oven to 400F/205C. Spray a large baking sheet (or two if you have them) with nonstick spray.
  2. In a large bowl, beat egg whites to soft peak stage. Gradually beat in 2/3 cup sugar, and continue beating until meringue is thick and shiny, and falls in a nice ribbon.
  3. Melt chocolate in a heat-safe bowl, and cool to lukewarm while you prepare the dry ingredients.
  4. In a separate bowl, sift or whisk together the other 2/3 cup sugar, cocoa powder, cornstarch, and salt.
  5. Beat the dry ingredients into the meringue, then stir in the melted chocolate.
  6. Place the extra sugar in a shallow bowl. Portion out a heaping tablespoon of dough and, dusting your hands with sugar if necessary to prevent sticking, roll the dough into a small ball. Roll the ball in the sugar to coat it well, then place the ball on the greased baking sheet. Continue in the same way with the remaining dough, spacing balls about two inches apart.
  7. Bake cookies until they are puffed, the tops are cracked, and the edges begin to set, about 10 minutes. Cool cookies on baking sheets 10 further minutes, then transfer cookies to a rack to cool completely.

Notes

  • If you don't have superfine (baker's) sugar, use confectioner's sugar.
  • Rolling the dough in sugar isn't necessary from a chemical point of view, but I think it highlights the baked cookies' cracks nicely. Using confectioner's sugar rather than superfine granulated sugar would probably highlight the cracks even better; that's an aesthetic choice you can make for yourself.


* and by "watching" I mean "shamelessly reciting virtually all the lines along with it."

There's more...

Wednesday, April 15, 2009

Chocolate caramel crackers... take 2

chocolate_caramel2_sm.jpg


Sister #2 has been feeling a bit at odds with the universe, which seems to be throwing everything it's got at her. To top it all off, this week she wound up in the hospital with a bad case of strep throat. She's on the mend, but a care package is in order, so today I put on my apron and got to baking. First up was a batch of lemon bread, a family favorite and something that keeps (and ships) well.

The other half of the care package was another batch of the chocolate caramel crackers I made earlier this week, but this time I departed a bit from Deb's recipe. Since the changes I made were rather substantial, I've decided to post my version of the recipe in full. The other post will be updated with a link to this one.

My main problem with the recipe in its original form was that when I made it, the caramel didn't turn out properly. I don't know if I stirred it too much, boiled it too briefly, or if it just wasn't my day for caramel. Whatever the cause, I boned up on caramel- and toffee-making, and decided to make some adjustments (hewing largely to this recipe) that I thought might give me better results.

The first change was in the ingredients: instead of all brown sugar, I used half white/granulated sugar and half brown sugar. I also added a couple of tablespoons of water, and incorporated the salt at the beginning of cooking rather than at the end. Next, I employed a candy thermometer and rather than boiling the mixture for a prescribed amount of time, I let it boil until it reached the hard crack stage, 300F. Furthermore, instead of all the stirring that Deb recommends, I mostly left the caramel alone. I only stirred it a bit now and again to make sure that things were homogeneous. Finally, instead of keeping the matzoh + caramel in the oven for 15 minutes, I only left it in there until it looked like the caramel had oozed through the matzo appropriately, which was about 8-10 minutes for me.

The result was a rich, toffee-like candy with a satisfying crunch, miles better than the first batch. I think Sister #2 will like it.

Recipe below the fold.


Chocolate Toffee Crackers

Yield: Makes one sheet pan's worth of candy

Ingredients

  1. matzoh or saltine crackers to fill a rimmed baking sheet, matzo cut to fit if necessary
  2. 1 cup (1/2 pound, or 2 sticks) unsalted butter
  3. 1/2 cup granulated sugar
  4. 1/2 cup brown sugar (light or dark, as you wish)
  5. large pinch of salt
  6. 2 tablespoons water
  7. 1 teaspoon vanilla extract
  8. 1 1/2 cups semi- or bittersweet chocolate, chips or chopped
  9. 3/4 cup nut(s) of your choice, sliced or chopped as appropriate, toasted if desired (I recommend almonds or pistachios)
  10. coarse salt for sprinkling (probably overkill if you're using saltines)

Directions

  1. Preheat oven to 350F.
  2. Line a large (11x17") rimmed baking sheet with aluminum foil, including the sides, then place a sheet of parchment paper over the foil.
  3. Arrange matzoh or crackers so that they cover the bottom of the baking sheet, breaking if necessary to fill the sheet. I recommend Deb's tip of pressing a serrated knife between perforations, not on them, in order to create neat edges.
  4. In a medium heavy saucepan set over medium heat, combine butter, sugars, water, and pinch salt, stirring occasionally until butter has melted.
  5. Bring mixture to a boil. Affix candy thermometer to side of pan, ensuring that the thermometer's tip does not touch the bottom of the pan. Boil gently, stirring only rarely and brushing sides of pan with a wet pastry brush as needed, until thermometer reads 300F, or hard crack stage. Meanwhile, measure out the vanilla and have it handy.
  6. Remove mixture from heat and stir in vanilla, being careful of hot splatter.
  7. Quickly pour mixture over matzoh on baking sheet, using spatula to spread it more or less evenly.
  8. Bake matzoh and caramel until caramel starts to bubble, 5-10 minutes. Keep an eye on it--you don't want the caramel to burn.
  9. Remove pan from oven and scatter chocolate over caramel. Let stand 5 minutes, or until chocolate has melted, then use an offset spatula to spread chocolate evenly over caramel.
  10. Sprinkle with coarse salt and nuts, and let cool.
  11. When chocolate has set, break crackers into pieces. Store in an air-tight container for up to 10 days.

Notes

  1. If you're feeling impatient, you can help the chocolate along by placing the pan in the fridge after you've added the nuts and such.
  2. I've used nuts here, but you could use all sorts of things: David Lebovitz suggests cacao nibs, and I bet some dried fruit would be lovely.


There's more...

Sunday, April 12, 2009

Easter (Passover) noms

(Updated below)

Happy Easter to all you Easter-celebrating folks out there. The closest I got to anything Easter-like today was walking past the Catholic church on my way to and from the farmer's market this morning, and eating our family's traditional Easter dinner of ham, potatoes Anna, and asparagus. But as with Christmas, the fact that I'm no longer a practicing Christian doesn't mean I can't use the holiday as an excuse to bake even more than usual.

The baking that I did is not actually Easter-specific. (I still have half a mind to bake some Easter- or spring-themed cupcakes, but that's neither here nor there.) In fact, even though as you can see from the aforementioned ham that my family is not Jewish, these nommable goods are more appropriate for Passover. I quite like the idea, one of these years, of keeping kosher* for passover. The challenge is attractive, and unlike giving something up for the entire 40 days of Lent (again, my family isn't Catholic, but I like to play games with my food) eating kosher for the eight days of Passover strikes me as an eminently manageable task.

But I digress, and we have goodies to discuss. First up is a recipe from Deb at Smitten Kitchen: chocolate caramel crack(ers). I'm just going to point you to her post, as I followed her directions to the letter. But, about those directions: I might recommend that you employ a candy thermometer when making the caramel, as mine wound up underdone and a bit grainy. Even though, like I said, I followed the directions to the letter. I don't have much experience making caramel, and I should have done a bit more reading before I tried it. That said, the stuff tastes great and I'm sure it will be gone in no time. (Fortunately I have a family who delights in exchanging baked goods, so I was able to leave most of it--and most of the next item--with my parents and hungry siblings.)

Update: A second batch with a different caramel-making method yielded better results for me. I've written it up here.

Next up is something that I've wanted to be able to make for a long time, but never got quite right: tuiles. Specifically, almond-flavored tuiles with a bit of lemon zest in them. I've tried making them before, but they were a disaster. I now suspect that their downfall was the wheat flour I used, specifically the gluten. Bad gluten. Evil gluten. At least in these matters. The stroke of brilliance in this recipe is potato starch, which I didn't even realize existed as grocery store item until I saw it in the "kosher for Passover" display at the store this week. Learning something new every day and all that. Anyway, the potato starch did the trick, and these tuiles came out gorgeously light and crisp. They're delightful on their own, but I bet they'd also be great stuck in a scoop of ice cream.

I love these cookies not just because they're delicious, though of course they are, but because the batter is so easy to work with. There's no special process to assembling it: you throw all the ingredients together at once and whisk away. And because there's no insta-leavening involved, you can proceed at a leisurely pace without worrying that all the air will escape and leave your cookies flat. Spreading the batter out into a picture-perfect round is something I have yet to accomplish, but that's not the batter's fault; and because a little of this batter goes a long way, you'll have plenty of chances to practice.

Full recipe below the fold. Enjoy!


Almond Tuiles

Modified from Gourmet, April 2009
Yield: Makes 2-3 dozen cookies, depending on how big you make them

Ingredients

  1. 1/4 cup sugar
  2. 1 large egg white
  3. 1/4 cup plus 2 tablespoons potato starch
  4. 1/4 cup very mild olive oil **
  5. 3/4 teaspoon lemon zest
  6. 1/4 teaspoon salt
  7. 3/4 teaspoon almond extract
  8. 1/2 cup sliced almonds, toasted

Directions

  1. Place oven rack in middle position and preheat oven to 375F.
  2. Line a large baking sheet with a non-stick mat (e.g. a Silpat) or parchment paper.
  3. Combine in medium bowl all ingredients except sliced almonds; whisk until smooth.
  4. Spoon batter, ~1 teaspoon per cookie, onto baking sheet. Leave plenty of room between cookies--six per sheet works well. Using a small offset spatula (or the back of a spoon), spread batter into a very thin round, ideally no more than 2 mm thick. Sprinkle each round with a few toasted almonds.
  5. Bake until cookies are pale golden, 7 to 9 minutes total. Working quickly but carefully, use a thin spatula to lift hot cookies off of sheet and drape over a rolling pin or (empty) wine bottle. Press gently to get the cookies to curl. When baking sheet has cooled, proceed with the rest of the batter in the same manner.

Notes

  1. If cookies crispen before you can curl them, return baking sheet to oven for 1 minute.
  2. Can be made 2 days ahead. Store at room temperature in an airtight container.


* When I say "keeping kosher," I only refer to eating kosher-for-passover food. It's quite beyond my means to acquire a whole separate set of dishes and cookware, and anyway, the point of the challenge is the food.

** You could use another, more neutral tasting oil, but depending on which one you use, it might not be kosher.

There's more...

Friday, December 12, 2008

Truffles! (Virtual candy exchange)

Work has been terribly busy of late, so I've barely had time to cook dinner, let alone get started on holiday baking. But today I return at least to the idea of holiday baking. Bee has graciously invited me to join her virtual candy exchange for Christmas, and I am only too happy to participate.

I've made truffles nearly every Christmas for several years now, and for most of those years I've gone from recipe to recipe without being really sold on any of them. The taste was insipid, the texture wasn't quite right, and so on. Then last year I found this recipe. Gingerbread is one of my favorite holiday treats, and although I might not have thought of pairing it with chocolate, these truffles are winners.


As is usually the case with truffles, these take quite a bit of waiting, so I find that it's best to make them on a weekend when you can putter about the house (or wrap gifts) while things chill.

If you have a favorite holiday candy recipe, please share it or drop a link in comments. Happy baking!


Gingerbread Truffles

From: Bon Appetit, December 2005
Yield: Makes about 2 dozen
Holiday spices and molasses give these chocolate truffles seasonal charm.

Ingredients

  1. 3/4 cup whipping cream
  2. 10 whole cloves
  3. 1 tablespoon mild-flavored (light) molasses
  4. 1 1/2 teaspoons grated peeled fresh ginger
  5. 1/2 teaspoon ground cinnamon
  6. Pinch of salt
  7. 7 ounces plus 12 ounces bittersweet (not unsweetened) or semisweet chocolate, chopped
  8. 7 ounces plus 12 ounces high-quality white chocolate (such as Lindt or Perugina), chopped
  9. 1/2 cup chopped crystallized ginger plus additional for garnish

Directions

  1. Bring first 7 ingredients just to boil in heavy medium saucepan; remove from heat and let steep 1 hour.
  2. Combine 7 ounces bittersweet chocolate and 7 ounces white chocolate in large metal bowl set over saucepan of simmering water; stir until chocolate is melted and smooth. Remove bowl from over water. Strain cream mixture into chocolate; stir to blend. Stir in 1/2 cup chopped crystallized ginger. Chill filling until firm, at least 3 hours.
  3. Line baking sheet with parchment. Using 1-inch melon baller, scoop filling and roll between palms to form balls. Place on parchment. Chill truffles at least 2 hours.
  4. Line another sheet with parchment. Place 12 ounces bittersweet chocolate in medium metal bowl set over saucepan of simmering water; stir until chocolate is melted and smooth. Remove bowl from over water. Cool until thermometer inserted into chocolate registers 115°F. Quickly submerge 1 truffle in chocolate. Using fork, lift out truffle and tap fork against side of bowl so excess coating drips off. Using knife, slide truffle off fork and onto prepared sheet. Repeat with remaining truffles. Chill until set.
  5. Line another baking sheet with parchment. Place 12 ounces white chocolate in another medium metal bowl set over saucepan of simmering water; stir until melted and smooth. Remove bowl from over water. Cool until thermometer inserted into chocolate registers 100°F. Hold 1 truffle between thumb and index finger; dip halfway into white chocolate. Place on prepared sheet. Repeat with remaining truffles. If desired, press small pieces of crystallized ginger atop truffles. Chill until firm, about 30 minutes. (Can be made 1 week ahead. Cover; keep chilled.)

There's more...

Saturday, October 25, 2008

A Luxurious Cup of Chocolate for a Cozy Day

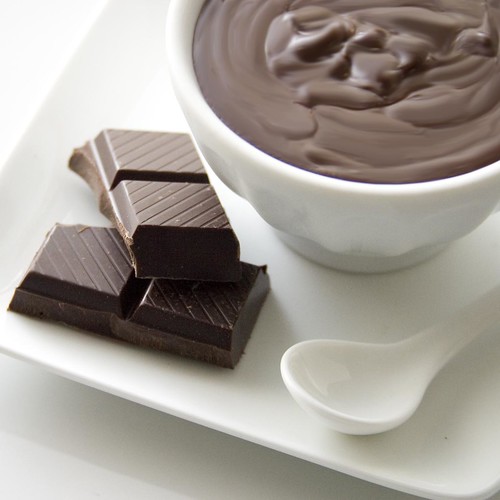
There's hot chocolate, and then there's hot chocolate. This is the latter: a thick, rich, velvety cup of chocolate that feels and tastes like the very essence of decadence. It takes more time and effort than your average cup of stir-milk-into-powder cocoa, but it's well worth it. On a day when the fog is creeping up the cliffs to envelop the house--I can now barely see the vegetable garden only 100-150 feet below the house, and through the skylight I can see only the tiniest hints of blue sky--there is nothing better than curling up with a good book and a cup of drinking chocolate

A few notes on the ingredients: it calls for whole milk, but frankly, I think you can use skim (if you so desire) and not lose much of the velvety richness. We used skim this morning, and I had no complaints. Don't feel that you need to spring for bottled water, either--good tap water will be perfectly sufficient. As for the chocolate, if you're going to run the hot chocolate through a blender or use an immersion blender on it, I don't think it's worth the trouble to shave the chocolate with a serrated knife. Chop it up finely, and it won't have any trouble being adequately melted and blended. If you plan to hand-whisk it, though, I might suggest making sure the chocolate is chopped very finely.

A final note: if you haven't yet read Jeffrey Steingarten's side-splittingly funny It Must Have Been Something I Ate, I wholeheartedly recommend that you pick up a copy. It's written in self-contained vignettes, good for the busy reader or foodie, and is guaranteed to put a smile on your face.


Chocolat Chaud

From: It Must Have Been Something I Ate (Jeffrey Steingarten); adapted from Pierre Hermé
Yield: Four 6-ounce cups of hot chocolate.

Ingredients

  1. 2-1/4 cups whole milk
  2. 1/4 cup bottled still water
  3. 1/4 cup (generous) superfine granulated sugar
  4. 1 100-gm bar (3-1/2 ounces) dark bittersweet chocolate, Scharffen Berger, Valrhona, or Lindt (see note, below), finely sliced with a serrated bread knife
  5. 1/4 cup (1 ounce or 28 gm) cocoa powder, loosely packed, preferably Valrhona

Directions

  1. In a 2-quart saucepan, stir together the milk, water, and sugar. Bring to a boil over medium heat.
  2. Add the chopped chocolate and the cocoa and bring to a boil again, whisking until the chocolate and cocoa are dissolved and the mixture has thickened. Reduce the heat to very low.
  3. Blend for 5 minutes with an immersion mixer or whirl the hot chocolate in a standard blender for half a minute, until thick and foamy.

Notes

  1. Steingarten recommends using a dark chocolate containing close to 70 percent cocoa, though Lindt bittersweet also works just fine.
  2. The Mayans and the Aztecs considered the froth the best part. Today, five minutes with an immersion mixer or a blender accomplishes what a half hour of beating did long ago.

There's more...

Tuesday, March 25, 2008

Easter Cupcakes (and Silicone Baking Cups)

I've been waiting to post on these cupcakes until I got the pictures off the camera... but it looks like that's not going to happen. Lately connecting the camera to my laptop has been resulting in, at best, a hung program, and at worst, an evil-sounding noise and what looks like the Mac equivalent of the dreaded Blue Screen of Death. So, no pictures. Which is a shame, because some of the cupcakes were really quite cute.


We dyed the icing pink, green, purple, and yellow, and spread/piped it in various Easter-themed ways. There were flowers, there were dots, there were stripes, there was even a bunny (or rather a bunny's ears and the top of his head from the eyes up). We put them on platters and took them out to be photographed in the sunshine and on the grass. But the photos, evidently, were not to be.

Anyway, we worked with the Magnolia Bakery cupcake recipe, which I've previously blogged here. This time around they weren't as good as I remembered them being. They tasted great, but I remembered them being softer and lighter than these were. What could have gone wrong? For one thing, I might have overbeaten the batter. For another, there might have been too much protein in the flour in the first place. Next time I'll probably use cake flour instead of all-purpose, and I'll probably substitute buttermilk for the milk. Meanwhile, it's still a darn good cupcake recipe. 

At some point, hopefully in the near future, I'm going to try out (and will blog about) a Cook's Illustrated recipe that claims to reproduce the moist, light, tender crumb that one gets from a boxed cake mix--but from scratch, and without all the awful other stuff they put in those mixes. Specifically, it's a yellow cake with chocolate frosting. I'm eager to make it, but I'll have to wait at least a few weeks. 

At one point in comments Bee asked about silicone baking cups. I neglected to answer in my reply comment, so I'll address the question here. I quite like them: they're more cleanup-friendly than big one-dozen muffin trays, and they make it wonderfully easy to make only a few muffins (or cupcakes) at a time. This is especially useful when there's only one muffin eater in the house, and making a whole batch of a dozen muffins is just not wise. 

I've also found a few other uses for them since then. For one, they make a great mold for homemade peanut butter cups: just dip the bottom of the cup in melted chocolate and set on a parchment-lined baking sheet. When the chocolate cools and hardens, just slide the cup out and you have a little chocolate shell ready for filling! 

Another chocolate-related use: in the past, I would often throw away extra melted chocolate that I had left over from some baking project or another, as there wasn't really a good way to get it all together and save it. I felt terrible about that, because it's good chocolate and could be used for something else (not to mention the sting of throwing away expensive chocolate when one's on a tight budget). These days I spoon it into one of the silicone cups, let harden, and then pop out and put in a plastic bag for storage. As they say in the Guinness commercials, brilliant!!

There's more...

Tuesday, February 26, 2008

Chocolate-toffee cookies

These cookies are amazing. They're like the world's best brownies, but in a handy cookie form. (Not that brownies aren't handy, but cookies are more so.) They are fudgy and decadent, with crunchy toffee bits and that delightful papery skin that the tops of brownies have. They call out to be topped with ice cream, or at the very least to be dunked in a very tall glass of milk. I brought two to work today, and struggled all day not to devour them at once.

Don't be alarmed by the high ratio of wet ingredients to dry, or the runny consistency of the "dough" ("batter" would be more appropriate, I think) after you've combined the wet and dry ingredients. This is basically a brownie batter that gets chilled so that it's marginally scoopable--and yes, after enough chilling, it is thick enough to be scooped out onto a baking sheet.

Another note: the instruction to use baking powder instead of baking soda (which is more commonly used in cookies) is not a typo. That's what the recipe says, and as far as I'm concerned it's just another aspect of the "brownies as cookies" theme. None of the other quantities is a typo, either: not the amount of flour (half a cup, no joke) or the number of eggs (I know four sounds like a lot, but it works) or the amount of chocolate (okay, I didn't quite use a whole pound--more like 14-15 ounces, since that's all I had--but it's worth it, seriously) or the sugar (question: can you have too much brown sugar? answer: no).

And a final word of caution: when the cookies have finished baking, resist the temptation to nibble as soon as they're cool enough to handle. I know I usually advocate eating things as soon as possible after removing them from the oven, but in this case good things (and less exasperation) come to those who wait. The bits of toffee will re-harden (it melts in the oven), and it will be easier to peel the parchment paper off of the underside of the cookies. If you don't wait, you risk leaving significant chunks of cookie goodness on the paper.

Okay. With all that out of the way, the recipe:

Chocolate-toffee cookies
Makes a whole heck of a lot

1/2 cup unbleached all-purpose flour
1 teaspoon baking powder
1/4 teaspoon salt
1 pound bittersweet chocolate, coarsely chopped
4 tablespoons unsalted butter
1 3/4 cups packed brown sugar
4 large eggs
1 tablespoon vanilla extract
1/2 pound (8 ounces) chocolate-covered toffee--with or without nuts, as desired--coarsely chopped

Sift together flour, baking powder, and salt and set aside. Place chocolate and butter in a heat-proof bowl set over (not touching) simmering water. Stir frequently until chocolate and butter are melted and smooth, then cool to lukewarm.

Using electric mixer (stand mixer or hand mixer, it doesn't matter), beat sugar and eggs in a large bowl until thick, about 5 minutes. Beat in cooled chocolate mixture and vanilla. Stir in flour mixture, then chopped toffee. Chill batter until relatively firm, at least 45 minutes.

Preheat oven to 350F and line a baking sheet with parchment paper. Drop batter onto sheets (I recommend using a squeeze-release ice cream scoop like this one for even portioning--they come in various sizes and are useful for all sorts of things), spacing 2-2.5" apart. Bake just until tops are dry and cracked but cookies are still soft to touch, about 12-15 minutes. Cool completely on sheets. (Can be made 2 days ahead; store in an airtight container at room temperature.)

There's more...

Wednesday, May 9, 2007

Double chocolate comfort cookies

It should surprise absolutely no one that I turn to food when I'm not exactly feeling upbeat. And what better food to comfort a sad heart (with the possible exception of a good pot of risotto) than chocolate? (Okay, maybe chocolate risotto...) With this principle in mind, I set out in search of a chewy chocolate chip cookie recipe that wouldn't let me down. I ended up combining elements of a few different ones, and making substitutions due to some lacking ingredients (for example, I had only one egg instead of two). So, here we go:


Double chocolate comfort cookies

2 1/4 cups unbleached all-purpose flour*
2 tablespoons vital wheat gluten flour*
1 teaspoon salt
1 teaspoon baking soda
1/4 cup unsweetened cocoa powder
2 sticks (1/2 pound) unsalted butter, melted very slowly over low heat
1 1/2 cups granulated sugar**
1/4 cup plus two tablespoons molasses**
1 egg
1/4 cup milk
2 teaspoons vanilla extract
2 cups semisweet/bittersweet chocolate chips and/or chopped chocolate (I just used what I had in my pantry, a combination of semisweet chocolate chips and a couple of different kinds of bulk bittersweet chocolate)

Preheat oven to 375F. Sift together the flour(s), salt, baking soda, and cocoa powder. Don't skip this step if your cocoa powder, like mine, is lumpy. Set dry ingredients aside.

Pour melted butter into a large bowl, add the sugar and molasses and beat until well creamed. I recommend using an electric mixer, either of the hand or stand variety. Add the egg, milk, and vanilla and mix well. With the mixer running, add the dry ingredients gradually, scraping down the bowl periodically. Stir in chocolate bits.

Now cover the dough and chill it for, oh, half an hour or so. The chilling will prevent the cookies from spreading when they hit the heat of the oven. If you don't care about spreadage, I suppose you don't need to bother with the chilling step.

Line a baking sheet with parchment paper and use either an ice cream scoop or a measuring cup to place as-uniform-as-possible mounds of dough on the sheet. Do give them a bit of room to spread out--the chilling will prevent some spreadage, but not all. Bake them for ~16 minutes (longer if your mounds of dough are enormous), until they start to look done around the edges. They don't need to be set in the middle. Check them halfway through, and rotate the baking sheet(s) if necessary to encourage even doneness.

Allow to cool as much as necessary to avoid burning yourself, and devour them--ideally with a big glass of milk.

* Alternatively, you can use 2 1/4 cups of bread flour in lieu of the all-purpose flour + gluten flour.
** The recipe called for brown sugar and I didn't have enough, so I substituted white sugar + molasses. If you'd rather use regular brown sugar, just use 1 1/2 cups.

UPDATE: Brave Sir Robin's comment reminded me that I ought to include the inspiration for my cookies, Alton Brown's chewy recipe from the "Three Chips for Sister Marsha" episode of Good Eats. YouTube has it in two parts:


There's more...

Wednesday, February 15, 2006

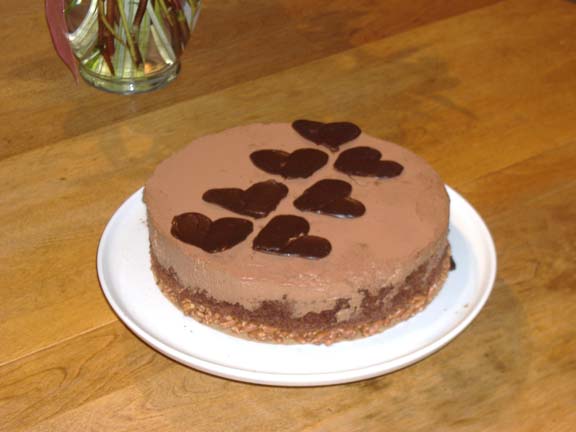
Milk Chocolate Mousse Cake with Hazelnut Crunch Crust

This cake was in Bon Appetit's December 2004 issue, and it's only now that I've gotten around to making it. The recipe is at Epicurious. I was sort of hoping to be able to post pictures with this recipe, since there are so many parts to it... but in the end, that's why I didn't take pictures as I was making it: it's a lot of stuff to juggle, and since I made it all in one evening (rather than spreading it out over a couple of days like the recipe advises), I opted to forego the pictures. Maybe the next time I have a visitor I'll draft him or her to be my photographer.

So, anyway, you just get a picture of the final product, which I'll put at the end of this post. In the meantime, I ought to make a few notes on changes I made to the recipe. The first is that, despite the fact that I *know* I'm a good baker, the recipe they give for the cake layer totally failed in my otherwise capable hands. Well, maybe not totally--but it failed in a very crucial way, and not in the way I expected it to fail. The recipe calls for clarifying the butter, which sort of threw me for a loop. I'd never clarified butter before, so even though they describe what to do, I ran, panicked, to my trusted copy of Julia Child's Mastering the Art of French Cooking and looked up clarified butter. Good explanation of what it is, why you do it, and how you do it, but as I suspected, she did not list "cake" as one of the ways you can use it. That's not to say, of course, that one cannot use clarified butter in a cake. I've just never seen a recipe that called for it, until now.

But that's beside the point. The cake I was instructed to make was a genoise which I've made before with okay success. It was a little gummy, but nobody seemed to know the difference. With this recipe, I didn't even get to the point of completing the batter and sticking it in the oven. You're supposed to beat the eggs with the sugar in a double boiler until they warm up to around 105F, which I did. You're then supposed to use an electric mixer to beat the eggs for several minutes until they cool and triple in volume. Now, I don't know about you, but when it comes to estimating change in volume, especially that of liquidy things that sort of just barely cover the base of a bowl, I'm useless. And unfortunately for me, the recipe gave no other indication of the proper level of beating, other than that a time estimate, and that the eggs should cool and triple in volume. Some guidelines on color, texture, etc. would have been much more helpful, at least to me, but I still feel that I ought to have been able to manage without them, as I have in the past. No such luck. I had been beating my eggs for a while longer than was called for, and they still looked pretty liquidy, but it looked like they might have tripled in volume. Maybe. I don't really know.

Anyway, so despite my reservations about the liquidy nature of my eggs, I moved on to the next stage of the recipe, adding the dry ingredients, and it was a mess. You know what I'm talking about, the kind of gummy, inhomogeneous mess that results when you add dry powder to a liquidy mixture. This is why when you make hot cocoa from a mix, you always put the mix in the mug and then add the hot water or milk--never the other way around. It's like that old chemistry saying: "do as you otter, add acid to water," only in this case nothing will blow up if you do it the wrong way around.

But chemistry mishaps aside, when I tried to fold the flour and cocoa powder into the egg mixture--and there's a big red flag right there: folding is used as an alternative to plain stirring, in order to maintain volume in one or both of the components to be combined, and if neither of your components is fluffy (witness the liquidy, decidedly non-fluffy eggs and the powdery flour and cocoa), something's wrong--what I got was gunk. The powder absorbed some of the liquid from the eggs, but not much, and turned into gunk. Gunk on the spatula, gunk on the sides of the bowls, you get the idea. So, I decided to scrap it and substitute another kind of chocolate cake.

In the end, it was for the best: genoise is a rather dry sort of cake, and the recipe as it's written calls for liqueur (Tuaca or Frangelico) to be brushed over the baked cake layer before the addition of the mousse, the idea being that the liqueur moistens it. Since I'm a grad student on a budget, I wasn't about to go out and buy a bottle of expensive liqueur, so the genoise all by itself would probably have ended up too dry, anyway. So, I didn't feel too bad about using a different kind of cake.

The recipe I chose to substitute is one from the February 2004 Gourmet (at Epicurious). It is my favorite chocolate cake recipe ever, and it has consistently given me light, soft, moist results--perfect, I thought, to go with the mousse. So I went and got the requisite buttermilk (what is it about buttermilk that makes cakes so wonderfully fluffy and soft?) and made a half batch, or one layer. It came out perfect, and I had a great time munching on the scraps that I got from cutting off the crusty sides and slightly uneven top. Mmmm... chocolate cake.

So, that was my adventure with the cake. The other change I decided to make was in the decoration of the assembled cake. The original recipe has you sift cocoa powder over the top of the cake, and then use a stencil to sift powdered sugar over it in the form of snowflakes or stars, or whatever. Since it's the day after Valentine's Day, I decided to do hearts--in chocolate, instead of powdered sugar. My adventures with that element of the cake can be found here.

And now, finally, the finished product:

There's more...

Heart problems (and solutions)

I didn't want to buy stencils. I really didn't. See, I'm making this cake--which I'll post later--and had an idea for decorating it: since today, potluck day, is the day after Valentine's Day, I thought I'd put heart shapes on it instead of the snowflakes that Bon Appetit's bakers used. And instead of doing them as powdered sugar standing out on a dusting of cocoa powder on top of the cake, I wanted to make thin little bittersweet chocolate hearts and arrange them on top of the cake (with or without a dusting of cocoa powder). I chose bittersweet chocolate so that when they cooled and hardened they would be fairly rigid.

The problem, aside from the fact that I don't have a chillable marble slab at my disposal, is that the only way I've ever seen something like this done is with a stencil that's about 0.5-1 mm thick: you lay the stencil down on your work surface, use a spatula to spread chocolate over it, carefully lift up the stencil, and voila! A nice, neat chocolate heart--or star, or gingerbread man, or whatever shape you're using. And I don't have any stencils, heart shaped or otherwise. Nor do I have heart-shaped cookie cutters.

So this afternoon when I got home from work I started looking around the house for materials I could use to make a stencil. Apparently I don't have any such materials. I have some bits of plastic, but they're too tough to cut with the level of accuracy that I want (jagged hearts are not what I'm going for). Parchment paper is easy to cut, but too flimsy to be of any practical use, as I found out when I tried to spread chocolate over it and ended up finding chocolate underneath the stencil as well as on top of it (smeared, unrecognizable hearts are not what I'm going for, either).

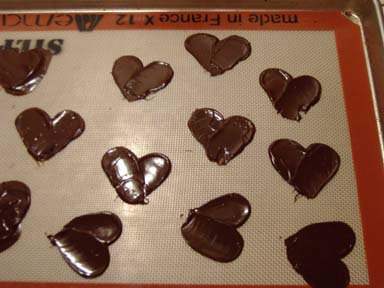
And then--and then!--I realized that my offset spatula, which I was using to spread the chocolate in the first place, has a rounded tip. Rounded in such a way that, given that the spatula itself is about 1" thick, the tip is the perfect shape to be the left half of the top of a heart (if that makes any sense). And so I experimented: I dipped the spatula into the chocolate and got a bit on the underside of the tip; then I touched it just gently to the silpat that I had waiting on a cookie sheet (the better to refrigerate, if necessary), and brought it back such that there was a streak with a rounded tip. It's tough to explain, but maybe a picture would help:


The ones at the bottom are quite a bit neater--obviously they were the last ones I did.

Anyway, that was my stroke of brilliance--nothing that hasn't been invented before, I'm sure, but I'm pleased so far with the results: the free-form hearts are nicer looking (if less perfect) than ones made from a boring old stencil, as they're flowy and have some texture to them. The form isn't perfect, and it's a little difficult to get a nice point at the bottom, but they should do the job nicely. Now, if only I can get them off the silpat without breaking them... stay tuned!

There's more...

Tuesday, May 17, 2005

Cappuccino-Fudge Cheesecake

This recipe is awesome. It is decadent in so many ways, it's probably a sin even to think about it. We've got a chocolate wafer crust. We've got nutmeg. We've got chocolate ganache. We've got espresso. We've got a pound of cream cheese and more than two pounds of chocolate. Oh, and we've got Kahlua and rum. Like I said, it's decadent. This is my semi-secret weapon ("semi-" because obviously it's not a secret if you tell people) and if you bring it to a party, it wows like almost nothing else.

I would simply link to the recipe on Epicuriuos, but it seems that they no longer have it in their online database. For those who are concerned about this sort of thing, it's from the February 2002 issue of Bon Appetit. And without further ado, the recipe:

Cappuccino-Fudge Cheesecake

Be sure to make this dessert at least one day ahead to allow the flavors to blend.
Serves 12

Crust:

1 9-ounce box of chocolate wafer cookies
6 ounces bittersweet (not unsweetened) or semisweet chocolate, coarsely chopped
1/2 cup (packed) dark brown sugar
1/8 teaspoon ground nutmeg
7 tablespoons hot melted unsalted butter

Finely grind cookies, chopped chocolate, brown sugar, and nutmeg in processor. Add butter and proces until crumbs begin to stick together, scraping down bowl occasionally, about 1 minute. Transfer crumbs to 10-inch-diameter springform pan with 3-inch-high sides. Wrap plastic wrap around fingers and press crumb mixture firmly up sides to within 1/2 inch of top edge, then over bottom of pan.

Ganache:

1.5 cups whipping cream
20 ounces bittersweet (not unsweetened) or semisweet chocolate, chopped
1/4 cup Kahlua or other coffee-flavored liqueur

Bring whipping cream to simmer in large saucepan. Remove from heat; add chocolate and Kahlua. Whisk until chocolate is melted and ganache is smooth. Pour 2 cups ganache over bottom of crust. Freeze until ganache layer is firm, about 30 minutes. Reserve remaining ganache; cover and let stand at room temperature to use later for creating lattice pattern.

Filling:

2 8-ounce packages cream cheese, room temperature
1 1/3 cups sugar
2 tablespoons all-purpose flour
2 tablespoons dark rum
2 tablespoons instant espresso powder or coffee crystals
2 tablespoons ground whole espresso coffee beans (medium-coarse grind)
1 tablespoon vanilla extract
2 teaspoons mild-flavored (light) molasses
4 large eggs

Position rack in middle of oven and preheat to 350 degrees F. Using electric mixer, beat cream cheese and sugar in large bowl until blended. Beat in flour. Stir rum, espresso powder, ground coffee, vanilla, and molasses in small bowl until intant coffee dissolves; beat into cream cheese mixture. Beat in eggs 1 at a time, occasionally scraping down sides of bowl.

Pour filling over cold ganache in crust. Place cheesecake on rimmed baking sheet. Bake until top is brown, puffed and cracked at edges, and center 2 inches moves only slightly when pan is gently shaken, about 1 hour 5 minutes. Transfer cheesecake to rack. Cool 15 minutes while preparing topping (top of cheesecake will fall slightly). Maintain oven temperature.

Topping:

1 1/2 cups sour cream
1/3 cup sugar
2 teaspoons vanilla extract

Espresso beans (optional)

Whisk sour cream, sugar, and vanilla in medium bowl to blend. Pour topping over hot cheesecake, spreading to cover filling completely. Bake until topping is set, about 10 minutes. Transfer cheesecake to rack. Refrigerate hot cheesecake on rack, until cool, about 3 hours.

Run a small, sharp knife between crust and pan sides to loosen cake; release pan sides. Transfer cheesecake to platter. Spoon reserved ganache into pastry bag fitted with small star tip. Pipe 6 diagonal lines atop cheesecake, spacing 1 inch apart. Repeat in opposite direction, making lattice. Pipe rosettes of ganache around top edge of cake. Garnish with coffee beans, if desired. Chill until lattice is firm, at least 6 hours. (Can be made 4 days ahead. Wrap loosely in foil, forming dome over lattice; keep chilled.)

There's more...