


Oh dear. It's been a while, hasn't it? What with a crashed laptop hard drive, the end of daylight savings time (which has relegated any and all picture-taking to the weekends, when I'm actually home for the daylight hours), and my spending half of those weekends at work, I'm afraid my camera and blogging software haven't been getting as much love as I would like.
In the meantime, we've gone through not one, but two heat waves, with a spell of glorious (if brief) fall weather in between. Now, a good two weeks into November, we've finally--really, I mean it this time, no more surprise heat waves--shaken off the last of summer. This week, in fact, marks the first time since early spring that we've turned on the heat. Or, I should say, the Suitor turned on the heat. I rolled my eyes and tossed him a sweater.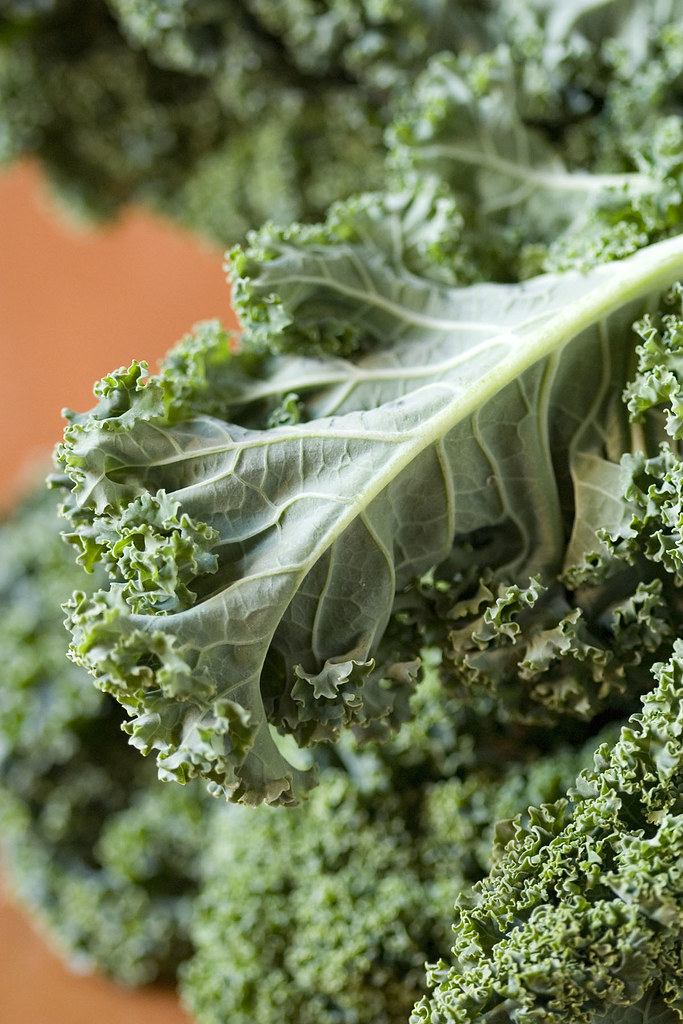
Which is a little odd, right? A California girl telling someone to buck up and deal with a bit of cool weather? Well, California born-and-bred I might be, but somewhere in the wind-chilled depths of my third or fourth Chicago winter, a long-dormant gene from my Danish ancestors switched on. After all the time I'd spent grumbling about the cold since my arrival, suddenly I loved the cold and everything about it--even that moment when you first step outside, and you cough because your lungs reject the air you've just breathed. I couldn't get enough of it.
Of course, eventually I graduated and moved away from those northern climes; but the damage was done, and ever since leaving Chicago I've missed "proper" winter something fierce. Now, between my convert's zealousness for cold and my penchant for fresh air, I want nothing to do with forced air heating until my fingers are stiff and numb. The Suitor has no such hesitation in turning on the heat, so we're off to a (good-humored) war with the thermostat. He prefers to make himself comfortable in a t-shirt, shorts, and liberal use of the house's heating system. I prefer to get cozy with long underwear, down booties, fleece blankets, and continual application of tea and warm, comforting foods.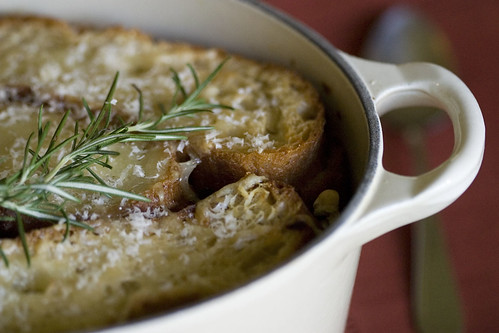
It's this sort of food that I've been craving recently: this food that comes steaming out of the oven or off the stove and onto your plate, then sticks to your ribs and warms your belly. In the last week or so, I've discovered (and tweaked) a recipe that it takes one of my favorite winter meals (a bean soup with greens) and one of my favorite things to do with it (ladling said soup over a slice of crisp bread), and bakes it all together in one big pot--including the bread.
The bread gets layered with a quick braise of greens, beans, and bacon (if you're into that sort of thing) and some cheese, over and over until you run out of your ingredients. Topped with a layer of bread and more cheese, doused in broth, and baked for a little while, it's an intriguing and most satisfying meal in a bowl. You can call it a panade, a bread soup, bready mush with greens, or whatever you like; but if you've been in the mood for the sort of hearty meal that one saves for cold evenings in front of the fire, I've got the dish for you.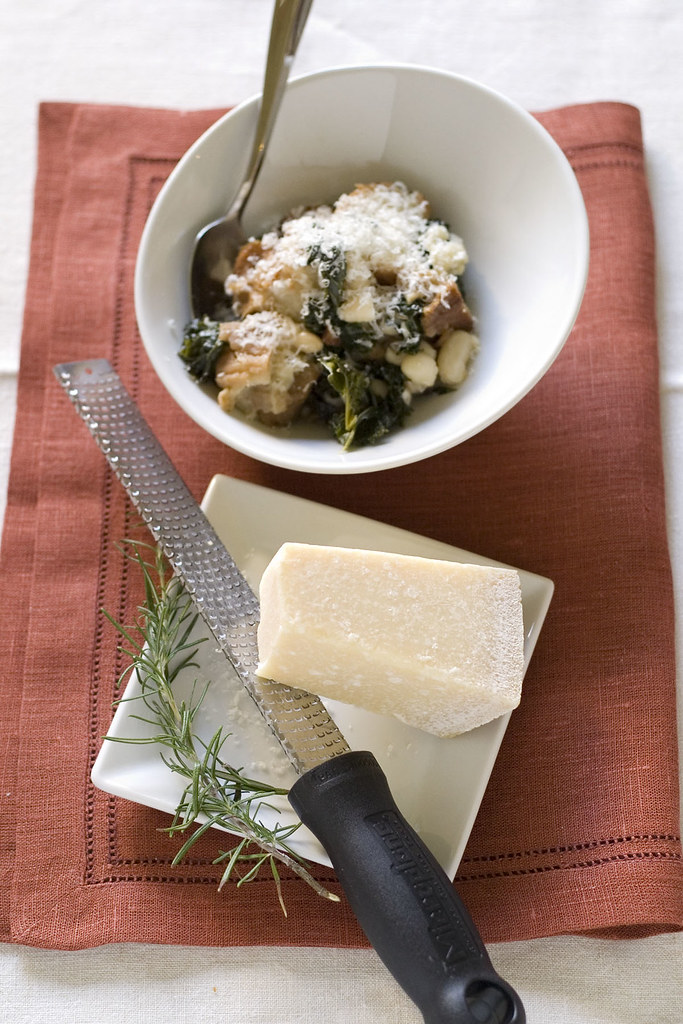
Panade with Kale and Cannellini Beans
Ingredients
Directions
Notes

Subscribe to Beyond Ramen

 Posts
All Comments
It's not nice to steal. Please don't republish what you find here unless you have my express permission.
In other words: unless otherwise noted, images and text © Anne Sandman 2005-2010. All rights reserved.

This won't come as a shock to many of you, but if there's a Hell, and if I wind up going there (in a handbasket or otherwise), it will almost certainly be for gluttony. Anyone who cooks and eats as much as I do is bound at least to be a candidate, if not a shoo-in, for the third circle. Accordingly, when I found myself with leftover pastry cream this weekend, there was only one thing to do about it: make some choux paste, and bake up some eclairs and cream puffs.
I get the sense that choux paste, or pâte à choux, has gotten a bit of an undeserved reputation for difficulty. I once brought chocolate eclairs to a potluck, and from people's reactions, you would have thought that I had made the sort of thing you see on the World Pastry Championships. All I'd made was a bit of choux paste, some pastry cream for filling! Seriously folks, eclairs and cream puffs might look fancy and sound like they'd be all kinds of tricky and temperamental, but they aren't. They just aren't. You boil together some water and butter, you dump in some flour and beat it like crazy, add some eggs, and beat some more until you start to see a film on the bottom of the pan. It's that simple. 
Choux paste is not only one of the easiest items in a baker's repertoire, it's also one of the fastest. You can go from raw ingredients to baked cream puffs in under half an hour, plus a little more time for the oven to heat up. It's perfect for when you find yourself with unexpected guests, because it bakes up quickly and can be filled with all manner of things. You get the idea. There is no reason for this not to be in your cooking arsenal.
The recipe I've written up here (below the fold) is the master recipe from Julia Child's Mastering the Art of French Cooking. It's served me well for as long as I've had that book, which is going on several years now. This is the sweet version, suitable for filling with things like ice cream, whipped cream, pastry cream, or--in my case--a combination of whipped cream and pastry cream. Fresh berries would not be out of place, and indeed I couldn't resist placing fresh raspberries on top of the cream in some of mine. If you are so inclined, the paste would also be excellent fried up and rolled in sugar (or cinnamon sugar). And if on the other hand an hors d'oeuvre is what you have in mind, I have included instructions at the end of the recipe for a savory pâte à choux. So have at it!
Pâte à Choux
Ingredients
Directions
Notes

Q: What makes leftover Bisquick pancake batter palatable?
A: Bananas.
Q: What makes Bisquick-banana pancakes taste rather good, actually?
A: Creme anglaise.
Back when I was growing up, with six in the family, we almost never had leftover bread. Now that I'm cooking for one, I often find myself struggling to use up a loaf of good crusty bread before it goes stale. I love homemade croutons, but I don't eat a lot of salads, so it seems like a the hassle outweighs the use I'd get out of them. (Of course, now that the weather is turning chillier, and soups are once again making regular appearances on my menu, having a supply of good, garlicky croutons on hand seems like a good idea.) Breakfast bread pudding is an option, but I rarely have time to bake and enjoy it in the morning, even on weekends.
My recent browsing of the New York Times series called "Recipes for Health" led me to this recipe for a bread pudding that is savory rather than sweet. The assembly is relatively quick and easy, and the 40-50 minute baking time leaves you plenty of time for other things--like a side dish. I recommend braised greens with some sort of legume, like cannellini beans or chickpeas. It's a rustic, versatile dish that seems like it would lend itself well to variations. Don't be shy with the herbs and cheese--they contribute to the strata's most excellent woodsy, robust flavor.
Savory Bread Pudding With Tomatoes and Herbs
Ingredients
- 1/2 pound stale bread, sliced about 1/2 inch thick (see note below)
- 1 large garlic clove, cut in half, green shoots removed
- 2 ounces Gruyère cheese, grated (1/2 cup)
- 1 ounce Parmesan cheese, grated (1/4 cup)
- 1 pound firm, ripe tomatoes, sliced
- Salt and freshly ground pepper
- 2 teaspoons fresh thyme leaves
- 2 teaspoons chopped fresh rosemary
- 4 large eggs
- 1/2 teaspoon salt
- 2 cups low-fat milk
Directions
- Preheat the oven to 350 degrees. Oil or butter a two-quart baking dish or gratin. If the bread is soft, toast it lightly and rub all the slices, front and back, with the cut clove of garlic. (If it’s hard and stale, just rub with garlic.) Mince what garlic remains. Combine the two cheeses in a small bowl.
- Layer half of the bread slices in the baking dish. Top with half of the tomato slices. Sprinkle the tomato slices with salt and pepper, then with half the thyme and rosemary and half the remaining garlic. Top with half the cheese. Repeat the layers.
- Beat together the eggs and milk. Add 1/2 teaspoon salt and a few twists of the pepper mill, then pour over the bread and tomato layers. Place in the oven, and bake 40 to 50 minutes until puffed and browned. Remove from the oven, and serve hot or warm.
Notes
- This can be assembled through step 2 a few hours before beating together the eggs and milk and completing the casserole.
- Variation: Add 1 pound Swiss chard or beet greens, prepared as they are for Sautéed Beet Greens With Garlic and Olive Oil. Layer the cooked greens over the bread with the tomatoes.
- If your bread is too hard to slice, dip it in the milk for about half a minute, then cut it.
I cook primarily for myself, and by that I mean that out of everything I cook, only a tiny percentage is ever even tasted by anyone other than myself. When it comes to food, I'm essentially a one-person household, despite the fact that I live in a two-person household. Anyway, I cook for one, but as most recipes are built for more than one, I end up with leftovers. This is overwhelmingly the case with soups and stews, and so I end up with a freezer full of chicken and rice soup, Tuscan white bean soup, black bean chili, chili con carne, and so on. I usually forget about all that I have tucked away in the freezer--out of sight, out of mind--but this weekend I'm patting myself on the back for having squirreled away so much food. When one knows that one will be at work late into the evening--when one can't cook a meal but doesn't want to spend the money on take-out--it's nice to be able to reach into the freezer on one's way out the door and grab a container, so that one might have a wholesome, delicious, home-cooked meal even when cooking is out of the question.
The other night I cooked artichokes for dinner, and had a whole one left over. I love artichokes, but after having them with dinner two nights in a row (once at a friend's house and once at home), I was feeling a little ho-hum about a third night of plain steamed artichokes. Knowing that I had some crusty bread at home, as well as some lemons, parsley, and garlic, I got some green olives at the grocery store on my way home. The idea: tapenade. No recipe, just throw a bunch of things in the food processor (in this case, my little mini-prep) and adjust the seasonings to taste. It was delicious, especially spread over some toasted bread that had been rubbed with a cut garlic clove. Here are some rough quantities that kind of, sort of amount to a recipe. If you're serving more than one person, I might suggest that you double (or, depending on the number of people, triple) the recipe.
Artichoke and Olive Tapenade
Makes about 2/3 cup
1/2 cup chopped cooked artichoke heart* (make sure to remove the tough outer fibers of the artichoke stem)
1/3 cup chopped green olive
1/2 teaspoon lemon zest
1 tablespoon lemon juice (or more to taste)
extra-virgin olive oil
1/2 teaspoon chopped Italian parsley
salt and pepper to taste
Put the first four ingredients in a food processor and whiz away until the artichoke and olive are finely chopped, if not a paste. Add the oil gradually until the tapenade is the desired consistency (I think I used about 2 tablespoons of oil), and add salt and pepper to taste. Transfer to bowl to serve.
* I've used fresh artichokes here, as that's what I had on hand, and honestly that's what I prefer. You could also make this with canned ones if fresh 'chokes are either out of season or just plain unavailable where you live.
Adapted from the Cook's Illustrated Best New Recipe cookbook. That recipe called for noodles, but I prefer wild rice in my homemade chicken soup. I had recently fallen out of the habit of making soup with my roasted chicken carcasses, since the stock recipe that I was using, while an excellent stock, was a bit of an undertaking. This one uses vegetables and herbs that I almost always have sitting in my fridge and, despite being very simple, comes out just as robust as the more elaborate stock recipe I used to use. Consider this a starter recipe: you could add mushrooms or whatever other vegetables you like (a friend of mine had great success with adding minced red and orange bell pepper). I've made this soup as written twice now, and gotten excellent results both times. I like to make a full batch and stick some in the freezer for when I'm sick or in a time crunch and need some comfort food.
Chicken and Wild Rice Soup
Makes about 3 1/2 quarts
For the stock:
1 whole chicken carcass (from a roasted chicken), plus saved drippings from the roasting pan (fat skimmed and discarded)
1-2 T. olive oil
1 onion, chopped
2-3 carrots, chopped
3 ribs celery, chopped
fresh parsley
fresh thyme
fresh sage
2 t. salt
water
Heat the oil in a large stock pot or Dutch oven. Add the onion, carrots, and celery and saute for 5-10 minutes, until tender. Add herbs (no need to chop them) and continue to cook for a few minutes. Add 2 1/2 quarts water, the salt, and the chicken carcass (plus drippings). Cover and bring to a boil, then reduce heat and simmer for 60-90 minutes, or until you're satisfied with how it tastes. Cool and strain the broth, discarding the solids.
For the soup:
2 T olive oil
1 medium onion, diced
3 carrots, diced
3 ribs celery, diced
Chicken stock (above)
at least 2 cups cubed or shredded cooked chicken (I usually use the leg meat from the roasted chicken, plus the meat of two legs that I roast while I make the stock)
1 cup wild rice, cooked until almost tender
additional salt and pepper as desired
Heat oil in large soup pot. Add vegetables and saute until softened, 5-10 minutes. Add the stock and chicken and simmer 10-15 minutes, then add the rice and cook until the rice is tender and the soup is seasoned to your liking. Serve with grated Parmesan cheese for sprinkling and good bread for mopping up.
This is loosely based on a recipe for Lemon-Raspberry French Toast Strata that appeared in Bon Appetit in March 2007, as well as a couple of other recipes that turned up in some googling. I had some good, crusty bread that was going stale and needed to be used up, so I thought first of French toast (which I love). But since I was going to be making an omelet for someone at the same time, I wanted to do something that could be made ahead and stuck in the oven at the appropriate time. Hence the French toast strata recipe. Raspberries being out of season, and apples being very much in season, I thought I'd tweak things a bit. Or a lot. One of the best things about this recipe is that you put it together the night before you want to eat it, and in the morning, all you have to do is stick it in a preheated oven. If you prepare it the same morning you bake it, it should still be fine, but do let it rest as long as possible before baking--you want to allow the bread to soak up the egg-milk mixture.
A note about the ratio of liquid to bread. Because this recipe is something of a mishmash of a few recipes, and because the dish I used was a different size from what was used in the other recipes, I estimated when figuring out how much milk, egg, and bread to use. The ratio I used (I did, in fact measure the quantities I actually used) makes for a slightly dry, crunchy top. I like the contrast between the crunchy top and the custardy interior, but if you prefer it more uniform, you could add an extra egg yolk and/or some more milk.
Baked Apple French Toast
Serves 3-4
1 medium-sized apple, peeled, cored, and cut into 1" pieces (about 3/4 cup)
1 T butter, plus more to spread in baking dish
1 cinnamon stick, broken into two pieces.
6-8 whole cloves
4-6 whole allspice
2-3 T raisins, as desired
4 cups slightly stale bread, cut into 1" cubes
2 whole eggs
1 egg yolk
1 cup milk (I used skim)
1/4 tsp. salt
3 T maple syrup, or enough to coat the bottom of the dish, plus extra for serving.
Heat butter in a small skillet over medium-high heat and when foam subsides, add the cinnamon stick pieces, the cloves, and the allspice. Cook them until they become very fragrant, about 30-60 seconds, and add the apple pieces. Mix and/or toss to coat them with the butter. After a minute or so over medium-high heat, turn the heat down to low and cook until they are very tender. The amount of time this takes will depend on the variety of apple you used, so pay attention to them. When they're done,turn off the heat, remove the spices, and stir in the raisins. Combine in a large bowl with the bread cubes, and set aside.
Combine milk, eggs, egg yolk, and salt in a small bowl, and whisk to blend. Pour it all over the bread cubes and apple mixture, stirring or tossing to moisten the bread evenly. Butter a one-quart baking dish, and pour in the maple syrup, tilting the dish so that the syrup coats the bottom. Dump the bread mixture into the dish, pressing on it lightly. Cover with plastic wrap and refrigerate overnight to allow the bread to soak up the milk-egg mixture.
When you're ready to bake, preheat the oven to 350. Bake the pudding until golden brown and slightly puffed, 45 minutes. Let cool for 5 minutes, and serve with extra maple syrup on the side.