

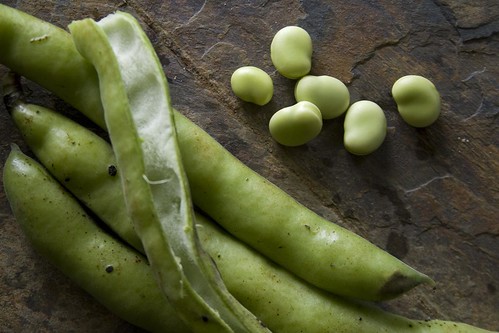
I will probably lose some foodie cred for this, but up until quite recently, I had never cooked with fava beans. I'm not sure that I had even tasted them. Part of what put me off, and I think I'm not alone in this, is the work involved: first the shelling, then the blanching, then the peeling. Or the peeling sans blanching, which I'm told is more difficult. As there are plenty of other delicious green veggies in the garden, especially in springtime, I've cruised along year after year without giving fava beans much thought.
This year was different: I got fava pods in my CSA box, which made them impossible to ignore. Fortunately for us fava bean novices, they started us off gently with baby fava pods. Fun fava fact: the young ones, no thicker than your finger, can be eaten pods and all just like string beans. They're surprisingly good cut into pieces and sauteed in some butter with a bit of salt and pepper, with a deeper, richer flavor than that of string beans. And so my introduction to fava beans was an easy one.
But young things grow up, even fava beans, and before long the pods had gotten too big to be eaten. It was time to shell and peel. Thanks to a nudge from Smitten Kitchen, peeled favas and I got off to a good start with this recipe from Bon Appetit. It was good, and definitely something I'll make again, but the favas' flavor didn't exactly play a starring role. I wanted to make something that really centered on the beans themselves and showcased their brilliant color, which I think is perfect for springtime.
I didn't expect to find that recipe in a parenting magazine, but there it was on Epicurious, exactly what I was looking for: something quick and easy for a weeknight (as quick and easy as favas ever are), and something in which the beans are front and center. But, a parenting magazine? Really? Not that good recipes can't come from parenting magazines, but fava beans? There are plenty of fresh vegetables that I can imagine preparing for a toddler. Fava beans are not among them. I have this mental image of a harried parent working furiously to peel the beans while a tired, hungry, and therefore cranky child does tired, hungry, and cranky child things.
If I ever have kids, and if they ever read this: kids, if I never make fava bean mash for you, it's not because I don't love you. It's because I love you enough to want you to have a sane mother.
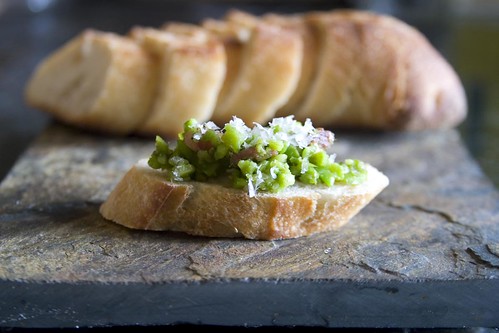
And yes, you read that correctly, this is a recipe for fava bean mash. Wrinkling your nose? I suppose I don't blame you, but I'm actually a big fan of mashed or pureed beans. Refried beans, pureed black bean soup, garlicky white bean puree on toast, and so on. This recipe is in the same vein. And as with many other bean dishes, this one starts out with some bits of cured pork (pancetta, in this case) for flavor. 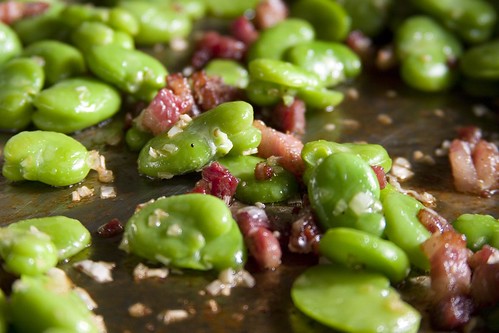
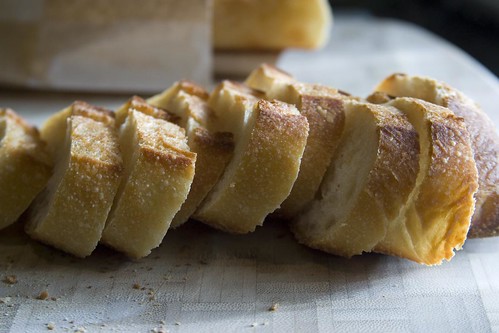
Some good, crusty bread--toasted, brushed with oil, and rubbed with fresh garlic--provides a nice vehicle and a bit of crunch to offset the mushiness. I think it's a great recipe if you need a relatively easy hors d'oeuvre for a get-together; but if you're in a simple mood, as I was this evening, it's also a fine, satisfying meal by itself. And I like the idea of appropriating a recipe intended for kids as a pleasant, even comforting meal for adults. Get some water boiling and have a colander at the ready, and follow me below for the recipe.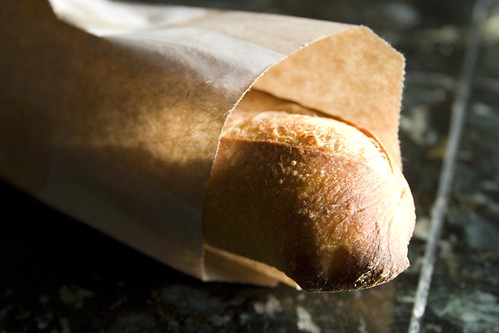
Fava Beans and Pancetta
Ingredients
Directions

Subscribe to Beyond Ramen

 Posts
All Comments
Posts
All Comments
It's not nice to steal. Please don't republish what you find here unless you have my express permission.
In other words: unless otherwise noted, images and text © Anne Sandman 2005-2010. All rights reserved.
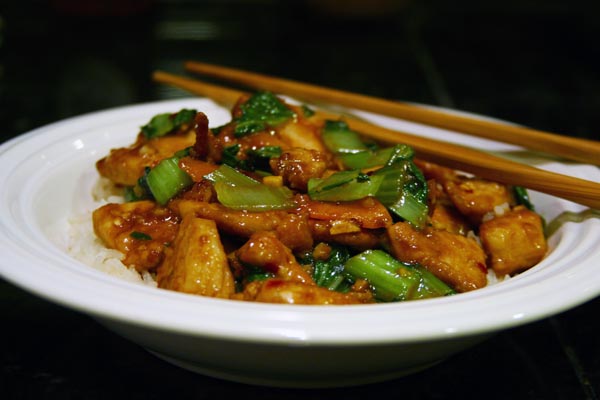
In the last several months I've moved away from stir-fries containing meat. Most of the shift was due to a conscious effort to eat less meat (for environmental, ethical, and economical reasons), but in truth it was also because meaty stir-fries inevitably leave my nice, clean stovetop with a film of splattered oil. I don't have a nice, deep wok to help contain the spitting-hot oil, and even though I use a splatter screen, I always have quite a clean-up job on my hands. There are a lot of kitchen chores that I don't mind much at all, even some that I actually enjoy doing. Cleaning the stove is not one of them.
But sometimes it's worth it. Like this time. Any dish that prompts your usually taciturn dining companion to announce unprompted, "I could eat this all day" is worth at least one stove cleaning, and possibly two. The same goes for any dish that gets the Suitor to eat leafy greens, so this one's a winner on two counts.

The greens in this dish (and in the picture above) are baby tatsoi, fresh from today's CSA box and probably fresh from the field just this morning. They're so small and delicate that I felt a little guilty chopping them up and putting them in something as brash as a stir-fry, but I can't say I'm sorry that I did. This dish would also work with other greens, such as bok choy or "baby bok choy" (which my CSA folks tell me is actually tatsoi, but that's neither here nor there), though I recommend that you adjust the cooking times/schedule to suit the size and thickness of your greens and their stalks.
Full recipe below the fold.
As with all dishes that move quickly once you get going, mise en place is a must if you want your food unburned, your smoke alarm untriggered, and your sanity intact. If you're serving this with rice, and I recommend that you do, I suggest that you give the rice a head start. That way it's all ready to go by the time you heat up the skillet. Don't be intimidated by the length of the ingredient list--it doesn't take that long to measure them out. In any case, if you don't want to be precise about things, a little more or less here and there won't hurt anything.
Spicy Stir-Fried Chicken with Tatsoi and Ginger
Ingredients
- 1/4 cup plus 2 tablespoons soy sauce
- 1/2 cup sake or dry sherry, divided
- 1/2 cup water
- 1/4 cup chicken broth
- 2 tablespoons oyster sauce
- 2 tablespoons plus 1 teaspoon toasted sesame oil
- 1 tablespoon plus 1 teaspoon cornstarch
- 1 teaspoon granulated sugar
- 1-2 teaspoons red pepper flakes, or to taste
- 1/4 minced fresh ginger, divided
- 2 medium cloves garlic, minced
- peanut or vegetable oil
- 1 pound tatsoi or similar greens (e.g. bok choy), stalks cut into 1/4-inch slices and greens cut into 1/2-inch strips
- 1 medium carrot or 2 small carrots, peeled and cut into thin slices on the bias
- 1 pound boneless, skinless chicken breasts, trimmed and cut into pieces 1 inch square and 1/4 inch thick
Directions
- Combine 1/4 cup soy sauce, 1/4 cup sake, and water in medium bowl. Add chicken and stir to combine. Cover and let sit for at least 20 minutes.
- In another medium bowl, combine flour, 1 tablespoon cornstarch, and 2 tablespoons sesame oil; whisk until smooth. Drain chicken well and toss with cornstarch mixture until evenly coated.
- In a small bowl, combine broth, remaining 1/4 cup sake, remaining 2 tablespoons soy sauce, oyster sauce, remaining teaspoon sesame oil, remaining teaspoon cornstarch, sugar, red pepper flakes, and half of minced ginger. Whisk to combine; set aside.
- Combine garlic, remaining ginger, and 2 teaspoons peanut oil in small bowl; set aside.
- Heat 2 tablespoons peanut oil in large skillet over high heat until just smoking. Add half of chicken to skillet in one layer, spacing evenly and being careful not to crowd the pan. Cook, without stirring, until golden brown, about 1 minute. Turn and cook until golden on second side, 30 seconds to 1 minute longer. Using slotted spoon, remove chicken and place in a clean bowl. Repeat with another tablespoon of oil and remaining chicken.
- Add 1 tablespoon oil to skillet (which should now be empty) and heat until just smoking. Add carrot slices and stir-fry until beginning to soften, 1-2 minutes. Add tatsoi stalks and stir-fry until beginning to brown.
- Create a clearing in center of skillet and add ginger-garlic-oil mixture. Cook, stirring, until very fragrant, 30 seconds. Stir to combine with carrot and stalks, then add tatsoi greens and stir until beginning to wilt, 30 seconds to 1 minute.
- Return chicken to skillet. Whisk sauce to recombine, and add sauce to skillet, adding a few tablespoons of water if sauce reduces too quickly. Cook, stirring, until chicken is heated through and sauce is thickened, about 30 seconds. Serve immediately.
* Subscription required
Okay, so I didn't actually get to my Thanksgiving menu this evening. I was in desperate need of a workout, dinner took longer than I expected it to take, and I wanted some quality time with the Suitor. Tomorrow it's leftovers for dinner, so I should have more time for Turkey Day menu planning.
I received a celery root in last week's box, and thanks to the magic of Epicurious, I didn't have much trouble finding a way to use it. This recipe, as is the case with many of the recipes I'm making lately, is particularly good for a chilly Fall meal. I don't have curry powder in my spice cupboard, so I made do with a mixture of ground cumin, ground coriander, ground ginger, and pepper--and maybe some turmeric, I can't really remember. Either way, it was delicious.
The lentils I used were the ones I had in the pantry: small French green ones (de Puy). I'm sure that brown ones would work just fine. I didn't use the butter in the celery root puree or the lentils (I didn't feel that they needed it), but on a whim, I did add it to the pan sauce. I'm not sure that it really added a whole lot, but it certainly didn't hurt. A final note: perhaps it was just my particular celery root, but I found that a) I needed to cook it longer, and b) when I put it through the food processor, I needed to add more of the milk than the recipe directed me to add.
Spiced Pork with Celery Root Purée and Lentils
Ingredients
- 2 pounds celery root (celeriac), peeled, cut into 2-inch cubes
- 5 cups whole milk
- 2 tablespoons (1/4 stick) butter
- 1 teaspoon fresh lemon juice
- Ground white pepper
- 3 bacon slices, chopped
- 1/4 cup 1/8-inch cubes peeled carrots
- 1/4 cup chopped shallots
- 1/4 teaspoon minced fresh rosemary
- 1 1/2 cups dried lentils
- 3 cups water
- 1 teaspoon butter
- 1/2 cup honey
- 6 tablespoons red wine vinegar
- 1 tablespoon curry powder
- 1 1/2 teaspoons cayenne pepper
- 2 1/2 pounds pork tenderloins
- 1 tablespoon olive oil
- 3/4 cup low-salt chicken broth
- 1 tablespoon cold butter
Directions
- Bring celery root and milk to boil in heavy large saucepan over high heat. Reduce heat and simmer uncovered until celery root is very tender, about 20 minutes.
- Using slotted spoon, transfer celery root to processor.
- Add 1/2 cup hot milk. Puree until very smooth.
- Blend in butter and lemon juice. Season with salt and white pepper.
- Sauté bacon in medium saucepan over medium-high heat until crisp, about 3 minutes.
- Add carrots, shallots, and rosemary; sauté until shallots begin to soften, about 1 minute.
- Add lentils and 3 cups water; bring to boil. Reduce heat and simmer uncovered until lentils are tender and liquid has nearly evaporated, about 35 minutes.
- Stir in butter. Season with salt and pepper.
- Preheat oven to 400°F. Whisk first 4 ingredients in bowl.
- Sprinkle pork with salt and pepper.
- Heat oil in large ovenproof skillet over medium heat. Add pork; sauté until brown on all sides, about 6 minutes total.
- Brush pork with honey mixture. Transfer skillet to oven; roast pork 10 minutes. Turn pork over and brush with honey mixture. Roast until thermometer inserted into center of pork registers 145°F, about 10 minutes longer. Transfer pork to work surface; tent with foil (temperature will increase 5 degrees).
- Preheat oven to 400°F. Whisk first 4 ingredients in bowl.
- Add broth and remaining honey mixture to same skillet. Boil over high heat until sauce is reduced to 3/4 cup, about 5 minutes. Strain sauce into small bowl. Return sauce to skillet. Whisk in butter. Season with salt and pepper.
- Rewarm celery root puree and lentils. Cut pork crosswise into 1/2-inch-thick slices. Place 1/2 cup celery root puree in center of each of 6 plates. Using back of spoon, make indentation in puree. Spoon 1/2 cup lentils into indentation on each plate. Arrange pork slices atop lentils and drizzle with sauce.
Notes
- Celery root puree can be made 1 day ahead. Cover and refrigerate.
- Lentils can be mde 1 day ahead. Cover and chill.
It's Friday afternoon, and although I'm at work, I am by no means in a frame of mind that is conducive to getting proper work done. Blogging is attractive at times like these: I get to feel like I've accomplished something (a small something), and it's far more enjoyable than debugging code that I've been trying to debug for the last several days.
It's late, so just a quick note on this recipe. If you don't care for lamb, I recommend that you use another type of sausage, as merguez (or at least the merguez that I had) has a rather strong taste... of lamb. I think that next time I might try it with a chicken and garlic sausage that they had at the wursthaus where I got the merguez. Other than that, it's a solid recipe for an ingredient (collard greens) that initially had me staring blankly at it. I bet pine nuts would do well in this dish, too. Original recipe here.
Delicious things, fajitas, and a dish I don't cook nearly often enough, given my love for Mexican and Tex-Mex food. For some reason I've long been reluctant to try my hand at them, but I'm not sure why. Perhaps I thought they were difficult to do well enough? As it turns out, they're not. In fact, they're so easy that they made their way into a "15 dishes in 15 minutes" special section in the June issue of Bon Appétit. I don't think I'll ever get it down to 15 minutes start-to-finish, but nevertheless, it's very quick. I've changed the recipe a bit, and my version is reflected below. The original recipe can be found here.
Steak fajitas
Serves 4
4 tablespoons lime juice (3 for now, 1 for later)
1 teaspoon lime zest
4 large garlic cloves, minced or pressed
2 tablespoons hot chili sauce (e.g. sriracha or harissa)
1 tablespoon ground cumin
1.5 pounds skirt steak, cut into pieces that will fit into your cookware of choice
1 large onion, halved lengthwise and thinly sliced
1-2 peppers (bell, poblano, or whatever else you fancy), seeded and sliced into 1/4" strips
salt and pepper
Combine first five ingredients (using 3 tablespoons of the lime juice) in a bowl. Trim steak and arrange in a 13x9" baking dish or place in a gallon-size sealable plastic bag. Pour marinade over steak, turn or toss to coat, and allow to marinate for at least 15 minutes--a few hours if you can.
Get your grill pan our outdoor grill heating (high heat). While you're waiting for it to heat up, add the onions and peppers to the steak and marinade, and mix to allow the onions and peppers to pick up some of the marinade as well. When the grill surface is hot, add the steaks and cook to desired doneness, about 4 minutes per side for medium-rare. I use my grill pan, which allows me to cook the onions and peppers right alongside the steak; if you're using an outdoor grill you'll have to be careful about the vegetables falling through the grate.
Alternatively, Brave Sir Robin recommends the following cooking method:
I usually grill them very, very rare then after they rest I slice them very thin and finish them with the onions and peppers. (of course you pour any accumulated juices in with them.)However you choose to cook the steaks and veggies, pour the remaining 1 tablespoon lime juice over it all when you're done, then transfer to a bowl or plate and serve with warm tortillas and whatever fixings you like. Tonight I'm having them with homemade guacamole!
For the upcoming lamb discussion, a thread all its own!
Incidentally, did anyone else know that David Macaulay (of The Way Things Work fame) wrote a book called Baaa about sheep inheriting the earth?? Wacky.
One of the good things about being sick is that I spend a lot of time on the couch with my laptop, without the attention span or motivation to do any real work. It's a great opportunity to catch up on some of my long-overdue food blogging. (If I'm a little incoherent today, please forgive me--I'm on as big a dose of cold medication as is permitted by the dosage guidelines, and it makes me a wee bit loopy.)
I like pork chops, but the few times I've tried cooking them at home in the past, they've come out dry and tough. Not, as Alton Brown would say, good eats. But I've made these pork chops (from the January/February Cook's Illustrated) twice now, and they've come out great both times. The secrets: a short (30 minute) brine and a not-too-long stint in a hot oven. The coating is delightfully substantial and sticks like glue to the chop, thanks to an ingenious batter of flour, mustard, and egg whites. And setting the chops on a wire rack during baking ensures that the breading doesn't go soggy on the underside of the chop.
A few notes: the toasted bread crumb mixture can be prepared up to 3 days in advance; the breaded chops can be frozen for up to 1 week and tossed straight from the freezer into the oven (but you will need to extend the cooking time from 17-25 minutes to 35-40 minutes). If you're using "enhanced" pork (injected with salt solution) rather than natural pork, skip the brine--or at least do it for a minimal amount of time, lest the chops end up too salty. Finally, this recipe is very forgiving. Seasonings can be altered and proportions fudged without too much of a change in the finished product, so don't worry if you don't have, for example, a bunch of garlic but no shallot, or vice versa.
Crunchy Baked Pork Chops
Serves 4
4 boneless, center-cut pork chops, 6 to 8 ounces each, 3/4 to 1" thick, trimmed of excess fat
4 slices hearty sandwich bread, torn into 1" pieces (original recipe calls for white bread, but I used whole wheat with excellent results)
1 small shallot, minced (~2 tablespoons)
3 medium garlic cloves, minced or pressed (~1 tablespoon)
2 tablespoons vegetable oil
Salt and freshly ground black pepper
2 tablespoons grated Parmesan cheese
1/2 teaspoon minced fresh thyme leaves (or 1/8 to 1/4 teaspoon dried thyme)
2 tablespoons minced fresh parsley leaves
1/4 cup plus 6 tablespoons unbleached all-purpose flour
3 large egg whites
3 tablespoons Dijon mustard
Lemon wedges for serving
Adjust oven rack to middle position and heat oven to 350F. Dissolve 1/4 cup salt (yes, 1/4 cup) in 1 quart water in medium container or gallon sized zipper-lock bag. Submerge chops, cover with plastic wrap, and refrigerate 30 minutes. Rinse chops under cold water and dry thoroughly with paper towels.
Meanwhile, pulse bread in food processor until coarsely ground, about eight 1-second pulses (you should have about 3 1/2 cups crumbs). Transfer crumbs to rimmed baking sheet and add shallot, garlic, oil, 1/4 teaspoon salt, and 1/4 teaspoon pepper. Toss until crumbs are evenly coated with oil. Bake until deep golden brown and dry, about 15 minutes, stirring twice during baking time. Cool to room temperature. Toss crumbs with Parmesan, thyme, and parsley and set aside.
Increase oven temperature from 350F to 425F. While it's coming to temperature, place 1/4 cup flour in pie plate (or shallow bowl). In another pie plate, whisk egg whites and mustard until combined; add remaining 6 tablespoons flour and whisk until almost smooth, with pea-sized lumps remaining. (The mixture should look like something you would have made as a small child and gleefully presented to your mother or father as your latest "invention.")
Spray wire rack with nonstick cooking spray (or don't--I didn't, and I haven't had any problems) and place in rimmed baking sheet. Season chops with salt and pepper. Dredge 1 pork chop in flour; shake off excess. Using tongs, coat with egg mixture; let excess drip off. Coat all sides of chop with bread crumb mixture, pressing gently so that a thick layer of crumbs adheres to the chop. Transfer breaded chop to wire rack. Repeat with remaining chops.
Bake until instant-read thermometer inserted into center of chops registers 150F, 17-25 minutes. Let rest on rack 5 minutes before serving with lemon wedges.
Adapted from the Cook's Illustrated Best New Recipe cookbook. That recipe called for noodles, but I prefer wild rice in my homemade chicken soup. I had recently fallen out of the habit of making soup with my roasted chicken carcasses, since the stock recipe that I was using, while an excellent stock, was a bit of an undertaking. This one uses vegetables and herbs that I almost always have sitting in my fridge and, despite being very simple, comes out just as robust as the more elaborate stock recipe I used to use. Consider this a starter recipe: you could add mushrooms or whatever other vegetables you like (a friend of mine had great success with adding minced red and orange bell pepper). I've made this soup as written twice now, and gotten excellent results both times. I like to make a full batch and stick some in the freezer for when I'm sick or in a time crunch and need some comfort food.
Chicken and Wild Rice Soup
Makes about 3 1/2 quarts
For the stock:
1 whole chicken carcass (from a roasted chicken), plus saved drippings from the roasting pan (fat skimmed and discarded)
1-2 T. olive oil
1 onion, chopped
2-3 carrots, chopped
3 ribs celery, chopped
fresh parsley
fresh thyme
fresh sage
2 t. salt
water
Heat the oil in a large stock pot or Dutch oven. Add the onion, carrots, and celery and saute for 5-10 minutes, until tender. Add herbs (no need to chop them) and continue to cook for a few minutes. Add 2 1/2 quarts water, the salt, and the chicken carcass (plus drippings). Cover and bring to a boil, then reduce heat and simmer for 60-90 minutes, or until you're satisfied with how it tastes. Cool and strain the broth, discarding the solids.
For the soup:
2 T olive oil
1 medium onion, diced
3 carrots, diced
3 ribs celery, diced
Chicken stock (above)
at least 2 cups cubed or shredded cooked chicken (I usually use the leg meat from the roasted chicken, plus the meat of two legs that I roast while I make the stock)
1 cup wild rice, cooked until almost tender
additional salt and pepper as desired
Heat oil in large soup pot. Add vegetables and saute until softened, 5-10 minutes. Add the stock and chicken and simmer 10-15 minutes, then add the rice and cook until the rice is tender and the soup is seasoned to your liking. Serve with grated Parmesan cheese for sprinkling and good bread for mopping up.
This is another one that I modified so much it's almost a different recipe. The basic technique is the same, though, so I'll credit America's Test Kitchen's Skillet Chicken with Broccoli, Ziti, and Asiago Cheese (free subscription required) for the inspiration. Basically I just made it with what I had on hand, substituting and/or omitting ingredients as necessary.
Skillet Chicken with Broccoli, Whole Wheat Penne, and Parmesan
Serves one generously, or two modestly.
One small boneless, skinless chicken breast, cut into 1" squares 1/4" thick.
Olive or vegetable oil
1/3 cup minced shallot
1 clove garlic, minced
generous pinch of dried oregano
pinch of red pepper flakes
2 ounces whole wheat penne, uncooked
1 1/4 cups chicken broth
1/4 cup water, plus more if needed
1 cup broccoli florets
2 T milk
1/3 cup grated Parmigiano Reggiano
fresh lemon juice
Salt and freshly ground black pepper
Sprinkle the chicken with salt and pepper. Heat about a tablespoon of oil in a small skillet (my 6" worked just fine) over medium-high heat until nearly smoking. Add the chicken, spread out in skillet, and let cook one minute before stirring. Cook until the chicken is lightly browned and most (not all) of the pink color has disappeared, 2-3 minutes in total. Transfer chicken to a clean bowl and set aside.
Put another tablespoon or so of oil in the pan, let heat, and add the onion to the skillet. Cook, stirring often, 2-5 minutes, or until the onion is softened. Stir in the garlic, oregano, and red pepper flakes, and cook another 30 seconds, or until fragrant.
Add the uncooked pasta and the chicken broth, and bring to a boil. Let simmer, stirring frequently to ensure that the pasta cooks evenly, 12-15 minutes, or until the liquid is syrupy and almost entirely absorbed. Add the broccoli and water to the pan. Cover, reduce heat to medium-low, and cook 3-5 minutes, until the broccoli is bright green and almost tender.
Uncover and turn the heat back to high. Stir in the milk, cheese, and reserved chicken with any accumulated juices. Continue to cook, uncovered, 1-2 minutes, or until the sauce is thickened and the chicken is cooked through. Remove from heat, add a squeeze of lemon juice, and season to taste with salt and pepper. Serve with additional cheese for sprinkling and if you like, some crusty bread for mopping up the sauce (I highly recommend this).
Vegetarians, avert your eyes. Omnivores, pay attention.
Due to a momentary lapse of concentration while in the grocery store this evening, I ended up with a Cornish game hen that I didn't need. Never one to let good poultry go to waste, and in need of some sort of dinner, I decided to use as a jumping-off point a recipe that I'd been considering earlier for Easter supper*. I used the basic spices and cooking format, but made a few changes. It smelled good as it was cooking, but I didn't realize how good until I took it out of the oven, put the bird on my plate, and ate a piece of bread that had brushed up against it. Delicious. So I took the rest of my bread (which I had intended to use to mop up my vegetable soup) and stood over the stove for five minutes, mopping up the divinely good drippings in the bottom of the roasting pot. And when I was done eating dinner, I put the pot (and the hen carcass) back in the fridge, 'cause I'm just not ready to give up those drippings. I'm sure I'll find a use for them.
Anyway, the recipe. I'm going to list the quantities I used for one hen, and you can multiply them by as many hens as you're cooking. It should be pretty linear that way.
Unexpectedly Delicious Cornish Game Hens
Serves one; modify as necessary
1 Cornish game hen
1/2 tsp. ground cumin
1/4 tsp. ground turmeric
1/2 tsp. salt
1/4 tsp. freshly ground black pepper
1-2 tbsp. vegetable oil
1/2 lemon
2 tbsp. sour cherry jam**
water
Preheat the oven to 375F.
Combine the four dry seasonings in a bowl, sieving if necessary to break up clumps. Rinse the bird under cold water, inside and out, and pat dry. Sprinkle spice mixture over the bird (both sides), patting to make it stick. Oh, and stick half of a lemon (or a quarter, it probably doesn't matter) in the chest cavity.
Get out a stove-top-proof roasting pan large enough to hold all of the birds you're cooking (I found my three-quart pot well suited to the job), and stick it on the stove over medium-high heat. Add the oil, and when it's hot, stick the bird in the pot. Let it sizzle away until it's nicely browned, about four or five minutes, and then do the same for the other side.
While it's doing its thing, put your jam and an approximately equal volume of water in a small pot or skillet and bring it to a simmer. While it simmers, whisk it a bit so that the jam breaks up and more or less dissolves into the water. You won't end up with a perfect syrup, but it will be a looser mixture than the original jam, and it will smell really good.
When your bird is brown and smells delicious, turn off the heat, pour the jam mixture over the bird, and put the pot (uncovered) in the oven. After 15 minutes or so, take it out and baste it with some of the lovely juices and drippings that have accumulated in the bottom of the pan, and then return it to the oven for another 15 minutes. According to the original recipe, the bird should be done after a total of 30 minutes in the oven, but mine wasn't--at least I didn't get the recipe-required reading of 170F when I stuck a thermometer into the leg. Basically, cook it, basting every 10-15 minutes, until you think it's done and you trust the doneness enough to eat it.
Let the bird rest out of the oven for a few minutes (it'll be longer than that, anyway, before you can tear into it without burning your fingers and/or mouth). While you wait, as soon as the drippings are cool enough, tear up some good bread and use it to mop up the deliciousness that covers the bottom of the pot. Then go to town on the bird--I recommend using your fingers.
* I rarely, if ever, use the word "supper," but for some reason in the case of Easter it seems to work.
** The original recipe told you to make a syrup out of water, sugar, and pomegranate juice. I didn't have any pomegranate juice, but I had some sour cherry jam from the suitor's parents, and it tasted like it might do the trick. If you want to go the pomegranate route, combine equal volumes of juice, water, and sugar in a pot. Bring the mixture to a boil and simmer, uncovered, 15-20 minutes (or until thick and syrupy).