Showing posts with label Breakfast. Show all posts
Sunday, April 18, 2010

Preserving the best of winter

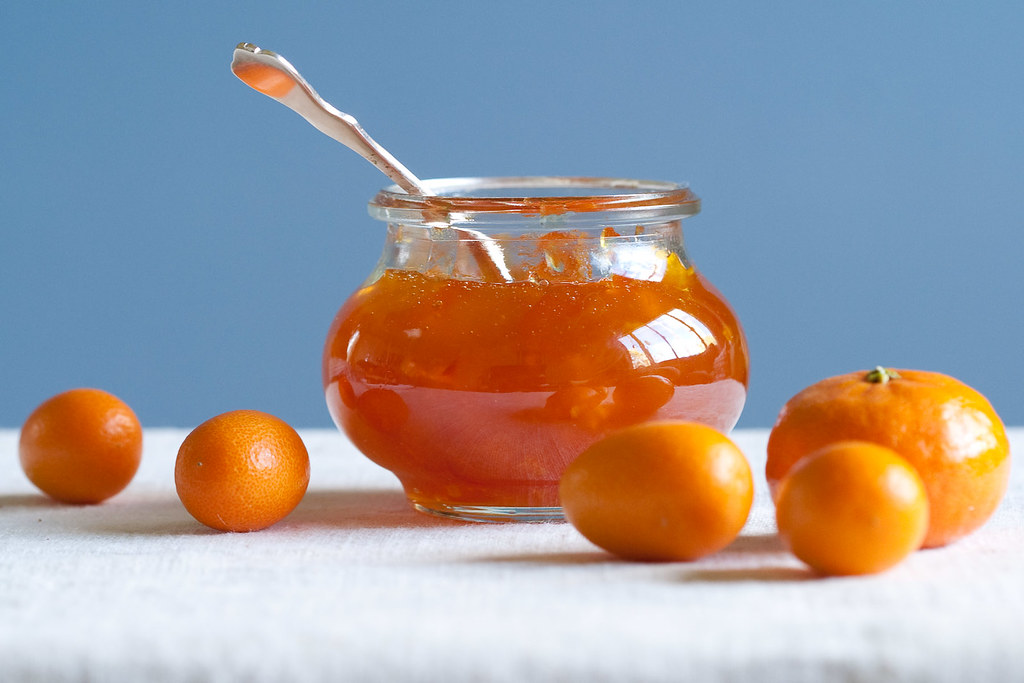
Clementine-kumquat marmalade

Before we begin, I must beg your pardon. I've waited so very long to share this recipe with you that at this point, I fear you'll have some difficulty in obtaining the ingredients. But it would be a shame to have to wait until next winter to make this marmalade, so I'm going to post it anyway. I hope very much that, what with California often being on the leading edge of the change in the turnover of seasonal produce, the bright hues of winter citrus are still in abundance at your local markets.
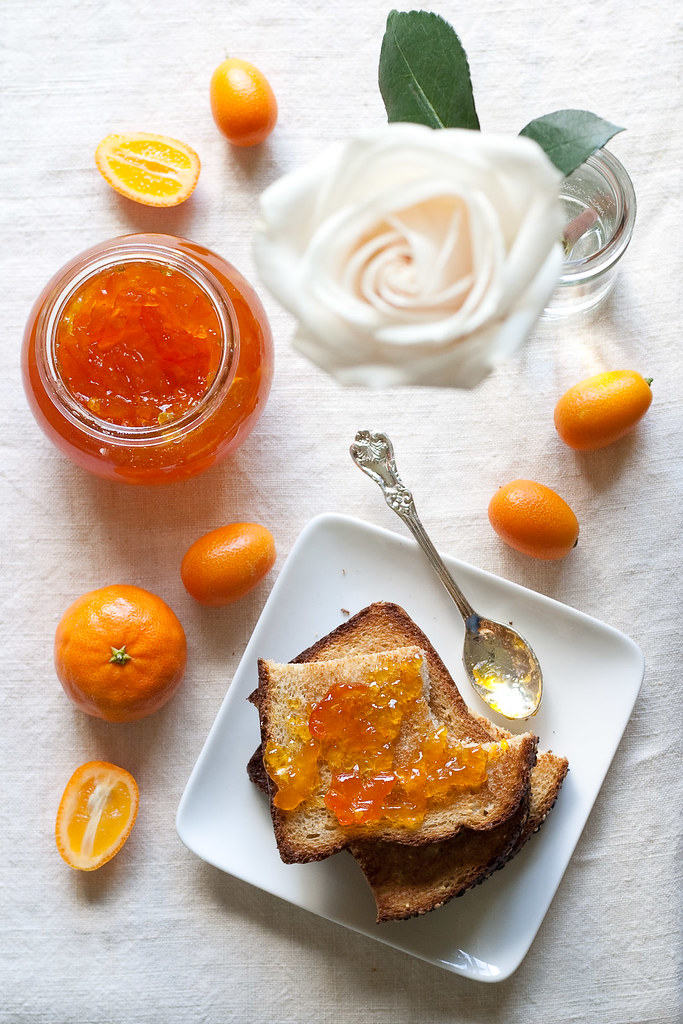
Breakfast table

Personally, I've missed my window. I made only a small batch as a test run, and as it often does, life (*cough* grad school *cough*) kept me from making another, larger batch before kumquat season came to an end. Now that that one small batch is long gone, I find myself pining for it.

I still love orange marmalade, but after making and tasting tangerine-kumquat marmalade, I admit that I'm spooning ordinary orange marmalade onto my toast with a little less enthusiasm than I used to. There might even be a sigh now and then as I remember that what I have left in my pantry for the next nine months or so is not, in fact, tangerine-kumquat marmalade.
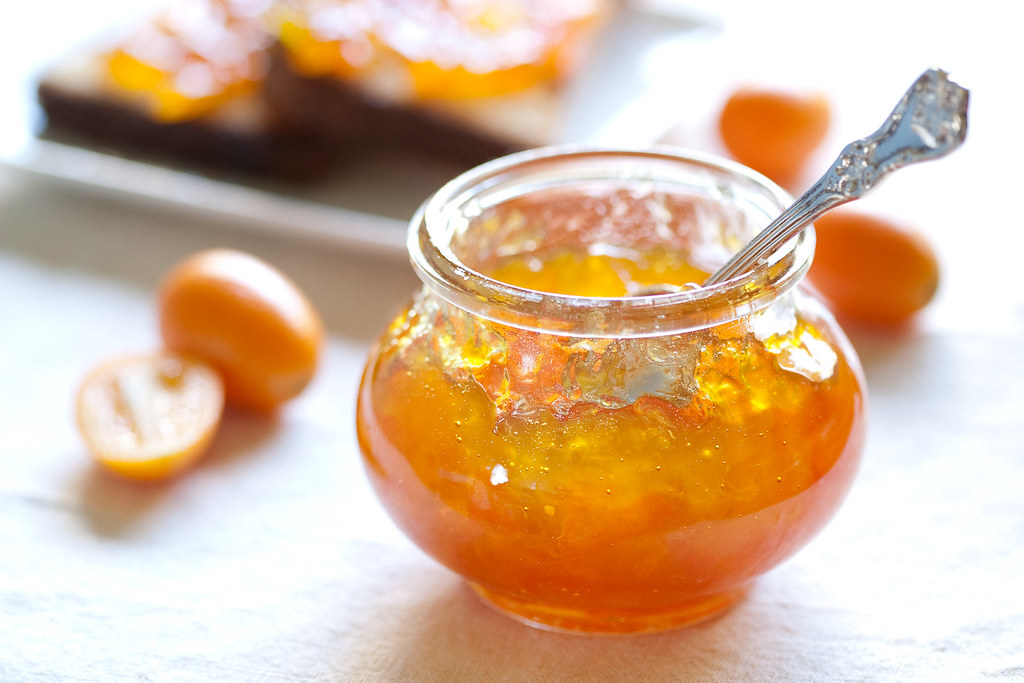
Pot of marm

Most marmalades succeed reasonably well in striking a balance among sweet, tart, and bitter flavors. None, in my experience, does it with the grace that this one possesses. As Thomas Keller notes at the beginning of the recipe, this marmalade is at home aside an elegantly prepared duck as it is atop a humble bagel with cream cheese.

Marmalade skeptics might look askance at the relatively large pieces of rind suspended in the jelly. Indeed, the marmalade does have a substantial (in my opinion, very pleasant) chew, but the rind's bitterness mellows with an overnight soak in water, so those large pieces are not as bold as they otherwise might be. In fact, other than the color, there's not much about this marmalade that is bold. But don't let that dissuade you. It doesn't need to be bold. It's perfectly content to wait, earnest and smiling, for you to discover its virtues in your own good time. And I'm sure you will--assuming you can find some kumquats.
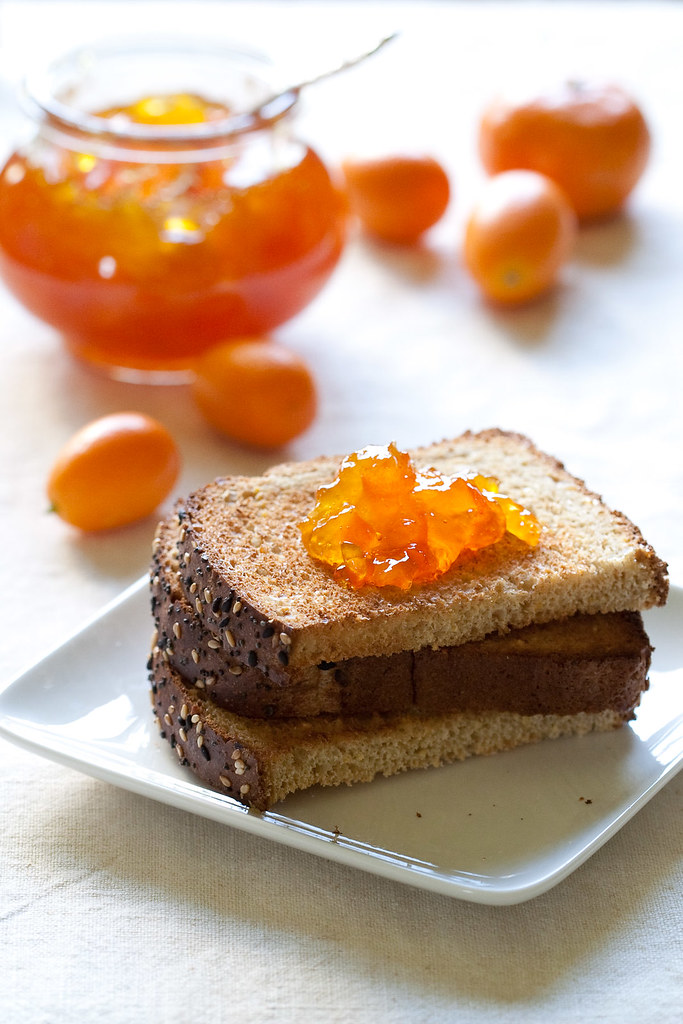
Marm on toast

Tangerine-Kumquat Marmalade

Adapted from Ad Hoc at Home
Makes about 2 1/2 cups

Ingredients

  • 1 1/2 pounds kumquats
  • 6 tangerines or other mandarin oranges, or enough to provide 1 cup of juice
  • 2 1/2 cups sugar

Directions

  1. Quarter the kumquats lengthwise, and remove the stems and all of the seeds. (If you prefer your pieces of rind to be smaller, cut the kumquats into eighths instead.)
  2. Put the kumquat pieces in a large bowl, and pour in enough cold water to cover by about 2 inches. Place the bowl in the refrigerator, and chill for at least 18 hours, or up to 24 hours. This soak and chill will temper the rind's bitterness.
  3. When you are ready to make the marmalade, quarter the tangerines and pour the juice from the cutting board into a 1-cup (or larger) measuring cup. Working with one quarter at a time, cut the tangerine flesh away from the skin (being careful not to cut into the pith). If you encounter any seeds, remove and discard them.
  4. li>Squeeze the tangerine juice into the measuring cup. Discard the rind, but reserve the juiced flesh. Continue until you have 1 cup of juice, then set the juice aside.
  5. Gather up the reserved tangerine flesh, chop it, and transfer it to a medium-sized pot.
  6. Add the kumquats, the juice, and the sugar, and stir to combine. Affix a candy thermometer to the side of the pot.
  7. Bring the mixture to a simmer and cook, skimming off as much foam as you can, until it registers 215-220F (100-105C) and a small amount dribbled onto a chilled plate sets nicely and wrinkles when pushed with your finger. Remove the pot from the heat.
  8. Ladle the marmalade into clean jars, cover, let cool to room temperature, and chill. The marmalade should be chilled for at least 2 hours, and ideally for 24 hours, before being served.

Notes

  • The marmalade keeps, refrigerated, for 1 month--that is, if you can make it last that long.
  • Alternatively, you can use the hot pack canning method for shelf-stable jars.

There's more...

Sunday, January 3, 2010

Starting off on the right foot

Breakfast

A year, much like a day, ought to begin on solid footing, don't you think? Even if you don't subscribe to the view that a new year is a clean slate, there's something heartening about getting a new calendar year off to a good start. We can define "good" in various ways, of course; but since this is the season of new gym memberships and diet resolutions, let's play along and go for something healthy.

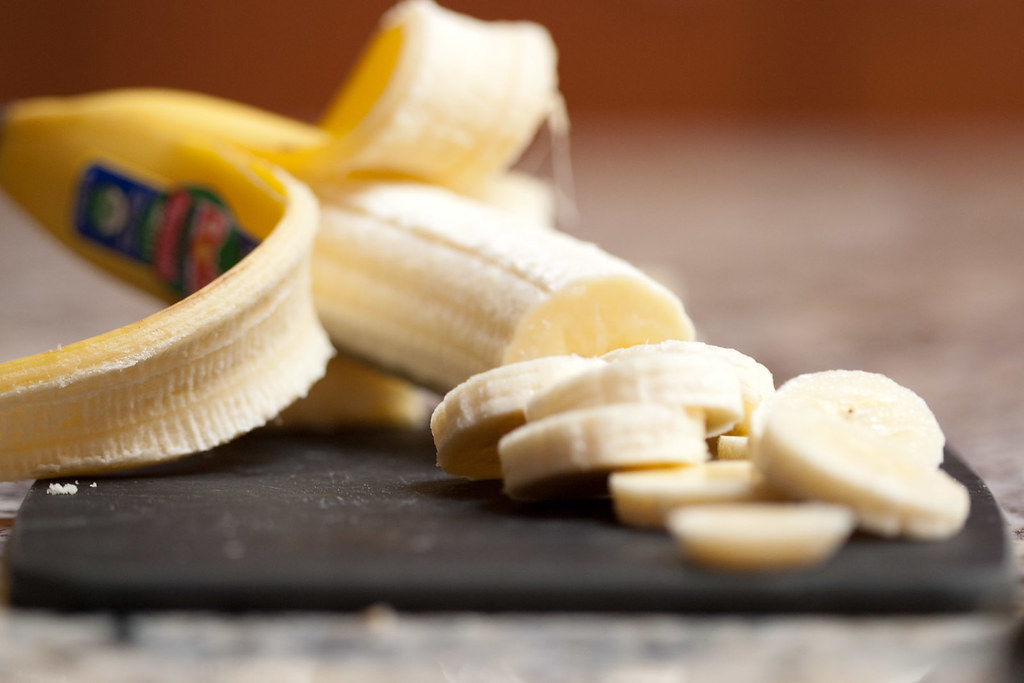
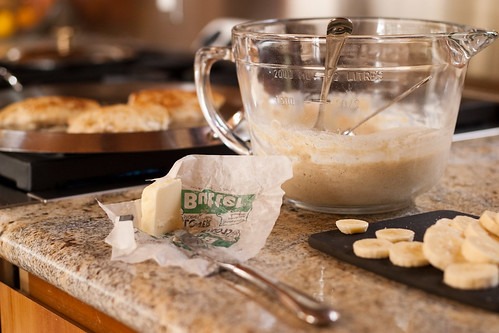
Sliced banana

Don't worry, I'm not about to convert this blog to a diet blog. On the contrary, given my new toy, I'll probably have all sorts of new and decadent recipes to share. And what with being on blood-thinning medication for the next several months, I don't exactly have free rein with most of the vegetables that are now in season. But that doesn't mean that we can't find new and interesting (and, above all, delicious) ways to nourish ourselves.

I've done a fair bit of nudging and winking recently about whole wheat recipes that I try to pass off as healthy, with varying degrees of success. This recipe falls right into that theme. These pancakes are cooked in butter (or at least I recommend that you cook them that way), and are delicious drizzled with maple syrup, so there's no claiming that they are 100% guilt-free. That said, of all the whole wheat recipes that I've posted, this is perhaps the one with the most bang for its nutritional buck.

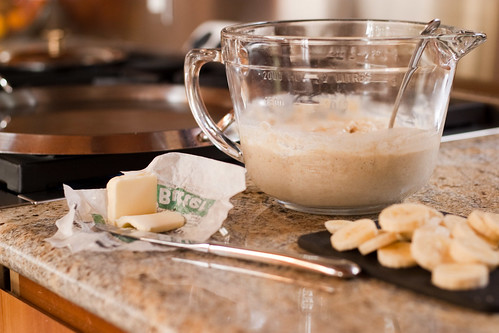
Mise en place

With some of the other recipes, I felt like you couldn't mess too much with the butter or sugar quantities before the intended tasty treat became, well, not as much of a treat. Unlike those recipes, these pancakes don't need a lot of dolling up in order to make you feel like you're starting your morning with something special. They've just a touch of oil and sugar--so little sugar, in fact, that I think you'd hardly miss it if you left it out--but tasting them, you wouldn't know it.

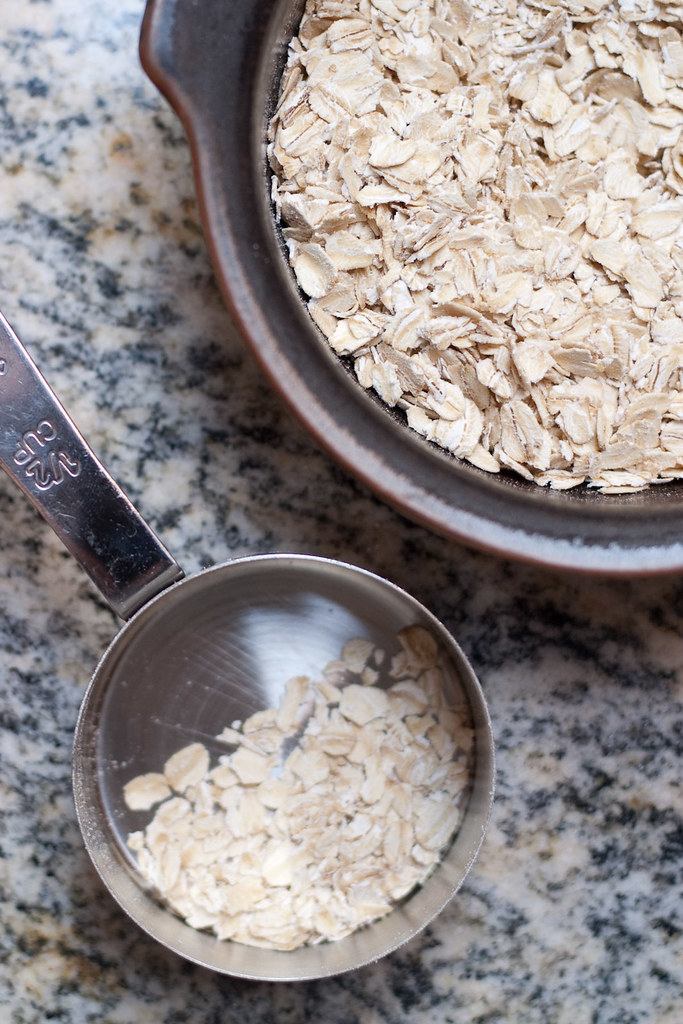
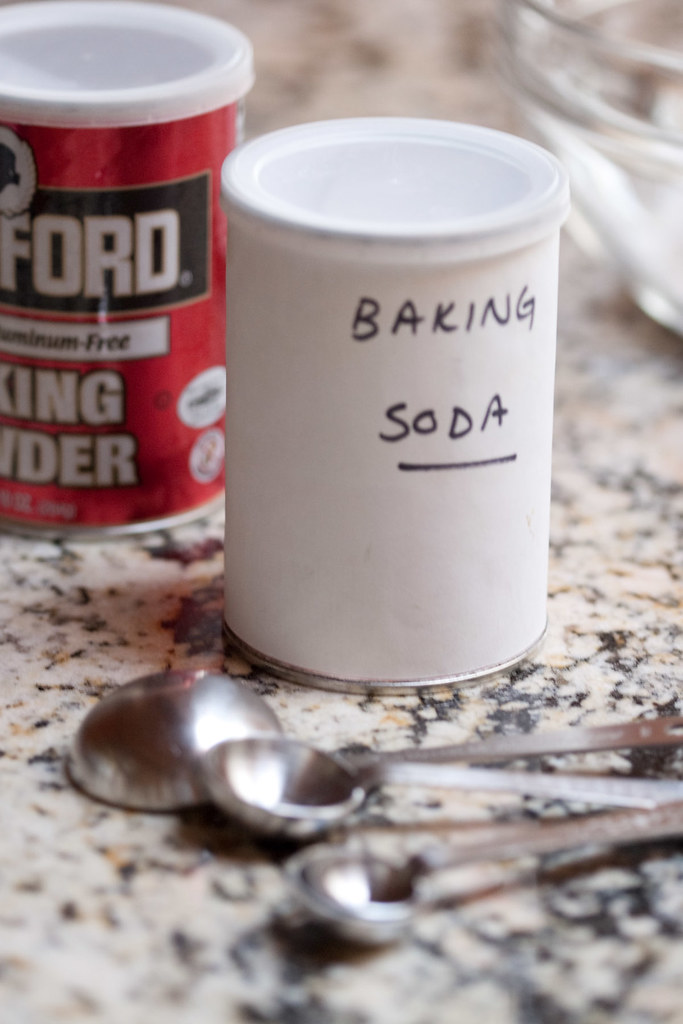
OatsLeavening

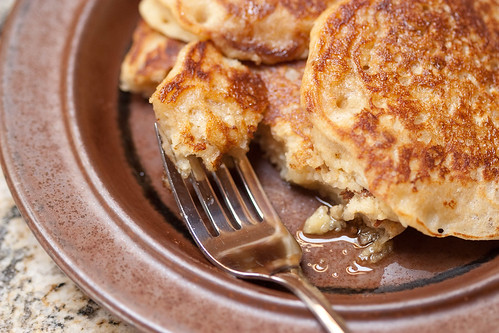
And here's another thing you might not guess from tasting these pancakes: they're actually two breakfast foods in one. That's right, these pancakes are made with oatmeal--the better to make your heart jump for joy when you sit down to a plate full of them. But the texture doesn't feel like a bunch of oats, the way oatmeal raisin cookies do. They dissolve (or something?) into the pancake batter, and you're left with a soft and hearty--but not tough or chewy--pancake.

The introductory comments on the original recipe mentioned something about these pancakes being rather dense, but I don't think that's the case at all. The buttermilk makes them pillowy, lighter than one might expect of whole wheat pancakes. And if you have your heart set on a truly fluffy pancake, you can always separate the eggs, make the batter with the yolks only, and then fold in the beaten whites.

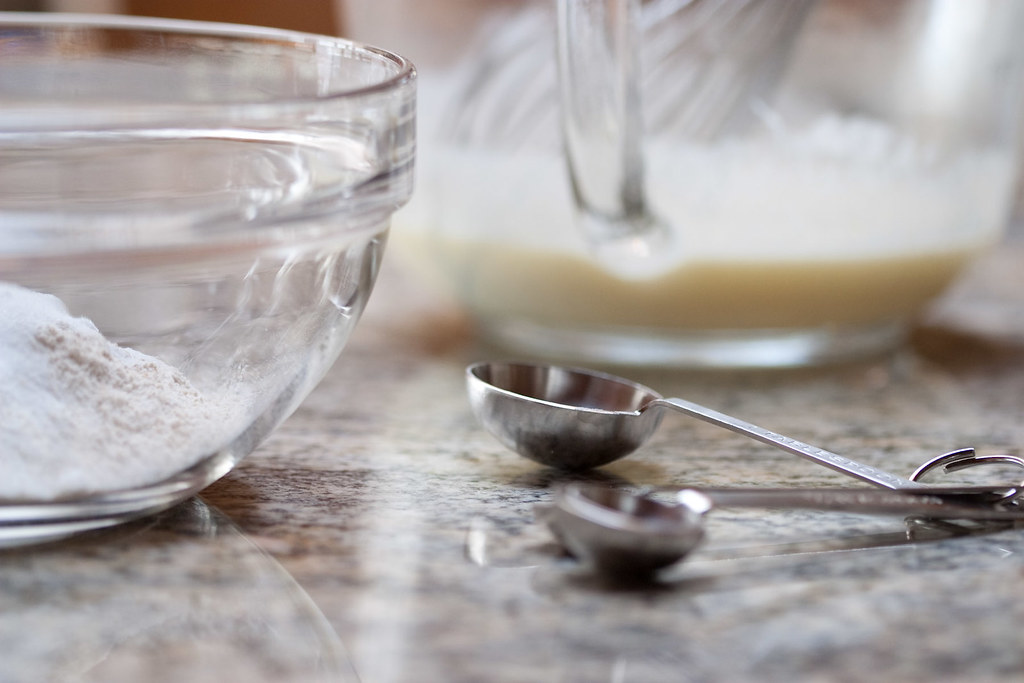
Measuring

These pictures reflect a banana-walnut version of the pancakes, but that's just a variation born of necessity. The recipe was originally written with blueberries in mind, and the pancakes are equally good that way. I imagine they would also be good with no fruit at all, or made plain and topped with fresh raspberries, or apple (or pear, or quince) compote... I'll let your imagination keep that train of thought going.

But before I lose you to your reverie, I'd like to wish you all a peaceful and prosperous (and pancake-filled!) new year. Here's to another year of good eating!

Pancakes

Oatmeal Buttermilk Pancakes

Makes 15-20 pancakes, depending on size

Ingredients

  • 1/2 cup rolled oats (not steel-cut)
  • 1/2 cup (4 fluid ounces) low-fat milk
  • 1 cup whole wheat flour
  • 1/2 cup unbleached all-purpose flour
  • 2 teaspoons baking powder
  • 1 teaspoon baking soda
  • 1 tablespoon sugar (optional)
  • 1/4 teaspoon salt
  • 2 large eggs
  • 1 1/2 cups (12 fluid ounces) buttermilk
  • 1 teaspoon vanilla extract
  • 3 tablespoons canola oil
  • 1 cup fruit (optional)
  • 1/2 cup chopped nuts (optional)
  • butter or cooking spray for greasing the pan

Directions

  1. Combine the oats and milk (not the buttermilk) in a bowl and set aside.
  2. Sift or whisk together the two flours, the baking powder and soda, the sugar (if using), and the salt, and set them aside as well.
  3. In a large bowl, whisk together the eggs and buttermilk. Add the vanilla extract and the oil, and whisk to combine.
  4. Stir the flour mixture into the buttermilk mixture until just barely combined (a few lumps of flour are fine). Fold the oats mixture and nuts (if using) into the batter. The batter can sit out at room temperature for up to an hour, or you can refrigerate it overnight.
  5. When it's time to make the pancakes, heat a griddle over medium heat until water droplets skitter across the hot surface. (Fun physics fact: this is called the Leidenfrost Effect.)
  6. Grease the pan with a small pat of butter. When the foam subsides, ladle or scoop the batter in scant 1/4-cupfuls onto the pan, leaving a few inches of spreading room. If you are adding fruit, now's the time to drop it onto the individual batter portions.
  7. Cook the pancakes until the edges are set and there are several bubbles on the surface of the pancake, a few minutes. Flip them and cook for another minute or so further, until nicely browned. Remove from heat and, if desired, keep warm until serving.

Notes

  • Cooled, well wrapped pancakes can be kept in the refrigerator for a few days, or in the freezer for a few months. Rewarm before serving.
  • If you don't have buttermilk, feel free to substitute yogurt or sour cream; in a pinch, you can even use regular milk, but the pancakes might not be as puffy.
  • For those who are watching their blood pressure, I absent-mindedly omitted the salt one morning and didn't notice the difference. Then again, I did cook them in salted butter.

There's more...

Saturday, December 5, 2009

Tea and Cake or Death

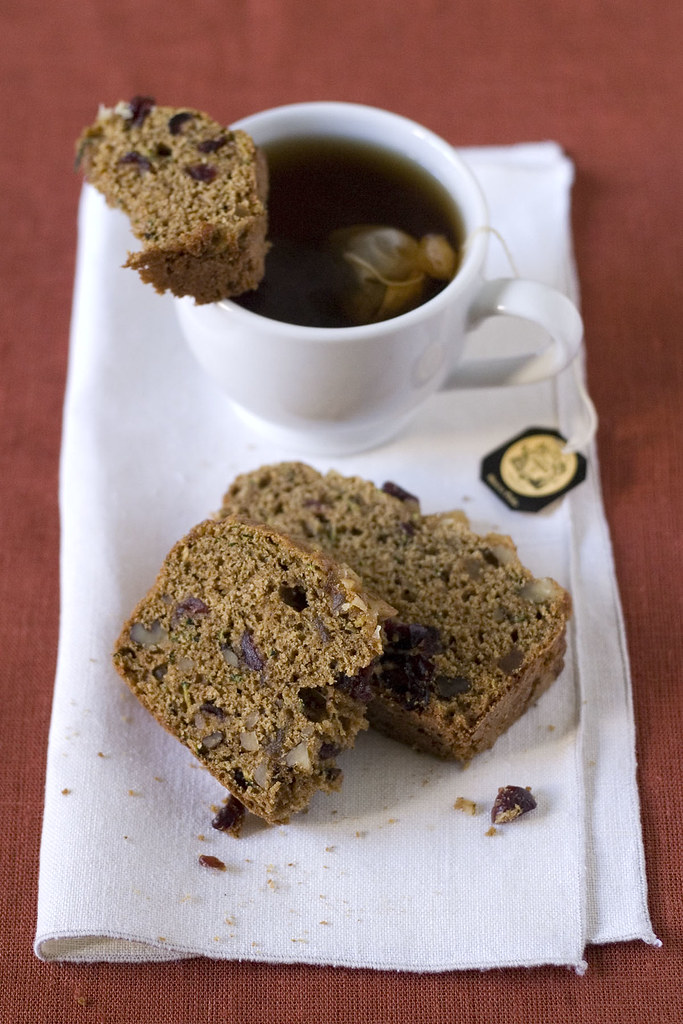
Tea and cake

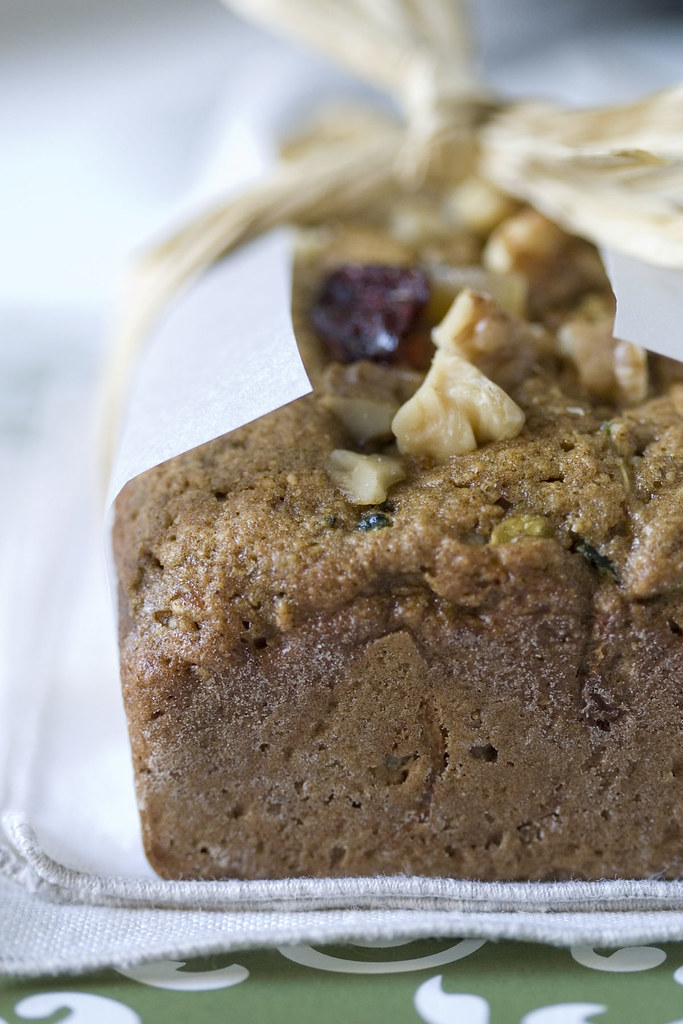
That title probably needs an explanation, doesn't it? I can't possibly do the line justice, so I'll just refer you to this Eddie Izzard clip (or rather, the Lego version thereof). If you're not an Eddie Izzard fan or can't watch the video, just trust me that no one died, or was even mildly injured, in the making of this cake. Or bread--we refer to it as bread, and in fact it is a quickbread, but it's really more like cake, isn't it?

Perhaps we need a bit more context. The other evening when I was winding down the day with a cup of chamomile tea and a slice (okay, two) of this cake, I said to myself, "tea and cake." (What, you don't talk to yourself about what you're fixing in the kitchen?) Having watched that Izzard clip umpteen times, my brain's natural follow-on was "or death." And a post title was born.

Loaf panLoaf

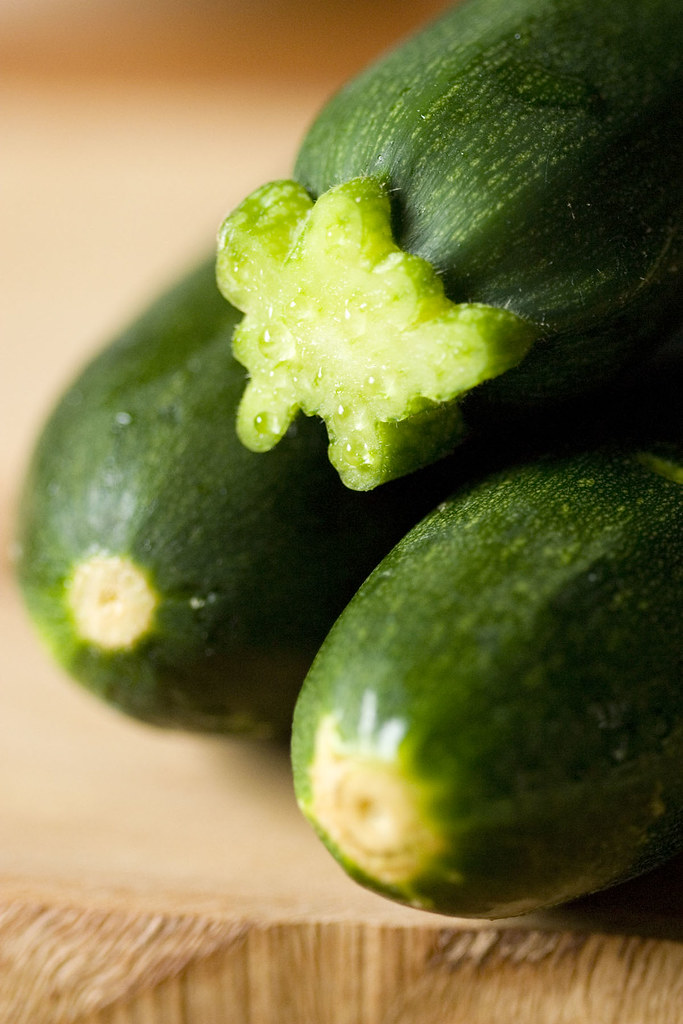
Anyway... Out here in this most mild-weathered part of the country, we get zucchini absurdly late in the year. We'll have summer squash and winter squash sitting side by side on the tables at the farmer's market. My enjoyment of zucchini has really been coming into its own this year, but by the time it got to October and November, I was starting to exhaust my growing, but still limited repertoire of zucchini recipes.

There was one obvious addition to said repertoire that I had always dismissed because of my skepticism about the results. Zucchini bread is the classic way for inundated gardeners to use up their zucchini (or courgettes, as they're known to some readers), but I have to admit that I've always wrinkled my nose a bit at the prospect--due in part, no doubt, to the remains of the not-so-warm feelings I had for the vegetable in years past. Zucchini bread? Wouldn't it taste like zucchini? Or to be more precise, like everything I disliked about zucchini?

ZucchiniIngredients

Well, I'm here to tell you that zucchini bread doesn't taste anything like what I disliked about zucchini. Or at least, my zucchini bread doesn't, and that's because I did what's obvious when you're looking to hide a potentially unpleasant-tasting ingredient in a cake: I made a spice cake.

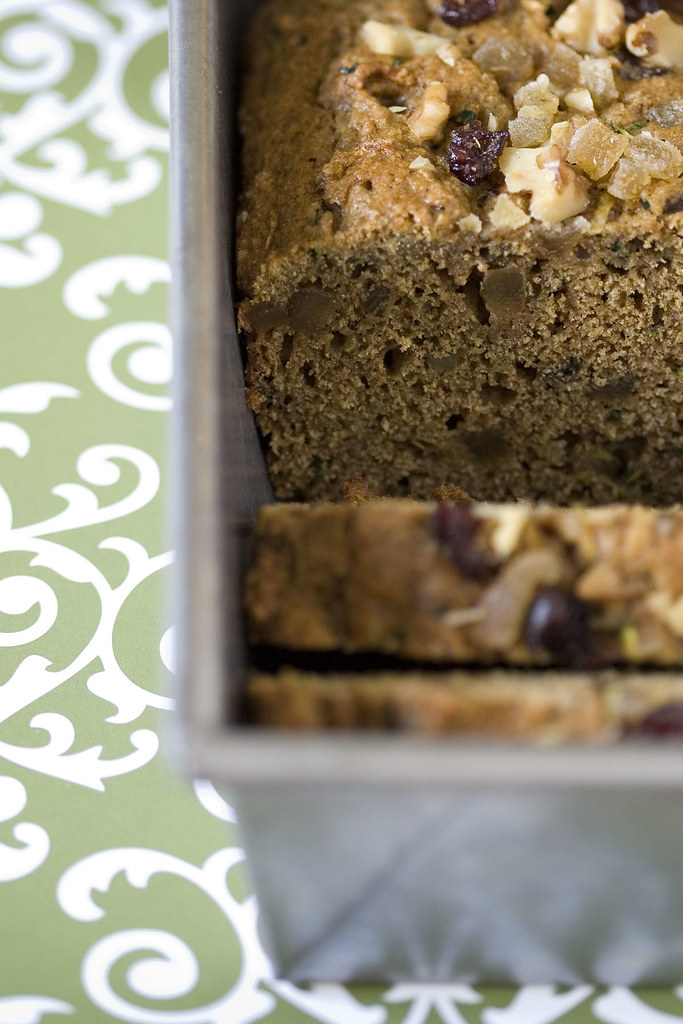
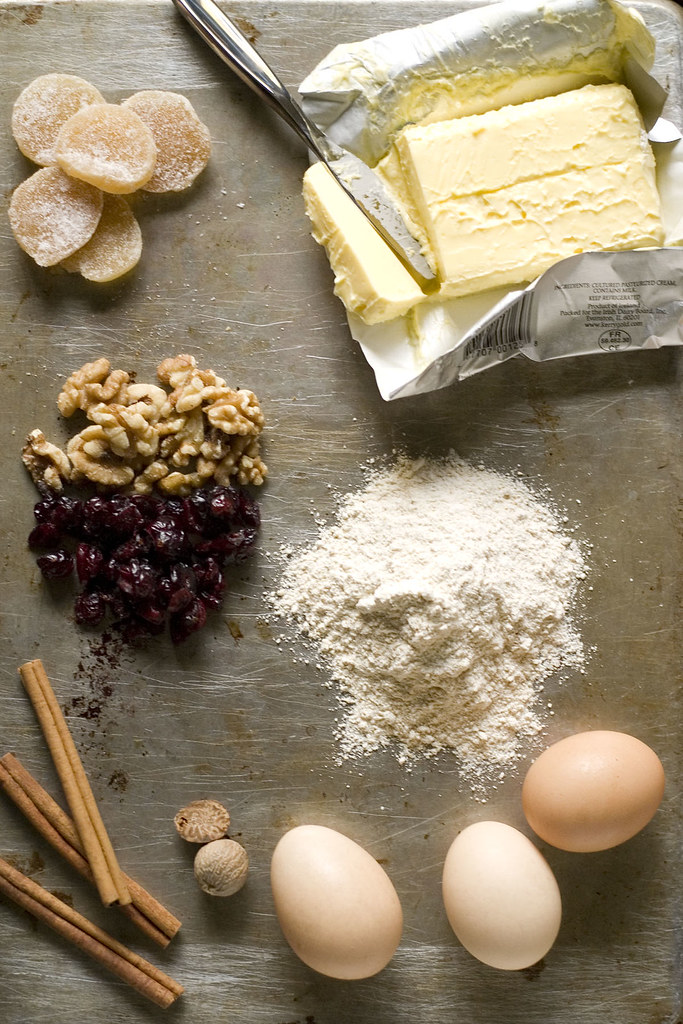
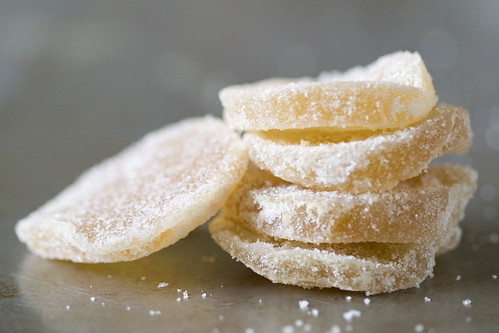
If you ask me, there's no better way to ensure that a baked good will taste delicious than adding cinnamon, cloves, and nutmeg. To err even more on the side of safety, and because by the time I was making this cake we were well on our way toward the season of holiday baking, I added dried fruit, nuts, and some crystallized ginger. There was really no way that this cake could go wrong.

Crystallized ginger

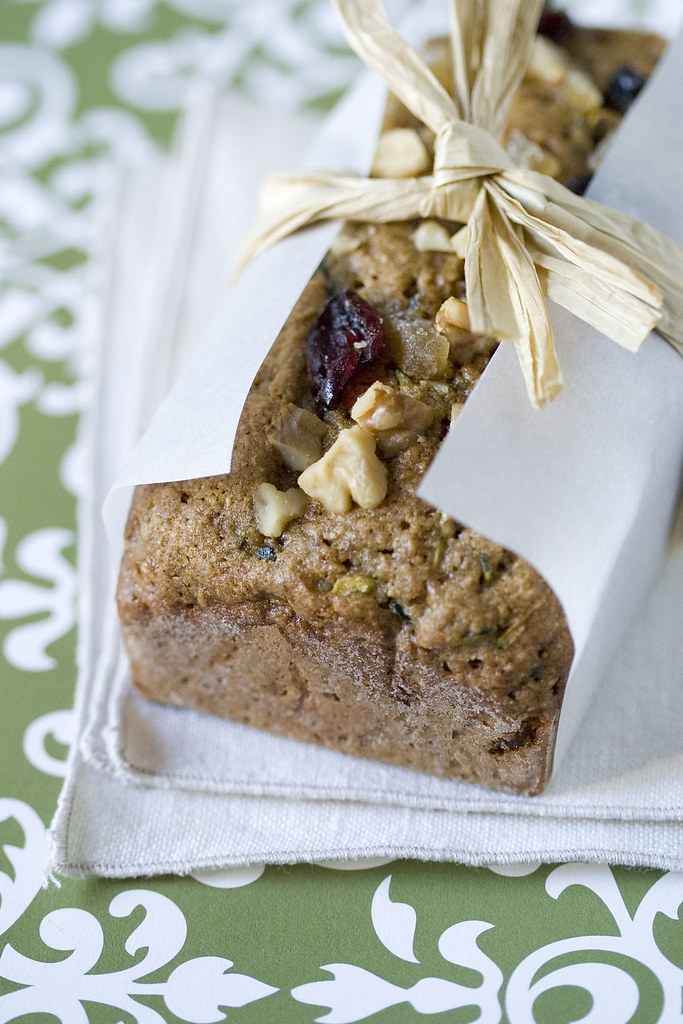
Sure enough, there is no hint of zucchini flavor; in fact, the only indication that there's any sort of vegetable in the cake is the tiny green bits you might see peeking out the top. The rest is nothing but tender, aromatic cake, studded with cranberries and walnuts and the occasional piece of candied ginger. What with all that decoration inside, this cake feels festive; and in fact, it's perfect for the holiday gift baking that I'm sure many of you will be undertaking soon (or have already started). But I, for one, won't blame you if you want to keep it all for yourself.

Wrapped

Whole Wheat Zucchini Spice Cake

Adapted from 101 Cookbooks
Makes 2 4x8-inch loaves, or 4-6 mini loaves

Ingredients

  • 1/2 cup (4 ounces, or 1 stick) butter, softened
  • 1 cup packed brown sugar
  • 3 large eggs
  • 2 teaspoons vanilla extract
  • 3 cups grated zucchini (about 3 medium zucchini)
  • 3 cups whole wheat pastry flour (see note)
  • 1 1/2 teaspoons baking soda
  • 1/2 teaspoon baking powder
  • 1 teaspoon salt
  • 2 teaspoons ground cinnamon
  • 1 teaspoon ground ginger
  • 1/2 teaspoon ground cloves
  • 1/2 teaspoon freshly grated nutmeg
  • 3/4 cup chopped walnuts
  • 3/4 cup dried cranberries
  • 1/2 cup minced crystallized ginger

Directions

  1. Place an oven rack in the middle position, and preheat the oven to 350F/175C.
  2. Prepare your loaf pans: line the pans with parchment paper, or butter them and dust them with flour.
  3. Combine the walnuts, cranberries, and crystallized ginger in a bowl and set aside.
  4. In a separate bowl, whisk together the flour, baking soda and powder, salt, and spices and set that aside as well.
  5. In a large bowl, cream together the butter and sugar until light and fluffy.
  6. Add the eggs one at a time, beating well and scraping down the bowl after each addition.
  7. Add the vanilla extract and mix well; then add the zucchini and stir until everything is combined.
  8. Add the flour mixture in two additions, stirring only until just combined, then gently fold in the dried fruit, nuts, and crystallized ginger.
  9. Divide the batter equally among the pans, and use a spatula to smooth it out a bit. Place the pans on a baking sheet for easy maneuvering.
  10. Bake for about 40-45 minutes for regular loaves, or 30-35 minutes for small loaves. They are done when a toothpick inserted into the center comes out with moist crumbs attached, or even a bit of almost-done batter. The loaves will be dry if you overbake them, so I like to err on the side of underbaking for a nice, moist cake.
  11. Cool the loaves in their pans for about 10 minutes, then turn out onto a rack to finish cooling.

Notes

  • A food processor, fitted with the grating blade, makes wonderfully quick work of grating the zucchini.
  • If you don't have whole wheat pastry flour, you can substitute 1 1/2 cups all purpose and 1 1/2 cups whole wheat.
  • Vary the fruit, nut, etc. combination as much as you like, perhaps staying close to the rough guideline of about 2 cups total additions.
  • As noted above, this cake can be prone to dryness if overcooked, so keep a close eye on it as it bakes.

There's more...

Monday, October 12, 2009

Almost-healthy Apple Muffins

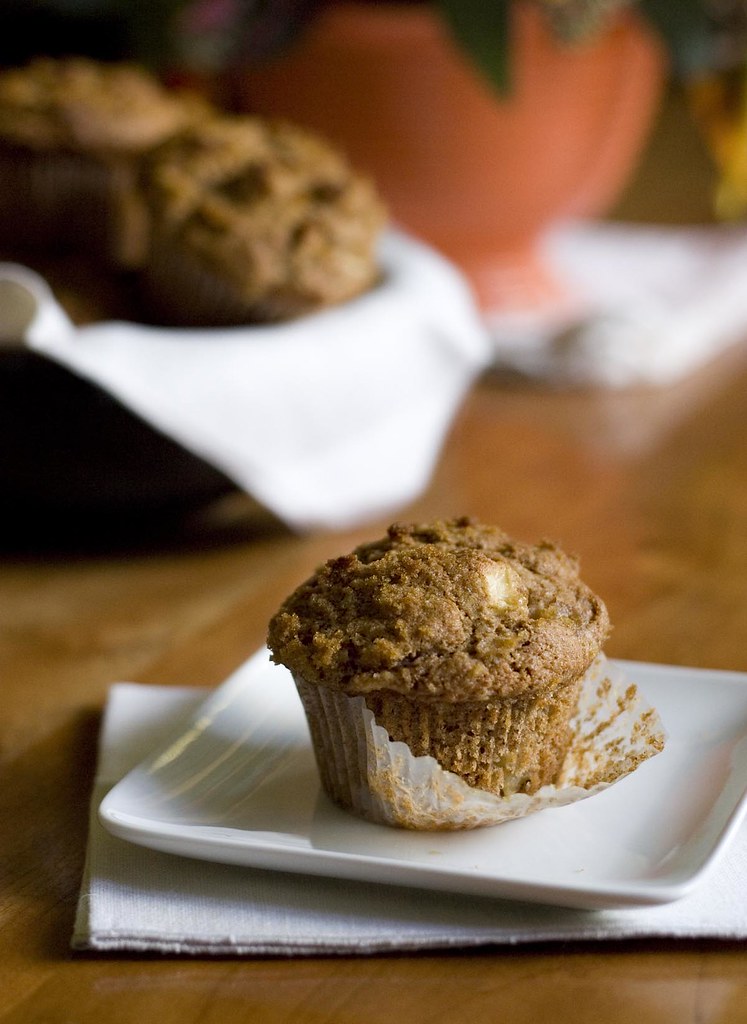
Whole wheat apple muffin

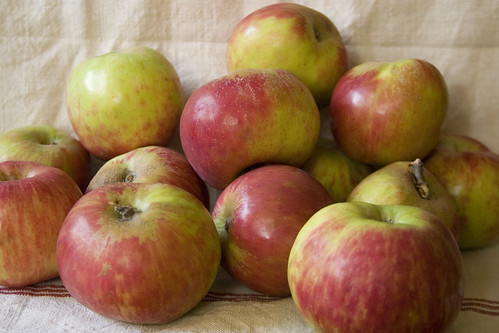
I mentioned recently that one of my strategies for using up a bunch of apples is to make muffins. Well, I have a confession to make: it's not actually a very good strategy, namely because making muffins doesn't really get you through that many apples. After all, there's only so much apple that you can pack into muffins without your muffins falling apart.

Apple pile

Yet this notion persists in my head (and I'm sure that it's completely in my head) that making muffins is a good way to use up apples. Not only good, but "better" for you than making something like a pie, which would of course use up even more apples than these muffins do. And it's silly, isn't it? A fruit pie, at least the way I make my fruit pies, isn't terribly unhealthy as far as desserts go. Oh, there's the crust, but it's not so bad; and the rest of the pie is simply fruit--maybe with some seasonings, but quite little added sugar or fat.

Muffins, on the other hand... Well, let's face it: they're essentially little bits of cake. We can tweak the ingredients all we want in various efforts to turn them into something healthy, but at heart they're bits of cake. Perhaps that's why I love them so.

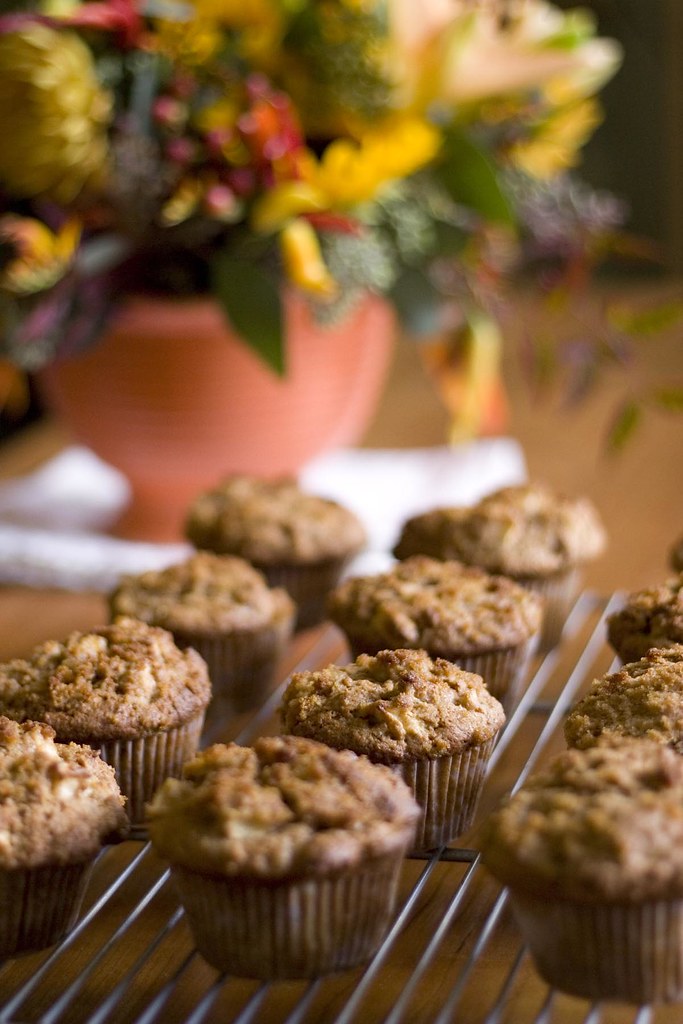
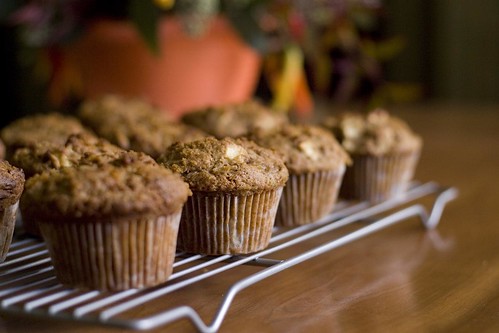
Muffins cooling

That said, while these muffins are still, you know, muffins, they do have a couple of saving graces. First, they contain whole wheat flour. Now, whole wheat flour alone does not a health food make, but it does bump up the nutrition value at least a little bit. At least you're getting some vitamins and fiber along with your fat and sugar. The apples help with that, too.

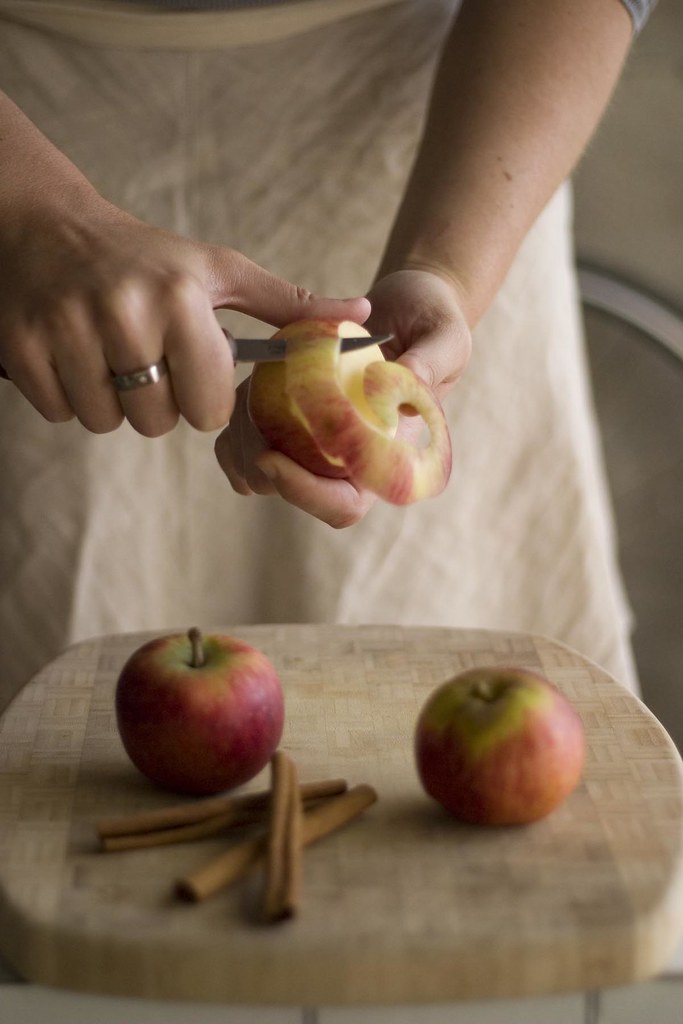
Peeling apples

Second, thanks to their being deliciously dark and moist, they keep better than any other muffins I've made. Most muffins lose a lot of their luster by the second day, but these keep for three or four (or five) days, meaning that you can space out your indulgence over several days. That is, you can try to space it out.

Let me just say right now that I take no responsibility for what happens to your willpower after you taste these muffins. I typically think of whole wheat baked goods as heavy, perhaps tough, and not always very pleasant to eat. These muffins have blown away that particular notion. Honestly, I tend to forget that they have any whole wheat flour in them at all, and I bet you will, too. Of course, that assumes that you make them, but really, why wouldn't you?

Muffins cooling

Whole Wheat Apple Muffins

Adapted from King Arthur Flour
Makes 12 muffins

Ingredients

  • 1 cup whole wheat flour
  • 1 cup all-purpose flour
  • 1 teaspoon baking powder
  • 1 teaspoon baking soda
  • 1/4 teaspoon salt
  • 1 generous tablespoon cinnamon (or to taste)
  • 1/4 teaspoon ground cloves
  • 1/2 cup (4 ounces) unsalted butter, at room temperature
  • 1/2 cup granulated sugar
  • 1/2 cup brown sugar, packed, divided
  • 1 large egg
  • 1 cup (8 ounces) buttermilk
  • 2 large apples, peeled (if desired), cored, and chopped

Directions

  1. Place an oven rack in the middle position and preheat the oven to 450F/230C. Line a 12-cup muffin tin with paper liners, or grease and flour the cups.
  2. Whisk together the flours, the baking powder and soda, the salt, and the spices; set the mixture aside.
  3. In a large bowl, beat the softened butter until it is smooth and creamy. Add the granulated sugar and 1/4 cup of brown sugar, and beat until the mixture is fluffy.
  4. Add the egg and beat well to combine, scraping down the bowl as needed.
  5. Stir in the buttermilk. If you over-mix it, the mixture might curdle, but I haven't found that to be a problem for the finished muffins.
  6. Gently stir in the dry ingredients until just combined, then fold in the chopped apples. The batter will be rather stiff, almost more like a very sticky dough.
  7. Divide the batter among the muffin cups. The cups will look like they have too much in them, but the batter should be stiff enough to hold its shape, and the muffins don't rise very much. Sprinkle the remaining 1/4 cup brown sugar over the top of the muffins.
  8. Bake at 450F/230C for 10 minutes, then decrease the oven temperature to 400F/205C and bake for a further 15-20 minutes. The muffins are done when a toothpick or cake tester comes out clean.
  9. Cool the muffins in the pan for 5 minutes, then remove to a wire rack and let cool completely.

Notes

  • If you happen to have whole wheat pastry flour on hand, using 2 cups whole wheat pastry flour rather than the combination of all-purpose and regular whole wheat works fine. The resulting muffins are more delicate and might have less rise to them.
  • Batter tip: a spring-action ice cream scoop makes it easy to portion batter evenly.

There's more...

Monday, July 13, 2009

In search of nooks and crannies

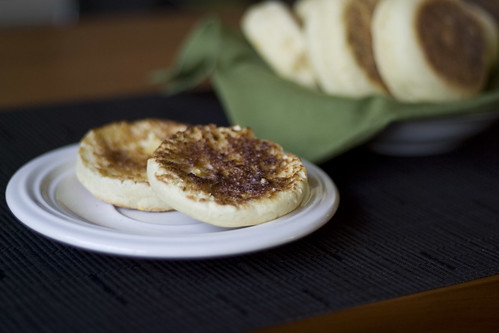
Toasted English muffin

I don't remember what it was that launched my recent search for a great English muffin recipe. I like English muffins, or "Eng muffs" as we referred to them when I was a child, but I haven't eaten (let alone bought) them in years. They are not exactly an obsession of mine. Yet something in the last couple of weeks put English muffins into my head, which tapped into eight or nine years' worth of English muffin deprivation, and suddenly I desperately wanted an English muffin. Of course, it wasn't good enough simply to go out to the store and buy some, I had to make them. And so my quest for the perfect homemade English muffin was born.


To be honest, I still haven't found it. I've tried three different recipes, and each one was inadequate in some way (or many ways). The first, well, perhaps the less said the better--even though it came from a trusted source. The second came from another fairly trusted source, Alton Brown, but the muffins came out small and lackluster, and hardened substantially only a few hours out of the skillet. The flavor was acceptable, though, and the recipe did have one thing going for it: the muffins had great nooks and crannies.

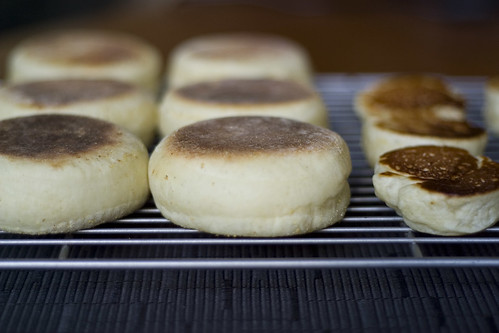
English muffin comparison

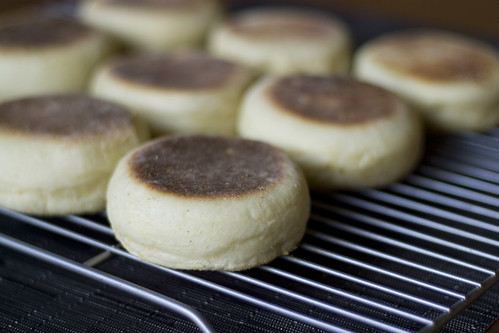
Enter the third recipe, and my current favorite, from Bernard Clayton's New Complete Book of Breads. That's it up on the left there; the ones on the right are the results of Alton Brown's recipe. I ask you: which would you rather toast and spread with butter and jam (or sandwich around an egg, or a piece of cheese) for your first meal of the day? Still, for all that they might look like beautiful English muffins, they aren't perfect: despite being delightful in almost every way, they lack nooks and crannies. Split open (with a fork, as they should be), the interior texture resembles that of a torn loaf of bread-- soft, moist, delicious bread, but ordinary bread nonetheless--more than the nooked and crannied English muffins I know from my childhood.

English muffins

I have a notion in my head of what ought to produce a good English muffin: a hearty dough, using an egg or two for richness and bread flour for substance; rolled out on a cornmeal-dusted surface and cut to shape; and cooked in a pan to give a lovely, browned crust on top and bottom, with light, pillowy sides that yield nicely to a fork or fingers. Clayton's recipe has all of this, but the result is still not quite right. I read somewhere in the Interwebs that an English muffin requires a softer, scoopable dough, almost a batter, in order to achieve proper nooks and crannies. Yet I don't see how a batter could ever achieve the kind of mouth feel that a dough made with bread flour possesses.

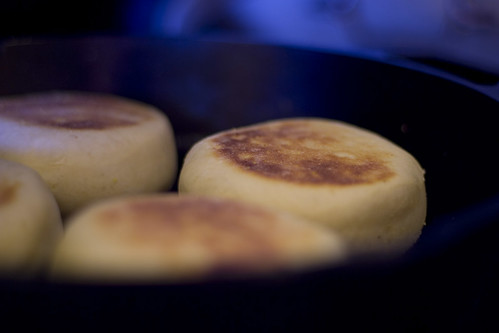
So, here I am with my almost-but-not-quite-perfect recipe. I am not entirely satisfied, and I will keep looking (and baking). All in all, though, this is actually a very good recipe, so I'll post it below the fold. It doesn't have the hoped-for nooks and crannies, but it toasts up beautifully and takes butter nicely, so I suppose my complaints are only aesthetic. And it really is satisfying to plop little rounds of dough down onto a skillet (cast iron or otherwise) and watch them puff up and brown into beautiful little muffins. I haven't been this excited about breakfast in months.

English muffins cooking


English muffins

Makes about two dozen

Ingredients

  • 5 to 5 1/2 cups bread or all-purpose flour, approximately
  • 2 packages dry yeast
  • 2 tablespoons sugar
  • 1 teaspoon salt
  • 1/2 cup nonfat dry milk
  • 1 1/4 cups hot water (120-130F, or 50-55C)
  • 3 tablespoons butter, room temperature
  • 1 egg, room temperature
  • Cornmeal for dusting

Directions

  1. Combine 3 cups of the flour and the other dry ingredients in a large bowl, or the bowl of an electric mixer, and stir to blend.
  2. Mix the butter with the hot water, and stir until the butter has melted. Pour the mixture into the dry ingredients.
  3. If you are using an electric mixer, attach the mixer's flat beater and beat for 2 minutes. If you are mixing by hand, grab your favorite wooden spoon and beat for 150 strokes, resting as necessary to keep your arm from falling off.
  4. Add the egg and beat to combine.
  5. Gradually stir in the remaining flour by 1/4-cupfuls, stopping when you have a rough, shaggy mass of dough.
  6. If you are using a mixer, remove the flat beater and change to the dough hook. Keep mixing; the dough should clean the sides of the bowl nicely and move in a ball with the hook. If you are working with your hands, turn the dough out onto a clean, floured surface and knead until the dough is smooth and elastic. Clayton says it should feel "alive under your hands." Add sprinkles of flour as necessary to keep the dough from sticking, and knead for 10 minutes.
  7. Place the dough in a large, lightly greased bowl, and turn to coat. Cover the bowl with plastic wrap and let the dough rise at room temperature until doubled in size, approximately 1 hour.
  8. When the dough has risen, punch it down and then knead it for about 30 seconds. Let it rest for another 10 minutes.
  9. Meanwhile, clean the work surface and sprinkle it with cornmeal. Turn the dough out onto it, and roll the dough out to 1/4-inch thick. If it resists rolling and shrinks back, allow it to rest for a couple of minutes before continuing. Use a 3-inch cookie or biscuit cutter to cut the dough into rounds.
  10. Sprinkle the work surface once again with cornmeal. Cover the rounds of dough with a clean towel, and allow them to rise until they are doubled in height, about 45 minutes.
  11. There are three ways to cook these muffins: electric griddle, old-fashioned stovetop skillet, and oven. If using an electric griddle, heat it to 325F/165C. If using a skillet, I found that using my cast iron skillet on medium and low heat worked best. If using an oven, preheat it to 420F/215C.
  12. On the stovetop (griddle or skillet): cook the muffins for 2 minutes per side. You do not want them to cook too quickly, so avoid the hottest part of the cooking surface, and rotate them if necessary to ensure even browning. Reduce the heat and cook for a further 6 minutes per side. Be careful not to scorch them. In the oven: bake the muffins on a sheet pan for 6 or 7 minutes, then turn them over and bake for another 8-9 minutes for 15 minutes total.
  13. Let the muffins cool on a rack before toasting.

Notes

  • The muffins freeze well for a few months.

There's more...

Wednesday, May 27, 2009

Sweet treats for an anniversary

Roses (II)

This week marks four years since the Suitor first came a-courtin'. Usually we don't do much to celebrate--or anything, really--but in a break with our non-observance of previous years, this year we decided to do something about it. Or rather, I did, and he went along with it.

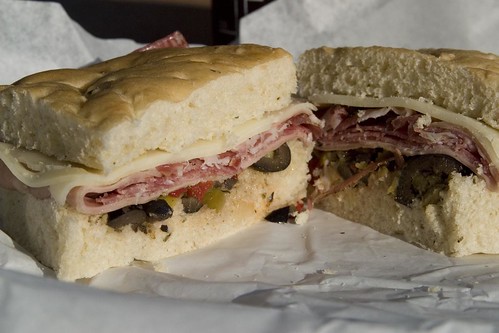
Which is not to say that the Suitor was entirely absent from the process, and in fact he was the one who suggested what we ended up doing. We met in New Orleans (at a physics confererence--nerd love FTW!), so the Suitor's idea was that we recreate, more or less, one of the meals we had there. The obvious choice--obvious because it was the most easily mimicked--was our lunch of muffulettas and Pimm's cups at Napoleon House.

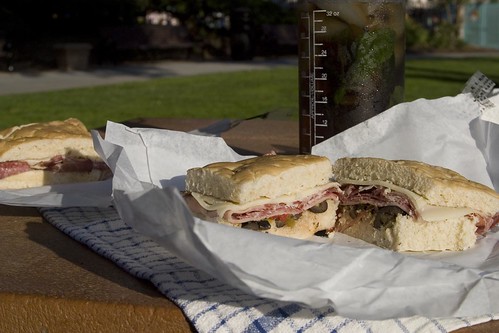
This being a weeknight affair, we had the sandwiches made at a local Italian deli using ingredients that were as close as possible to the "real thing." The muffuletta might be best known stateside as a sandwich from New Orleans, but in fact it's a type of bread from Sicily, and only came to be known as a sandwich because of the Sicilian immigrant who first served it at a New Orleans grocery store. The ingredients are more or less typical Italian charcuterie, so we were able to recreate the sandwiches to a fairly good approximation.

SandwichDinnerPimm's

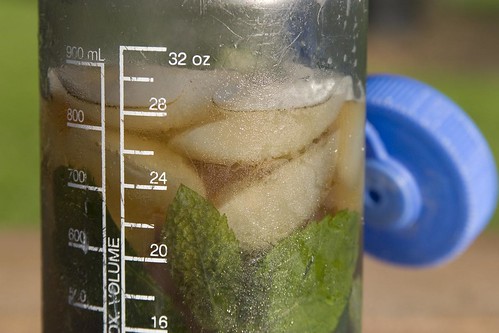
The idea was that we would take our sandwiches and drinks and enjoy them at a park a few blocks away from our house, and that's exactly what we did. And yes, that's a Pimm's cup in a Nalgene bottle. 'Cause we're classy like that at the Beyond Ramen household. (I promise, when I drink them at home I use a highball glass like I ought to do.)

Of course, being the way I am, I couldn't let the date pass without making some sort of celebratory mess in the kitchen, and this is where we get to the really fun part:

Beignets (I)

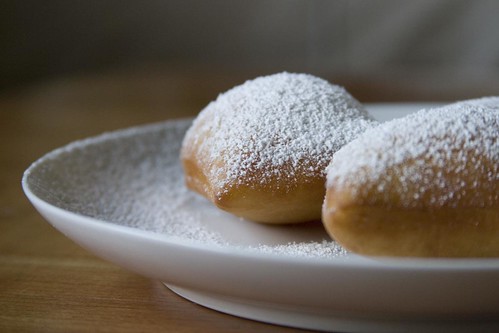
Those, friends, are beignets: delicious bits of dough fried until puffed and browned, and then covered in a blizzard of confectioner's sugar. They're really just doughnuts, and technically the word "beignet" can be used to describe a variety of fried, doughy pastries, sweet or savory, with or without filling. But for me, and I suspect for a lot of people, the word conjures up not meat-filled pastries, but the simple, ethereal deliciousness of the plain sweet ones.

Unsugared beignets

And as it turns out, they're remarkably easy to make. All you need are a several hours' lead time, a frying/candy thermometer, and the guts to work with oil that's hovering around 360F/180C. Got those? You're all set, so see below the fold for some ingredients and instructions.


Beignet dough

Beignets

Adapted from The Gumbo Pages
Makes about 2 - 2 1/2 dozen beignets

Ingredients

  • 1.5 teaspoons active dry yeast (about half of one packet, or a little more than half)
  • 3/4 cups warm water (100-115F or 38-46C)
  • 1/4 cup sugar
  • 1/2 teaspoon salt
  • 1 large egg, lightly beaten
  • 1/2 cup evaporated milk
  • 3 1/2 cups flour, approximately
  • 2 tablespoons vegetable shortening
  • oil for deep frying
  • confectioner's sugar for dusting

Directions

  1. Pour the water into a large bowl. Add about a teaspoon of the sugar, sprinkle in the yeast, and stir to combine. Let it sit for about 10 minutes, until it's slightly foamy on top.
  2. Add the remaining sugar and the salt, egg, and evaporated milk, and whisk to mix thoroughly.
  3. Add about 2 cups of the flour and, using a wooden spoon, beat until the mixture is smooth and uniform.
  4. Add the shortening in small pieces, and beat until it's well incorporated.
  5. Add more flour in 1/3 cup increments and beat the dough until it forms a soft, sticky dough.
  6. Flour a clean work surface, and turn the dough out onto it. With floured hands, gently knead the dough a few times, then place the dough in a greased bowl. Cover with plastic and refrigerate for at least four hours, or overnight. The dough should roughly double in size.
  7. When you and the dough are ready to proceed, pour the oil into a medium pot to a depth of a few inches, and affix a candy or frying thermometer to the side of the pot. (The sensitive bit of the thermometer should not touch the side or bottom of the pot.) Set the pot over high heat; you want the oil to reach 360F/180C for the frying.
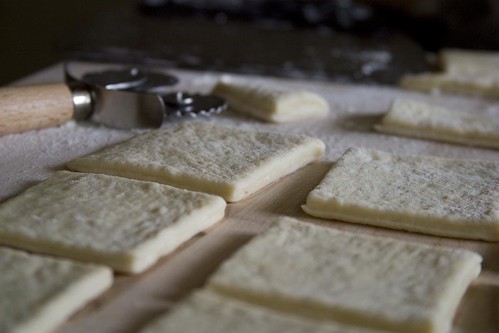
  8. Meanwhile, flour a work surface, turn out the risen dough, and divide the dough roughly into quarters. Roll out one of the pieces of dough to a thickness of 1/8 inch, and then cut it into rectangles 2 1/2 inches by 3 1/2 inches (or as desired). A pizza cutter works well for this task, as does a pastry wheel or even just a sharp knife. Don't worry if you have some irregular pieces; fry them up anyway, and either serve them with the perfectly shaped ones or--my preference--nibble on them while you work.
  9. Line a large plate or platter with a few layers of paper towels, and place it near the frying pot.
  10. When the oil has come to temperature, add 3-4 pieces of dough. Don't add more, or the oil temperature will drop too fast. Adjust the heat as necessary to maintain the right temperature. This might take some practice, so if you are concerned about presentation, I recommend frying the irregular ones first until you get the hang of it.
  11. The beignets will rise to the surface relatively quickly, even before they start to puff. Turn them a few times as they cook, starting when they just appear puffed throughout the area (rather than only at the edges). This turning will ensure that the beignets don't puff out too much on one side.
  12. When the beignets are golden brown on both sides, use a slotted spoon or spider to remove them to the paper towel-lined plate. You can hold them at room temperature or place them in a 200F/90C oven until you have finished with the frying.
  13. Serve dusted with powdered sugar, lightly or heavily as desired.

Notes

  • This recipe makes quite a few beignets (and this is half the original recipe), so don't feel bad if you don't want to use all of the dough at once. The dough keeps, covered and refrigerated, for up to 1 week.
  • You can also cut out the beignets and store them in the freezer, in an airtight container and separated by layers of waxed paper, until you're ready to use them.


Mmm, tasty


There's more...

Sunday, April 6, 2008

A Fine Breakfast

Homemade orange marmalade and toasted homemade oatmeal bread.

There's more...

Saturday, February 2, 2008

Joyeux chandaleur!

Today is la chandaleur, or crêpe day! Make yourself some delicious French pancakes! I am enjoying mine with a squeeze of Meyer lemon juice and a sprinkling of sugar. Later this evening, if there are any left over (which is by no means a sure thing) I might splurge a bit with some banana and Nutella. To inspire you (as if you needed any more inspiration than the thought of warm, delicious crêpe goodness) I give you the following fun little video. It's Scottish rather than French pancakes, but I'm sure they taste good just the same.

There's more...

Thursday, January 17, 2008

Granola goodness

One of my favorite breakfasts is yogurt with granola mixed into it. Something about it just feels like a good start to the day. But I'm picky about my granola, and for what felt like ages I muddled through with sub-par stuff simply because I couldn't find a kind that I liked. Well, until a few years ago, when Katie's mom made me a batch of the Best Granola Ever and gave me the recipe (giving a girl a fish AND teaching her how to fish is really the best deal). I've tweaked it ever so slightly--mmm, flax seeds--but this is pretty much the same recipe she gave me. I keep it in a gallon-size ziploc bag in the pantry, and always go through it before it goes bad. I recommend 1/3 cup of it mixed in with a single-serving container of peach yogurt. Yummy.


Granola

4 1/2 cups rolled oats (NOT quick-cooking)
1 cup toasted wheat germ
1 cup unsalted sunflower seeds
2 cups chopped, slivered, and/or sliced almonds (this time I used a combination of slivered and sliced)
1/4 cup sesame seeds
1/4 cup flax seeds
1/2 cup unsweetened shredded or flaked coconut
1/2 cup brown sugar, firmly packed
1/2 cup neutral-tasting oil (I used coconut, but you could use any neutral salad oil)
1/3 cup honey
1 tsp. almond extract (I didn't have any this time around, and the granola still tastes great without it)

Preheat oven to 325F. In a large bowl, combine the first 7 ingredients; set aside. In a small pan, combine the brown sugar, oil, and honey. Stir over medium heat until mixture boils. Boil for 2 minutes. Remove from heat and stir in almond extract. Pour over dry ingredients and mix thoroughly.

Spread mixture evenly in 2 large baking pans. Bake, uncovered, for 25-30 minutes, or until golden. Stir several times while cooking. Makes 9-10 cups.

There's more...

Sunday, October 28, 2007

Omelet success!!!

Well, after spending all week frustrated by my failure last weekend to produce an omelet that both tasted AND looked good, I was determined to try again. I didn't buy a new pan, and I didn't even take the Suitor's old nonstick pans out of the garage.

What I did do was this:

1) Heat the pan not for a specific length of time, rather until until I observed the Leidenfrost effect (where little beads of water skitter across the pan for several seconds before eventually evaporating away), before adding the butter. Yes, I should have been doing this in the first place. Bad chef, bad.

2) Use not only more butter (~1.5 T.), but melted butter, so as not to lower the temperature of the pan too much when I put the butter in the pan.

3) When agitating the egg in the pan to produce a soft curd, I didn't touch the bottom of the pan with the spatula, I left that layer intact. It occurred to me a few days ago (yes, I've been thinking about this all week) that by breaking up that layer, I might be introducing uncooked egg into an area that didn't have enough fat to keep it from sticking to the pan.

The result: well, I don't have a picture of it--I was so thrilled that I took it straight to the Suitor with a triumphant "victory is MINE!!" But trust me, it was perfect. No sticking, no tearing, and plated beautifully in thirds. Score!!!

There's more...

Tuesday, October 23, 2007

Omelet question

I don't like eggs. I never have, and I probably never will. Until recently, even the smell of scrambled eggs or omelets cooking was enough to make me lose my appetite (and almost more). So when I was starting to get into cooking, I never bothered to learn how to make eggs: scrambled, poached, sunny-side-up, omelets, I wouldn't touch them with a ten-foot pole. But this weekend the Suitor was recovering from laser eye surgery, and I wanted to make him breakfast. His favorite breakfast fare: omelets.

So I did plenty of reading, watched the Good Eats episode on omelets, took plenty of notes, and felt more or less ready. Couldn't be that hard, right? And in truth, making an omelet isn't hard. I warmed the eggs in hot water for five minutes to allow them to cook faster, I added a bit of milk to the beaten egg to make it fluffier, I made sure all the fillings were cooked and at room temperature (or heated), and I didn't have any trouble finding the balance between not browning the outside too much and allowing the inside to cook enough. And when all was said and done, the Suitor proclaimed my omelet very tasty and well cooked.

My problem is in presentation. Now, maybe this will just take practice, but the whole folding-in-thirds thing? Yeah, didn't work out so well, mostly because the egg tore. I made two omelets for him, one Sunday and one Monday, and both of them tore. The second one tore less catastrophically, but it still tore. Does anyone out there have experience making omelets and/or have any advice on how I can avoid future tears? I assume that, like "ride more," "make more omelets" is a large part of the answer, but if there's anything I'm doing wrong, I'd love to fix it.

There's more...

Sunday, October 21, 2007

Baked Apple French Toast

This is loosely based on a recipe for Lemon-Raspberry French Toast Strata that appeared in Bon Appetit in March 2007, as well as a couple of other recipes that turned up in some googling. I had some good, crusty bread that was going stale and needed to be used up, so I thought first of French toast (which I love). But since I was going to be making an omelet for someone at the same time, I wanted to do something that could be made ahead and stuck in the oven at the appropriate time. Hence the French toast strata recipe. Raspberries being out of season, and apples being very much in season, I thought I'd tweak things a bit. Or a lot. One of the best things about this recipe is that you put it together the night before you want to eat it, and in the morning, all you have to do is stick it in a preheated oven. If you prepare it the same morning you bake it, it should still be fine, but do let it rest as long as possible before baking--you want to allow the bread to soak up the egg-milk mixture.

A note about the ratio of liquid to bread. Because this recipe is something of a mishmash of a few recipes, and because the dish I used was a different size from what was used in the other recipes, I estimated when figuring out how much milk, egg, and bread to use. The ratio I used (I did, in fact measure the quantities I actually used) makes for a slightly dry, crunchy top. I like the contrast between the crunchy top and the custardy interior, but if you prefer it more uniform, you could add an extra egg yolk and/or some more milk.

Baked Apple French Toast
Serves 3-4

1 medium-sized apple, peeled, cored, and cut into 1" pieces (about 3/4 cup)
1 T butter, plus more to spread in baking dish
1 cinnamon stick, broken into two pieces.
6-8 whole cloves
4-6 whole allspice
2-3 T raisins, as desired
4 cups slightly stale bread, cut into 1" cubes
2 whole eggs
1 egg yolk
1 cup milk (I used skim)
1/4 tsp. salt
3 T maple syrup, or enough to coat the bottom of the dish, plus extra for serving.


Heat butter in a small skillet over medium-high heat and when foam subsides, add the cinnamon stick pieces, the cloves, and the allspice. Cook them until they become very fragrant, about 30-60 seconds, and add the apple pieces. Mix and/or toss to coat them with the butter. After a minute or so over medium-high heat, turn the heat down to low and cook until they are very tender. The amount of time this takes will depend on the variety of apple you used, so pay attention to them. When they're done,turn off the heat, remove the spices, and stir in the raisins. Combine in a large bowl with the bread cubes, and set aside.

Combine milk, eggs, egg yolk, and salt in a small bowl, and whisk to blend. Pour it all over the bread cubes and apple mixture, stirring or tossing to moisten the bread evenly. Butter a one-quart baking dish, and pour in the maple syrup, tilting the dish so that the syrup coats the bottom. Dump the bread mixture into the dish, pressing on it lightly. Cover with plastic wrap and refrigerate overnight to allow the bread to soak up the milk-egg mixture.

When you're ready to bake, preheat the oven to 350. Bake the pudding until golden brown and slightly puffed, 45 minutes. Let cool for 5 minutes, and serve with extra maple syrup on the side.

There's more...

Sunday, April 29, 2007

"Oh #&@%!" coffee cake

I woke up in the mood for some sort of delicious baked good this morning, and I have some plain yogurt and buttermilk on hand, so I did a quick search for some sort of coffee cake using either the yogurt (which I often substitute for sour cream in baked things) or the buttermilk. Found a recipe (yes!), made sure I had all the ingredients (yep), and set about making it.

But I read the recipe wrong, and also misjudged how much yogurt I actually had, so I ended up improvising a bit. I also modified the streusel topping. Here, with the steps cleaned up a bit, is the recipe.

For the streusel topping:

1/3 cup dark brown sugar
1/4 cup granulated sugar
1 teaspoon ground cinnamon
1/4 teaspoon ground cloves
1/2 cup flour
1/4 cup butter
1/4 cup walnuts, chopped

Combine sugars, spices, and flour in a medium bowl. Using a pastry blender or two knives, cut the butter into the dry ingredients until well blended (the pieces of butter should be no larger than small peas, but the mixture need not be entirely uniform). Mix in the chopped walnuts and set aside--and try not to nibble on it too much as you make the cake.

For the cake:

2 cups unbleached all-purpose flour
1 teaspoon baking soda
1/2 teaspoon salt
1/8 teaspoon freshly grated nutmeg
3/4 cup + 2 tablespoons unsalted butter, plus a bit more for the pan, at room temperature
1 cup sugar
2 large eggs, room temperature
3/4 cup plain yogurt (can use sour cream if that's what you have on hand)
2 oz. cream cheese, room temperature
1 1/2 teaspoons vanilla extract

Preheat the oven to 350F. Take out either a 9x9 square baking dish or a 9" round cake pan (make sure the cake pan is at least 2" deep, as the cake will rise) and brush it thoroughly with butter. Whisk together the flour, baking soda, salt, and nutmeg in a medium bowl. Set aside.

In a large bowl, either with a stand mixer (paddle attachment) or a hand mixer, cream together the butter and sugar. Add the eggs one at a time, until well blended, and then add the vanilla. In another bowl whisk together the yogurt and cream cheese. Add the dry and wet ingredients to the butter mixture by turns, beginning and ending with the dry (3 additions for the dry ingredients, two for the wet). Don't overbeat.

Spread the batter into the prepared pan and top with the streusel mixture. Bake the cake for an hour and ten minutes, or until it is golden brown and passes the toothpick test. Cool slightly before serving.


... And as requested by Sir Robin:

Mmm, breakfast...

There's more...

Wednesday, September 28, 2005

Whole-wheat banana pancakes

Katie's mom, Nancy, made these when Steve and I were down at Grey Rock this weekend. They were awesome, and I just had to share her recipe. Apparently she's in the process of putting all her recipes online, so I'll link to it when it's available, but for now:

Whole-wheat banana pancakes

2 - 3 bananas
1 egg
1 c. buttermilk
2 T melted butter or salad oil -- optional
1/2 c. all-purpose flour
1/2 c. whole-wheat flour
1 t. baking powder
1/2 t. baking soda
1/2 t. salt

Puree one banana in a food processor. Add the egg, buttermilk, and (if using it) the butter or salad oil and mix. Add the dry ingredients and pulse just until combined.

Grease a skillet over medium or medium-high heat and pour out a little bit of batter per pancake. Slice up the remaining banana(s) and place slices over batter, adding a little more batter to cover. Proceed as for normal pancakes.

Nancy served these with goat's milk yogurt and homegrown raspberries (delicious), but the traditional maple syrup works, too!

There's more...