Showing posts with label Make-Ahead. Show all posts
Monday, March 15, 2010

Chocolate cream pies for Pi Day

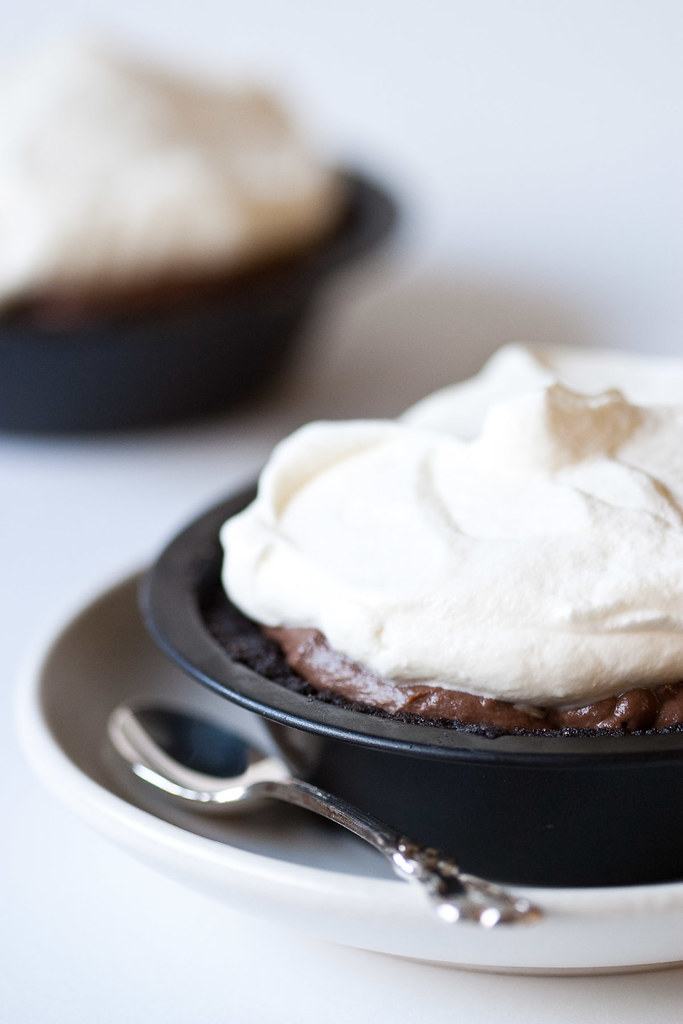
Miniature chocolate cream pies

Please allow me to brighten up this historically ill-fated day for you. Chocolate! Cream! Pie! Pi!

Wait, what?

Yesterday* was 3/14, Pi Day, that under-appreciated holiday on which we gather together to eat pie and give thanks for our ability to calculate the area of a pie plate. Well, maybe you don't. But even if you don't care much about the math, I think we can all agree that an excuse to eat pie is worth celebrating.
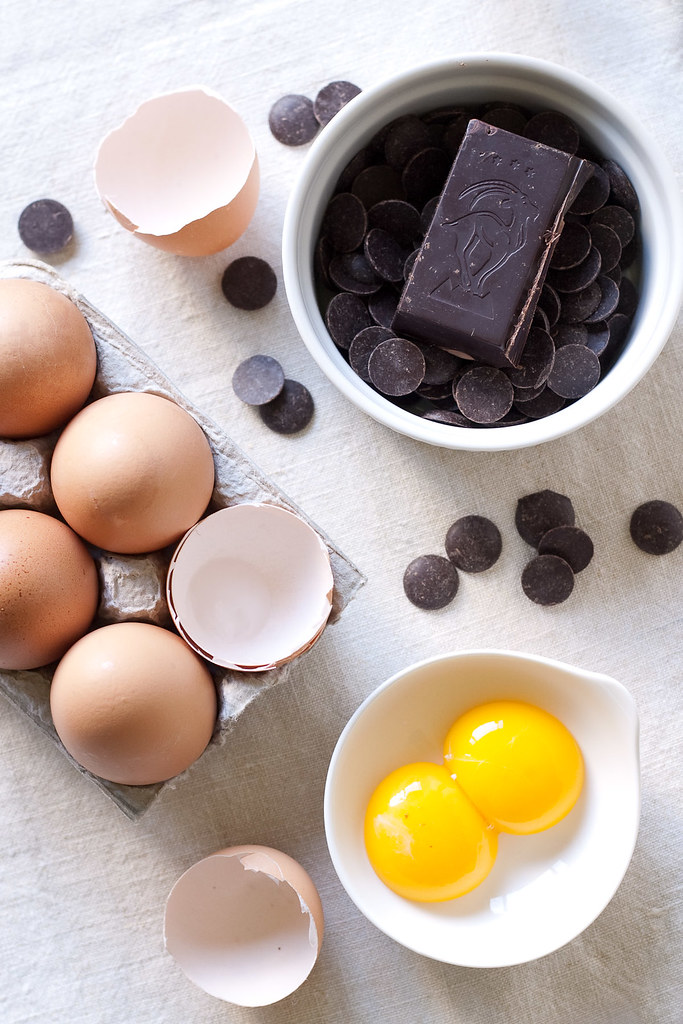
Ingredients

Unlike with some pies, there's really no way to convince myself that chocolate cream pie is good for me. It consists entirely of cookies, butter, pudding, and cream, so there's no getting around it: this is one of those desserts you can't justify making for anything other than a special occasion. I've been waiting months for a good excuse to make it, so when someone reminded me that Pi Day was coming up, it didn't take me long to decide. Chocolate cream pie was the one.
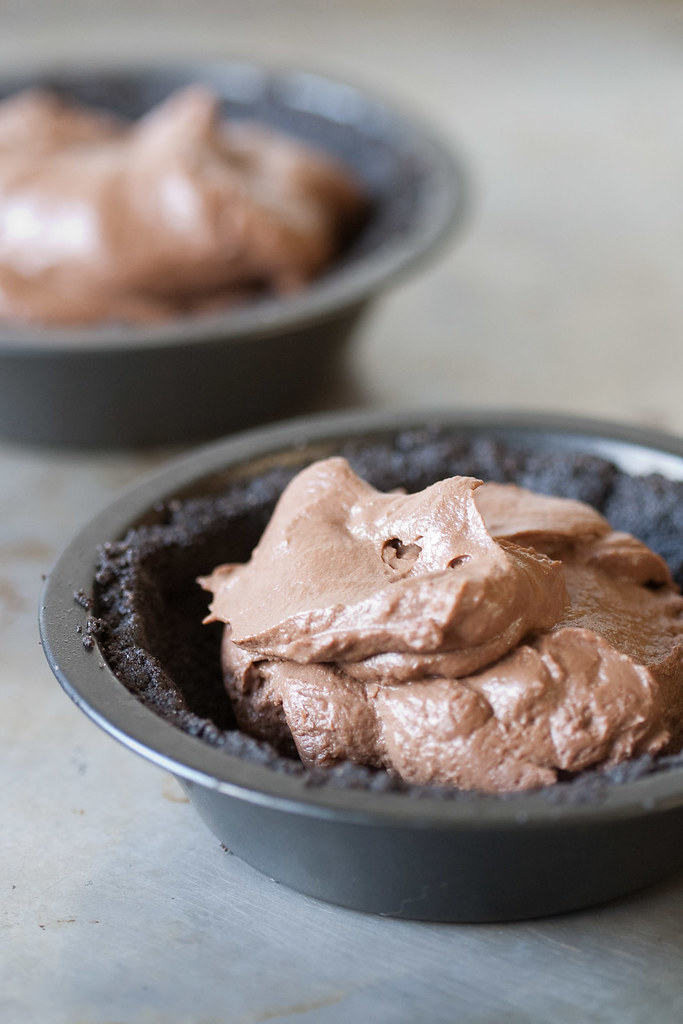
Filling

And what a pie it is. A pulverized chocolate cookie crust, chocolate pudding for filling, and whipped cream to top it all off. What's not to love? No doubt about it, this pie will turn your frown upside down.

Even the preparation will elicit a smile, especially from those for whom success with traditional pie crusts remains elusive. You'd have to try hard in order to overwork this crust, which comes together quickly and is simply pressed into place. The only aspect of the pie that might give one pause is the pudding. To that I say: arm yourself with a whisk and a sieve, and all will be well. By the time you've finished, you'll realize that the hardest part is being patient enough to let it chill for six hours before you dive in.
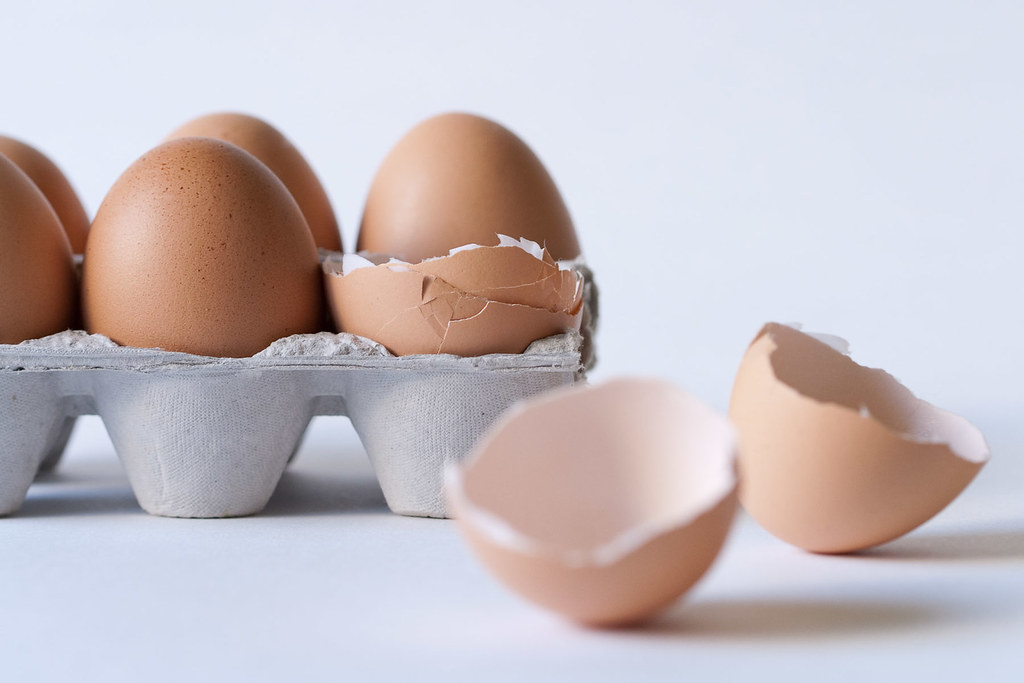
Eggs and shells

Hungry for more Pi Day fun? Head on over to Amy's, where fall flavors made a guest appearance for this late winter celebration. Did you make a pie for Pi Day? Please share with us in comments!
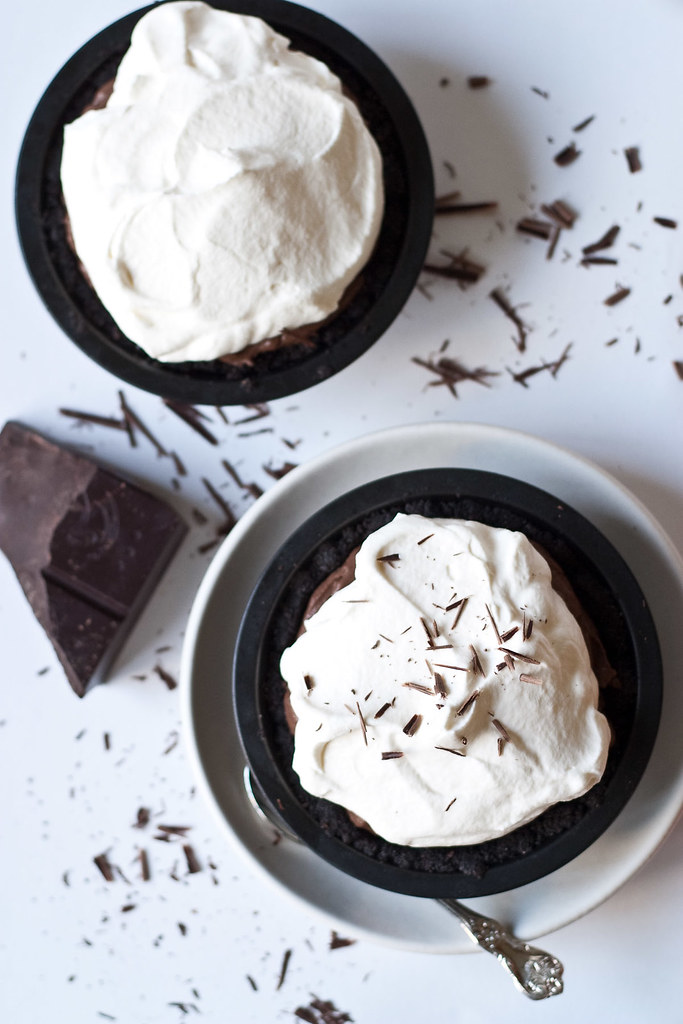
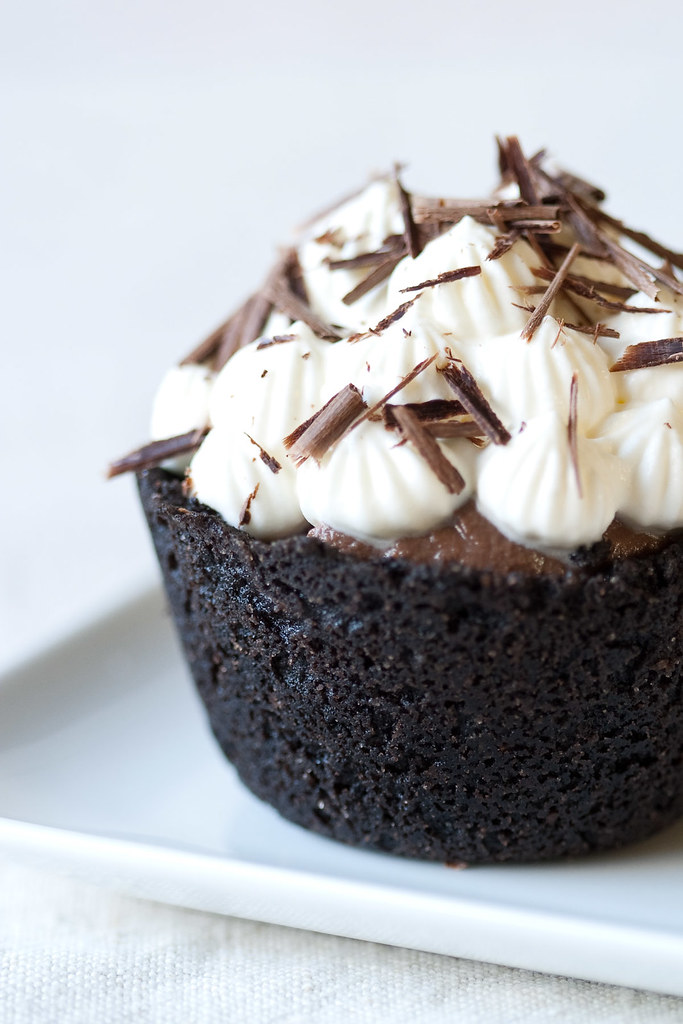
Chocolate cream pies for Pi DayMicro-mini pie

Chocolate Cream Pie

Makes one 9-inch pie, or a few smaller ones

Ingredients

For the crust:
  • 1 1/3 cups chocolate wafer crumbs
  • 5 tablespoons unsalted butter, melted
  • 1/4 cup sugar
  • Dash of cinnamon (optional)
For the filling:
  • 2/3 cup sugar
  • 1/4 cup cornstarch
  • 1/2 teaspoon salt
  • 4 large egg yolks
  • 3 cups whole milk
  • 5 ounces bittersweet chocolate (not unsweetened)
  • 2 ounces unsweetened chocolate
  • 2 tablespoons unsalted butter, softened
  • 1 teaspoon vanilla
For the topping:
  • 3/4 cup heavy cream, cold from the fridge
  • 1 tablespoon sugar

Directions

  1. Place an oven rack in the middle position, and preheat the oven to 350/175C.
  2. Combine the cookie crumbs, butter, sugar, and ground cinnamon (if using) in a bowl and stir until uniformly mixed. Pour the mixture into a 9-inch pie plate, pressing on the bottom and sides of the dish to compact the mixture into an even crust. Bake the crust for about 15 minutes, or until crisp, then set on a rack to cool.
  3. Meanwhile, place the two chocolates in a large, heatproof bowl and place over a pan of barely simmering water (the bowl should not touch the water). Stir the chocolate continually until it is melted and smooth. Remove the bowl from the heat, place a fine mesh sieve over the bowl, and set aside.
  4. In a medium bowl, whisk together the egg yolks, sugar, cornstarch, and salt until thick.
  5. Heat the milk in a heavy 3-quart saucepan until just simmering. Ladle some of the milk into the egg mixture, whisking vigorously, to temper the yolks. Once the tempered mixture is smooth, pour it into the pot with the rest of the milk, whisking as you go.
  6. Cook the custard, whisking constantly, until it thickens and reaches reaches a boil. Turn the heat down slightly and cook, still whisking, for another minute.
  7. Pour the thickened custard through the sieve into the chocolate. You might need to help it along with a spatula. Whisk the chocolate and custard together until they're evenly mixed, then add the vanilla and the softened butter, and whisk to incorporate. Butter a piece of waxed paper and place it, buttered side down, on the surface of the custard. Let cool completely, roughly 2 hours.
  8. Spoon the chilled filling into the prepared crust, then loosely cover the pie and place it in the fridge to chill for at least 6 hours, or up to 1 day.
  9. Just prior to serving, place the cream and sugar in a large bowl and beat just until the stiff peak stage. Spoon the whipped cream on top of the pie, and serve.

Notes

  • Make-ahead: as noted in the recipe, the pie can be made and filled (but not topped) up to 1 day ahead.
  • If you'd like to reduce the amount of sugar in the filling, go ahead. I wouldn't cut it by more than half, though.

* Yes, I'm a day late with this, and here's why. I dare you to be annoyed with that face.
There's more...

Monday, March 8, 2010

How I learned to love sweet potatoes

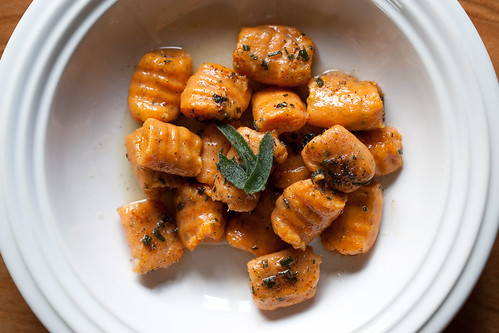
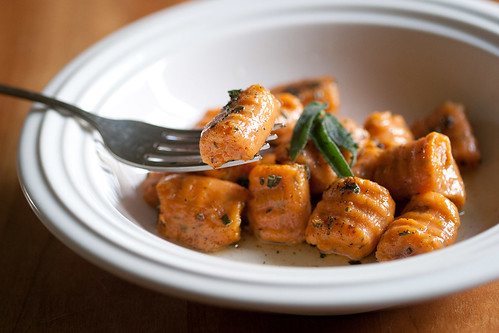
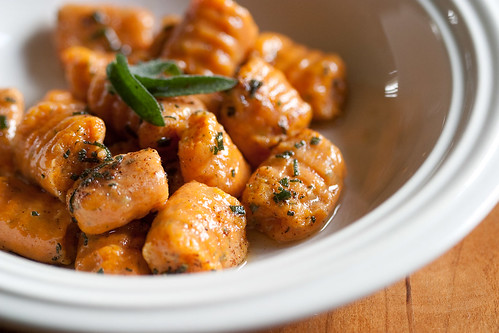
Sweet potato gnocchi with sage and brown butter

Somewhere in my past, I got off to a bad start with sweet potatoes. This is no great surprise: after all, I got off to a bad start with a lot of vegetables. But unlike with most other vegetables, I only overcame that bad start recently--as in, a few months ago rather than a few years ago.

And it's silly, isn't it? I don't know if I ever actually tried many sweet potato dishes before before digging in my heels about them. I don't even know what it was (is?) I didn't (don't?) like about them. I just had it in my head that they were... you know... ick.

Gnocchi

Well, all that's changed, and I have Wendy to thank for it. The recipe that changed my mind, a sweet potato gnocchi with sage and brown butter, was Wendy's contribution to the inaugural round of the Cross Country Cooking Parade (CCCP) recipe exchange. In the CCCP we each submit one savory and one sweet recipe, we make all eight of the recipes, and we share with each other our thoughts on the recipes and the results.

One of the ideas behind the CCCP is that we'll be encouraged to cook foods that we might be hesitant to try, and I'm thrilled that I'm already benefitting from it. These gnocchi have not only revived my faith in my gnocchi-making abilities, they've sold me on sweet potatoes. Even if this is the only sweet potato dish I ever make, I'll be perfectly content, because I'm not sure how anything else involving sweet potatoes is going to top it. That's probably due at least in part to the fact that they involve a sage brown butter sauce, but really, they made a convert out of me even before I tossed them in the butter.

From the top

I suppose they fall under the "time consuming" label, but to be honest, they didn't feel like a lot of work. The sweet potatoes can be roasted a little while ahead of time, and roasting them is no trouble at all if you already have the oven on for, say, baking yourself a buttery, flaky croissant for breakfast. (Seriously, remind me to gush about those croissants in another post and make you all green with envy.)

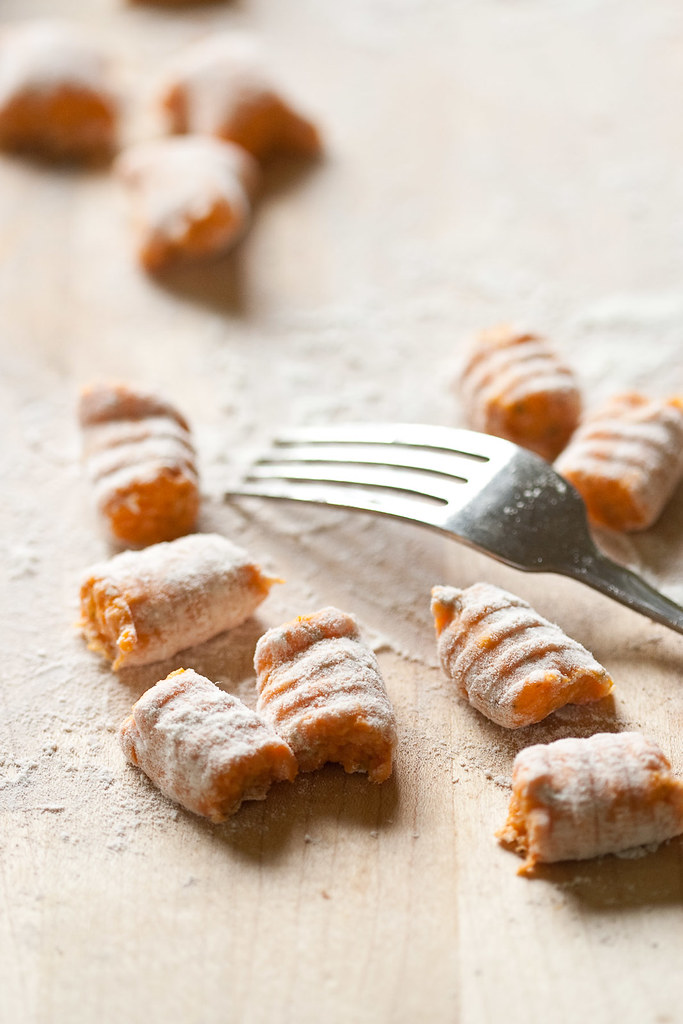
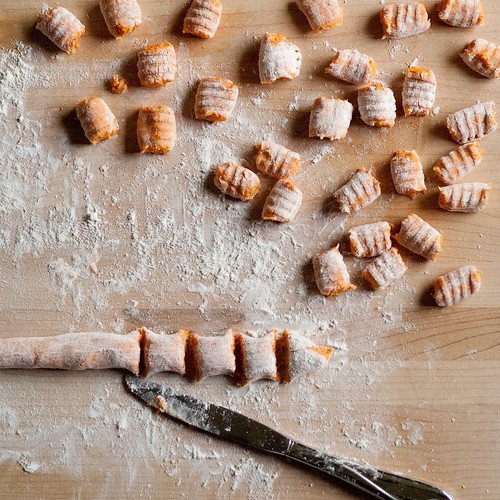
Once you're to the step of making up the dough, keep a light hand. The less you work the dough, the lighter and more pillowy the gnocchi will turn out, and the broader your smile will be when you finally sit down to eat them. (Or don't sit down, just eat them straight out of the pan in the middle of your kitchen. Who am I to judge?) In my experience--which, granted, has a sample size of only one--the dough is very soft and delicate, and sticky when bare, but not prone to absorbing additional flour. As a result, while you do need some extra flour while you're rolling and forming the gnocchi, you don't have to use a lot. One good dusting should be plenty.

Forming gnocchi

And speaking of plenty, a final note: the recipe calls for boiling the gnocchi for 10 seconds after they float to the top, and says that this should be about 5 minutes. Mine floated after 2 or 3, and, worried that they weren't done yet, I tried to let them cook the full 5 minutes. Big mistake--one that left me with a pot full of disintegrated gnocchi. If they float after 2 minutes, fine, that's plenty. Cook them for a further 10 seconds and get them out of the water. Then bathe them in brown butter and enjoy!

Bite

Sweet Potato Gnocchi with Sage and Brown Butter

Adapted from Marcella Hazan and The New York Times
Makes 6 servings

Ingredients

  • 1 1/2 pounds sweet potatoes
  • 1/2 cup all-purpose flour, sifted, plus up to 1/2 cup for kneading
  • 1/4 cup plus 2 tablespoons minced fresh sage
  • 1/2 teaspoon salt
  • 1 teaspoon freshly ground pepper
  • 1/2 teaspoon nutmeg
  • 1/4 cup grated Parmesan cheese, plus more for serving
  • 1/2 cup (1 stick) unsalted butter

Directions

  1. Preheat the oven to 350F/175C. Poke a few holes in each sweet potato to let steam escape, then place them on a baking sheet. Bake them until they're tender, about 45 minutes.
  2. When the potatoes are cool enough to handle, peel them and pass them through a ricer, or a food mill with a fine grate.
  3. Place the puree in a large bowl and add the flour, 2 tablespoons of the sage, the salt and pepper, and the cheese. Mix gently until just combined.
  4. Flour a work surface and scoop the dough out onto it. Dust the top and sides of the dough lightly with flour, and perhaps rub some flour between your hands so that they don't stick to the dough.
  5. Divide the dough into 6 equal pieces. Roll each piece under your palms so that it forms a long rope. [The original recipe says that the ropes should be about 1 inch wide and 20 inches long, but your mileage might vary.] Go ahead and sprinkle the dough with a bit of extra flour if it's sticking. Cut the rope into 1-inch segments, and roll each segment over the tines of a fork to form the characteristic indentations. (Use a gnocchi board if you're lucky enough to have one.) Collect the formed gnocchi on a baking sheet.
  6. When you've finished forming the gnocchi, bring a large pot of water to boiling and salt it generously. Drop several gnocchi into the boiling water (you'll need to work in batches so that you don't crowd the pot). Cook them for about 10 seconds after they rise to the surface. This could be only a couple of minutes, or up to five minutes. Use a slotted spoon to transfer the cooked gnocchi to a clean baking sheet, and cool completely.
  7. Place a large, heavy saucepan over medium-high heat and add the butter. Melt the butter and cook it, swirling occasionally, until the milk solids have turned a lovely chestnut color and smell nutty, about 5 minutes. If you plan to add fried sage leaves as a garnish, go ahead and fry them.
  8. Once the butter has browned, add the remaining chopped sage and turn off the heat. The mixture will bubble up, so don't be alarmed.
  9. Add the gnocchi to the sage butter, place over medium-high heat, and cook until the gnocchi are heated through, about 5-6 minutes. You might have to do this in batches, in which case it's useful to have the oven preheated to 300F/150C so that your earlier batches don't get cold. Divide the gnocchi and sauce among bowls, garnish with sage leaves (if desired), and serve.

Notes

  • Make-ahead: the gnocchi can be boiled up to 4 hours ahead, and kept at room temperature.
  • I haven't tried freezing these gnocchi, but based on this recipe I'm going to say go ahead and freeze them (prior to boiling) if you'd like to make them ahead of time and cook them later. Freeze them on a baking sheet, then transfer them to a zip-sealed plastic bag and freeze for up to 1 month. When you're ready to cook them, just dump them into the boiling water without thawing. They'll rise to the surface when they're done, just as with fresh gnocchi.
  • Wendy suggested, and I loved, a tart apple grated or cut into matchsticks and tossed with the gnocchi. I think it's a great variation.

There's more...

Wednesday, March 3, 2010

A different kind of post-op pudding

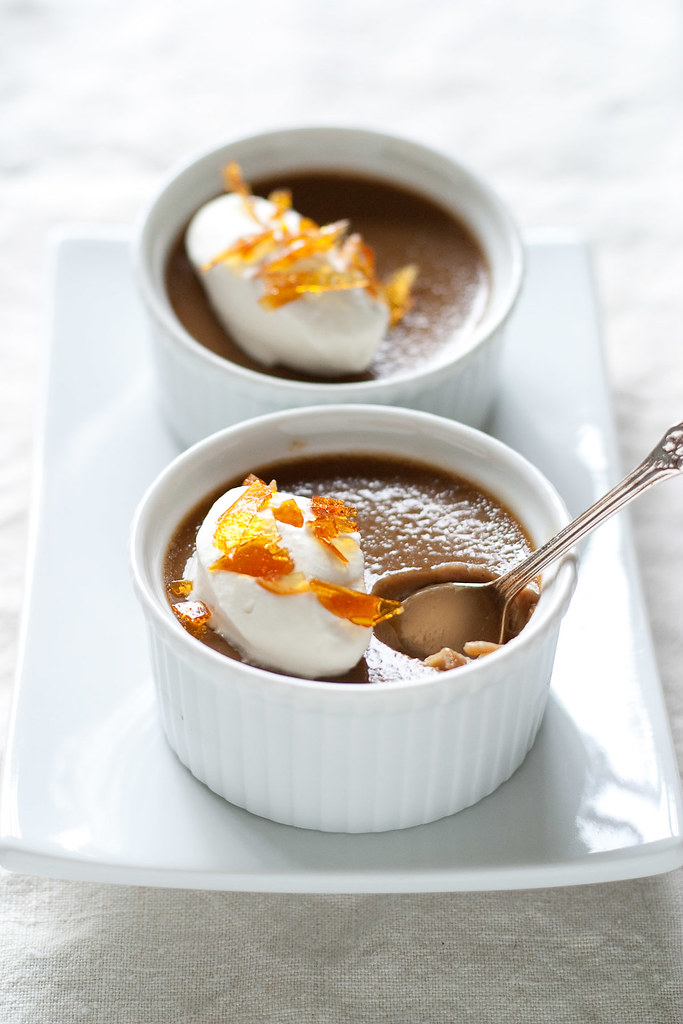
Butterscotch pots de creme

The last time we visited pudding, it was in preparation for a liquid diet after having a couple of wisdom teeth yanked. I'm happy to say that this post has nothing to do with wisdom teeth, and in fact nothing to do with oral surgery. What I'm not so happy to report is that it does have something to do with surgery, at least in some tangential way.

The Suitor, you see, is like a German Shepherd--or so his orthopedic surgeon tells him. As it turns out, he has hip dysplasia, and years of high-impact activities like running marathons have accelerated the inevitable deterioration of his hip. It was time for hip surgery. I'll spare you the gory details; suffice it to say that he avoided a full hip replacement, but he did need some work done.

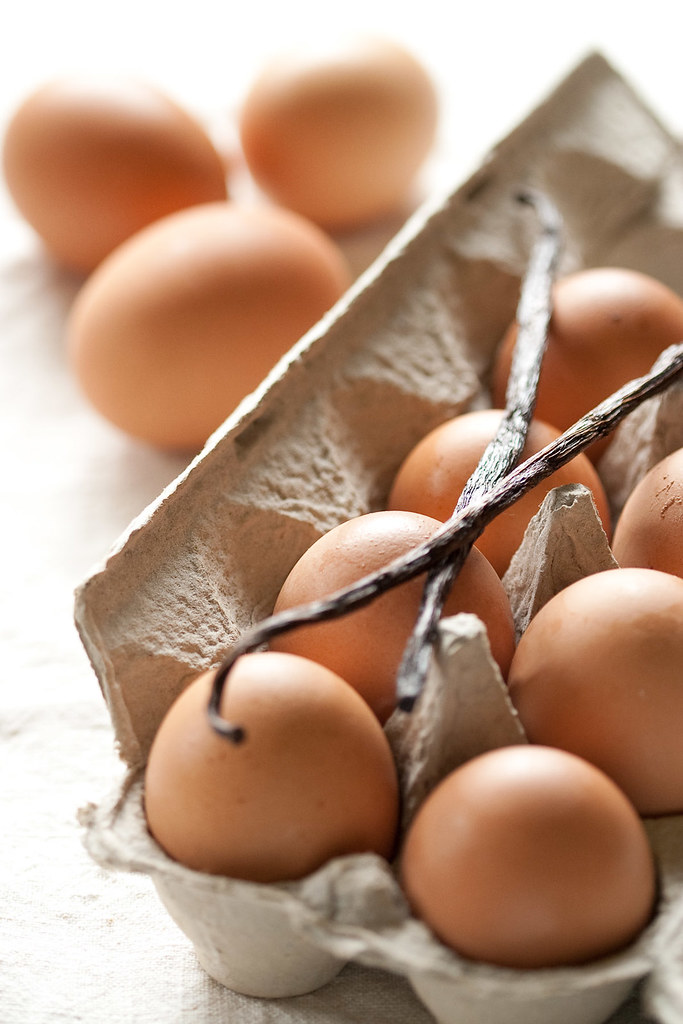
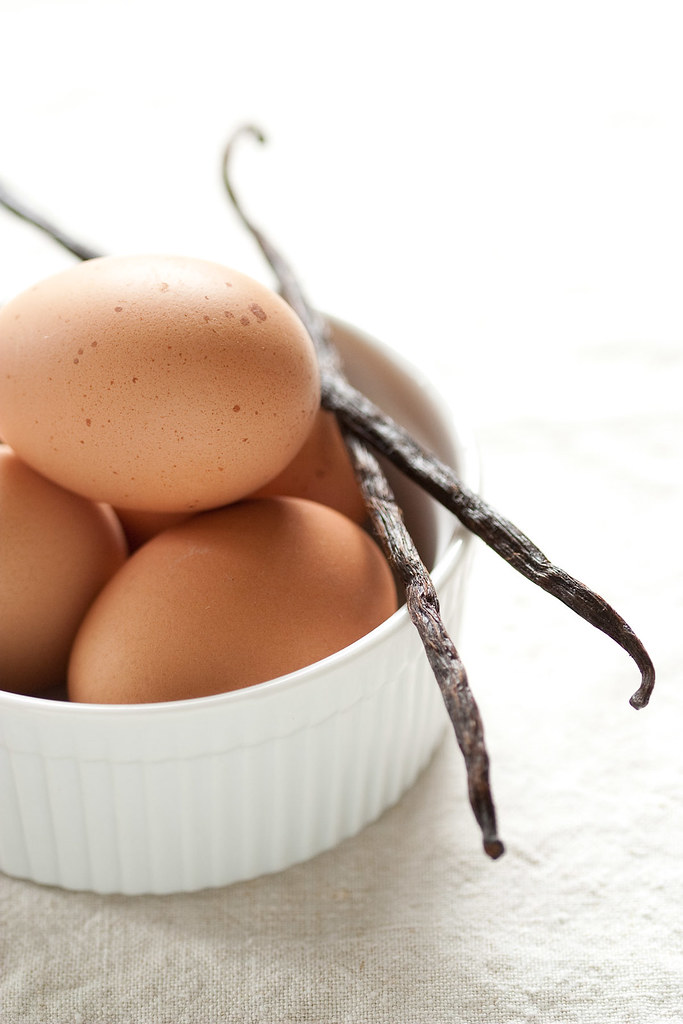
Eggs and vanilla beans

And work is what they did. The surgery went well, and the recovery is going well; but for the poor Suitor, surgery meant a return to the self-sufficiency of a toddler. If something was going to get done, I was going to be the one doing it--and that included everything from running errands to helping him in and out of his socks. Which, believe it or not, I have thoroughly enjoyed. For someone who doesn't have much interest in having kids, I sure do take to playing the mother hen.

Unfortunately, as pleasant as caregiving has been for the psyche, it was not what the doctor ordered for the clot-ridden lungs. According to my hematologist, my recovery is progressing at the normal pace; but that pace is a lot slower than I had anticipated, and until recently I haven't been up for much cooking or baking. (My parents were incredibly helpful, bringing over dinners for us, running errands, and so on.) But my lack of cooking in general didn't keep me from wanting to make myself a little treat for the calm moments when the Suitor was knocked out by the Vicodin and I could curl up for a rest on the sofa.

Eggs and vanilla beans

The trick, of course, was finding the right treat. Everyone has their favorite comfort foods, and specifically their favorite comfort desserts. I fall into two camps: when I'm feeling under pressure, sometimes the soothing familiarity of the creaming method brings me back down to earth, and I go for cookies or a cake of some sort. But when I feel like cozying up with a comforting dessert, I want pudding. And this time I wanted not chocolate pudding, but butterscotch pudding.

I first tried what was billed as a tried-and-true butterscotch pudding recipe. Despite my having every confidence in the source, I wound up underwhelmed. The texture was lovely, but the butterscotch flavor didn't exactly come out swinging. That's fine if you're going for subtle (and as subtle flavor goes, it was quite nice), but I wasn't. I was going for knock-out flavor.

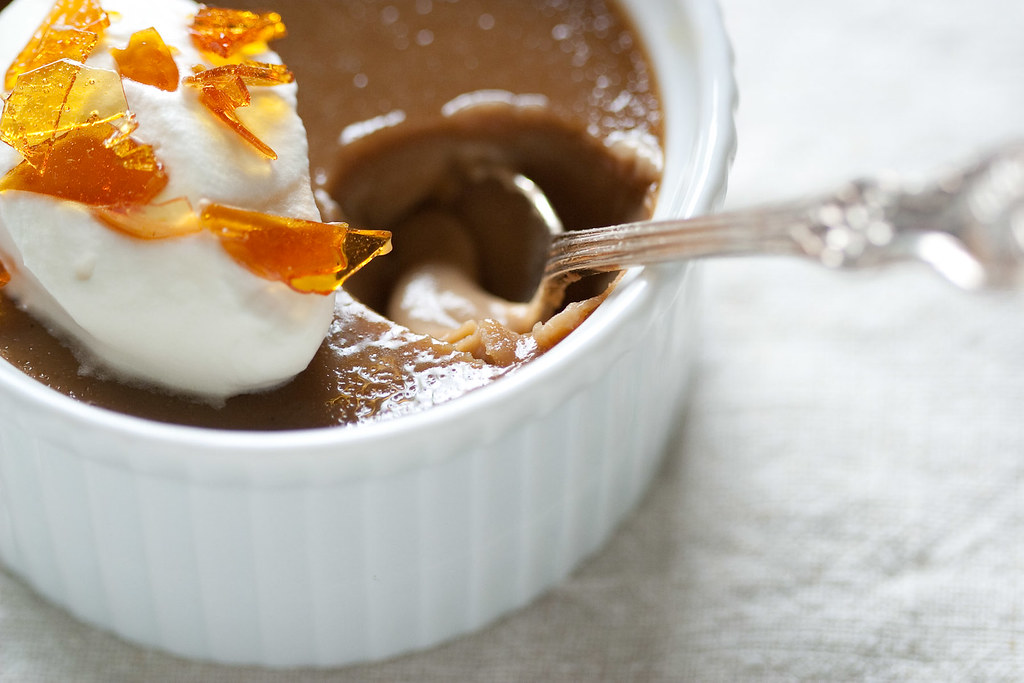
Fortunately one of my favorite food bloggers had recently posted a recipe not for butterscotch pudding per se, but for butterscotch pots de crème. A glance at the ingredient list--including two kinds of brown sugar, a slew of egg yolks, and some fleur de sel--convinced me that I was on the right track. and indeed, I was. These little pots of butterscotch goodness are the very essence of comfort--at least for me. Your favorites might vary, but I suggest that you give this one a try. You just might find that you have a new favorite comfort food.

First bites

Butterscotch Pots de Crème

Adapted from Cannelle et Vanille
Makes about 8 servings, assuming that you use 6 oz. ramekins

Ingredients

  • 500 mL heavy cream (about 2 cups plus 2 tablespoons)
  • 225 mL whole milk (about 1 scant cup)
  • 1 vanilla bean
  • 1/2 teaspoon fleur de sel or other good sea salt
  • 160 grams muscovado sugar (about 1 scant cup, lightly packed)
  • 80 grams demerara sugar (about 1/3 cup)
  • 8 egg yolks

Directions

  1. Preheat the oven to 300F/150C. Get some water heating either on the stove or in the microwave. You'll need it for the hot water bath when the ramekins go in the oven.
  2. Combine the cream, milk, muscovado sugar, and salt in a small saucepan. Split the vanilla bean, scrape the seeds into the pot, and add the scraped bean to the pot. Bring the mixture to a boil, then reduce (or turn off) the heat and keep the pot warm.
  3. Get out a medium saucepan, and place it over moderate heat. Sprinkle half of the demerara sugar evenly over the bottom of the pan. It will begin to melt at the edges, at which point sprinkle the remaining demerara sugar into the pan. Stir or swirl until the sugar is fully melted and a nice, golden caramel.
  4. Carefully (!) deglaze the caramel with the hot cream mixture, whisking in a little at a time. Keep whisking until you get all of the caramel to dissolve. If it's stubborn, return the pot to the heat and keep whisking. Those bits of caramel will work themselves out. Once it's smooth, take it off the heat if you like, but keep it hot.
  5. Whisk the egg yolks together in a medium bowl. Temper the yolks by adding a little of the hot caramel mixture, whisking well, then pour the tempered yolks back into the caramel pot.
  6. Strain the mixture through a fine sieve (or don't, if you're feeling confident or pressed for time), then portion it out into ramekins.
  7. Place the ramekins on a baking sheet, and pour the hot water into the pan and place carefully in the preheated oven. Bake until the pots de crème are just set in the center, about 30-45 minutes. Let cool to room temperature, then cover and chill before serving.

Notes

  • If you can't find muscovado sugar, use the darkest brown sugar you can find. Similarly, if you can't find demerara sugar, use light brown or raw sugar.
  • Need something to do with all those egg whites? Marshmallows are a good choice, and Swiss buttercream keeps beautifully in the freezer for all your impromptu cake-frosting needs.

There's more...

Tuesday, August 4, 2009

The problem with cooking

Marshmallows (III)

Here's the problem with cooking: it ruins things. I don't mean the cup or two of almonds that I left under the broiler too long and toasted way past the point of being edible, and I don't mean the oven mitt that inadvertently got pressed up against--and badly seared by--the heating element when I tried to retrieve my oven thermometer from under the lower rack. (I guess it's not actually ruined, just battle-scarred.) I mean that after cooking something yourself, it can be awfully disappointing when you go back to the often-mediocre purchased version.

My brother and sisters and I received an early introduction to this concept: pies, pancakes, and jam, among other foods, were all ruined for us at an early age. There's just no comparison between homemade strawberry jam and most of the jams and jam-like products you can buy at a grocery store. (Farmer's markets are typically a different story, but when I was growing up they weren't as commonplace in the Bay Area as they are now.) Over the years, food after food has fallen into the "ruined" category: applesauce, cupcakes, pastry cream*, cranberry sauce, and the latest: marshmallows.

This week I am at yet another conference (which is, thank goodness, the last I'll be attending this summer). The first evening, after the student day, there was a dinner followed by a fire for marshmallow toasting. Excellent, right? I haven't toasted marshmallows in years, and I'm long overdue for a beautifully golden, crisp-and-gooey, watch-your-tongue-or-you'll-burn-it marshmallow.

But... meh. I couldn't help feeling a little less enthusiasm than I ordinarily would for toasted marshmallows, and it's all my own fault. Or, if I feel like pointing fingers, it's all Deb's fault. You see, way back in June, Deb put up a post on marshmallows. Deb posts delicious-looking things on a regular basis, and normally it's not a problem, but this particular post went up in the middle of a prolonged cooking drought at the Beyond Ramen household. For nearly all of June, I hardly even set foot in the kitchen. For the first couple of weeks, I was spending nearly every waking moment at work trying to get some results for a conference. Then I was away in Boulder attending said conference, and then I came home for all of 36 hectic hours before heading off to Scotland for yet another conference. Seriously, folks, I went through withdrawal.

I thought about food. I thought about my kitchen. I thought--I schemed--about what I would make when I got back to my kitchen and had time to cook. I thought about how I would photograph what I was going to cook. I bought the latest issues of Gourmet and La Cucina Italiana to try to get a fix, and ended up with even more ideas for what to cook. I wrote extensive notes so that I could preserve those ideas for when I got home.

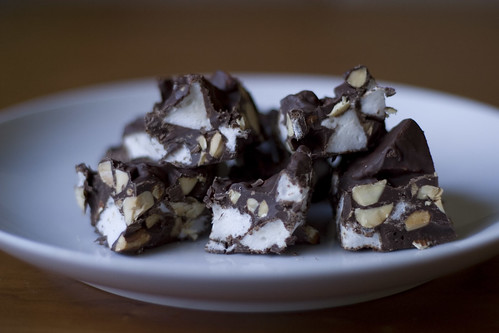
Given my state of mind, Deb's marshmallows were the perfect (or worst) thing for scratching that itch of mine. They were different. They were fun. They were unexpected, not the sort of thing that one often considers making at home. They had the potential to be turned into more fun and different and unexpected things--like homemade rocky road.

Rocky road

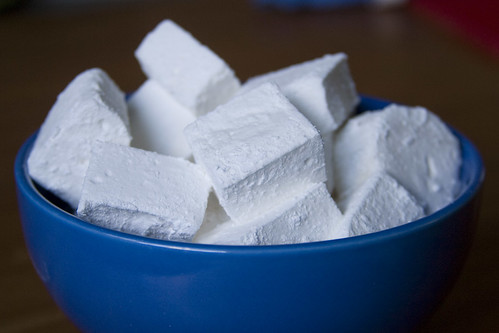
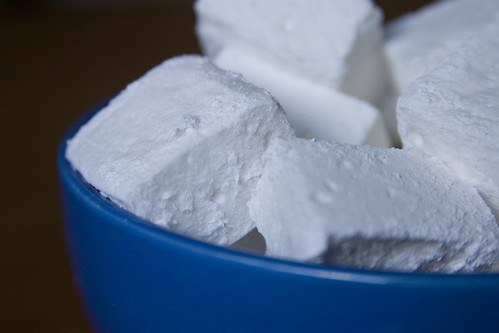
Naturally, when I finally did make it home, they were among the first things I made. And as is so often the case when you make something at home that you've always purchased ready-made, they were reminiscent of the purchased version, but so much better. Who knew that marshmallows could actually be moist? Not I. Moist, light, delicate, and resiliently springy... only distantly related to their rather tough, easily squished store-bought counterparts. They sort of make me think of a strange hybrid between ordinary marshmallows and jello. These marshmallows bounce.

Back at the conference and the not-quite-bonfire, it turned out that the marshmallows were a moot point: there was a pickup volleyball game going on, and I am drawn to volleyball like the Millennium Falcon caught in the Death Star's tractor beam. Fire and toasted marshmallows were quickly forgotten, and I was spared the potential disappointment of uninspiring marshmallows. I'm not saying that I'm so much of a snob that I'll never eat grocery store marshmallows again. I'll eat them, and even enjoy them. But I'll know what I'm missing.

UPDATE: In my typing haste, I neglected to include two items (granulated sugar and salt) in the list of ingredients. My apologies! The recipe should be correct now.

Marshmallows (II)


Marshmallows

Adapted from Gourmet, December 1998, via Smitten Kitchen
Makes one 13x9-inch pan of marshmallowy goodness, which you can cut up as you wish

Ingredients

  • 1 cup (roughly) confectioner's sugar
  • 2 tablespoons plus 2 1/2 teaspoons (or about 3 1/2 envelopes) unflavored gelatin
  • 1 cup cold water, divided
  • 2 cups granulated sugar
  • 1/4 teaspoon salt
  • 2 large egg whites, or (if you're concerned about contamination) reconstituted powdered egg whites
  • 1 tablespoon vanilla extract
  • oil for the pan

Directions

  1. Grease the bottom and sides of a 13x9-inch pan, or a pan (pans) of equivalent volume, and dust with confectioner's sugar.
  2. Pour 1/2 cup of the cold water into a large bowl. Sprinkle the gelatin over the water, and let it stand to soften.
  3. In a medium heavy saucepan, combine the granulated sugar, corn syrup, remaining 1/2 cup of cold water, and salt. Cook over low heat, stirring frequently with a wooden spoon, until the sugar has dissolved.
  4. Turn the heat up to medium, and affix a candy thermometer to the side of the pan. Boil the mixture, without stirring, until it hits 240F/115C, about 12 minutes. Remove the pan from the heat, and combine the sugar mixture with the gelatin mixture. Whisk until the gelatin has dissolved.
  5. Using an electric mixer (or a whisk if you're feeling vigorous), beat the mixture on high speed until it is thick, white, and has almost tripled in volume. This will take at least 10 minutes with a hand-held mixer and 6 minutes with a stand mixer.
  6. Set the whipped gelatin mixture aside, and clean the beaters thoroughly.
  7. In a separate small or medium bowl, beat the egg whites until they barely hold stiff peaks.
  8. Beat the whites and the vanilla into the gelatin mixture until everything is just combined. The mixture should be thick, shiny, and very sticky.
  9. Pour the marshmallow mixture into your prepared pan. Beware the urge to get every last bit of it out of the bowl, unless you're very adept with your spatula and are willing to run the risk of getting strings of marshmallow goop everywhere.
  10. Sift a nice, even layer of confectioner's sugar over the top, and chill the marshmallows until they're firm and springy. This will probably take at least three hours, but you can leave the pan in there overnight if you like.
  11. When you're ready to cut the marshmallows, run a thin knife around the pan's edges. Use your fingers to loosen the marshmallow block--gently, now--from the pan. You can either invert it onto a cutting board, or if you're feeling brave you can just pick up the marshmallow block and place it onto the cutting board.
  12. Use a large knife (or a pizza cutter, or cookie cutters) to cut the marshmallow into the desired shapes. Oil your cutting implement if you have problems with stickage.
  13. Sift the remaining confectioner's sugar into a bowl, or into the now-empty pan, and roll the cut marshmallows in the sugar to coat the cut edges. Shake off the excess sugar before storing the marshmallows in an airtight container.

Notes

  • The original recipe says the marshmallows keep for one week, but mine lasted a lot longer.
  • I haven't yet used these marshmallows for s'mores, but I can tell you that they make excellent homemade rocky road.


* This is a continual source of annoyance for me. What is it with some folks' apparent inability to cook a pastry cream properly so that it isn't chalky?

There's more...

Tuesday, July 14, 2009

A simple summer pleasure

Lemon posset

I admit that my choice of desserts for my Fourth of July menu was a bit odd. (Yes, this post is several days overdue.) The rest of the menu was more or less standard fare: spicy buttered corn, pesto potato salad with green beans, and herbed grilled chicken. But the dessert... well, let's just say that the the humor in using a British dessert to celebrate the date associated with American's asserting their independence from Britain is not lost on me.

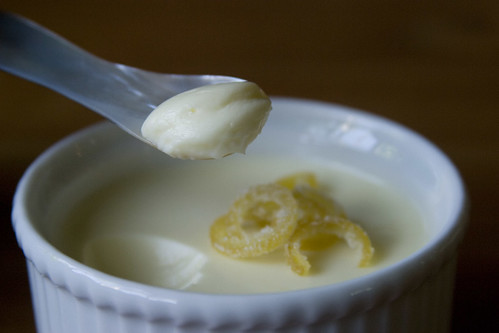
Originally I chose a posset for its simplicity: it requires only a few ingredients, is quickly prepared, and is best made ahead of time. Since I had three other dishes to prepare that afternoon, an easy make-ahead dish suited me perfectly. I was also just back from my trip to Scotland, where my meal at The Dogs* had first introduced me to possets. They are--for those who, like I was, are unfamiliar with them--simply cream, sugar, and acid (typically lemon juice) boiled together, and divided into individual dishes, and chilled until set. They are delightful and, despite the richness of the cream, wonderfully refreshing on a warm afternoon.

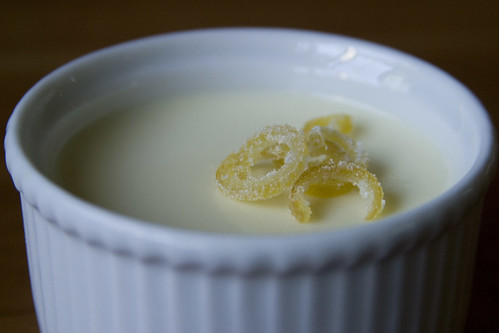
Of course, since they are so very rich--not to mention because they're very little more than cream and sugar, so you're getting some serious bang for every bite--they are best served in small portions, and petite dishes such as ramekins come in handy. They take adornment well, from the light (a bit of lemon zest, freshly grated or candied) to the more substantial (a berry compote, for example), but you can also just enjoy them in their plain, perfect glory. Recipe below.

A bite of posset

Lemon Posset

Makes 6 servings

Ingredients

  • 2 1/4 cups heavy cream
  • 3/4 cup sugar
  • 1/4 cup plus 1 tablespoon fresh lemon juice

Directions

  1. Combine the cream and sugar in a small saucepan and bring to a boil over medium-high heat. Stir to encourage the sugar to dissolve.
  2. Boil the mixture for 3 minutes, stirring constantly and being careful to avoid boil-overs.
  3. Remove the pan from the heat, and stir in the lemon juice. Allow the mixture to cool for 10 minutes.
  4. When it has cooled, stir it again and divide it evenly among six ramekins or other small, individual serving dishes.
  5. Cover the cups and chill until the possets set, at least 4 hours or overnight.
  6. Garnish as desired and serve chilled.


* I cannot mention that restaurant without noting that theirs was one of the best breads I've had in some time, and certainly the best I had while in Scotland. Nuts and seeds, a hearty but soft crumb, and a thick and crunchy crust. I could eat it all day long, especially smeared with good butter and sprinkled with a bit of salt. *swoon*


There's more...

Sunday, May 24, 2009

Almond Biscotti

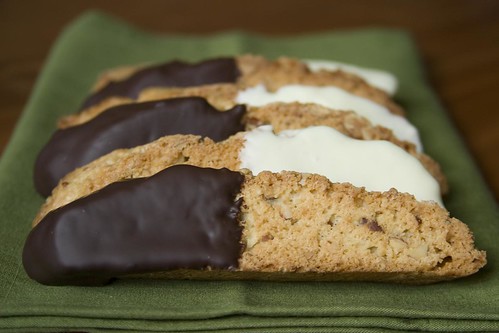
Chocolate-dipped almond biscotti

Biscotti fall into that invaluable category of baked goods that can be put together relatively easily and stored for days or even weeks. They're great to have on hand just in case you: fancy something to nibble on with your tea or coffee, find yourself with unexpected guests, need to crumble some dry cookies for a cheesecake crust, or just want something sweet for a small afternoon snack. There are many good and worthwhile varieties out there, from anise to pistachio to chocolate. My favorite is almond; indeed, I firmly believe that almond is the best and most suitable flavor for biscotti.

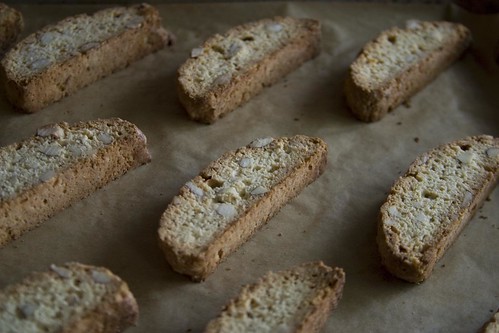
Almond biscotti (I)

Biscotti can be purchased at specialty shops and an increasing number of grocery stores, but as with most baked goods you can buy in a store, I think they're much better when made at home. Purchased biscotti always seem stale and dull to me, whereas homemade ones remain fresh-tasting and full of flavor even several days after baking. In fact, they often improve in flavor if you give them a day or two (or three) to mature.

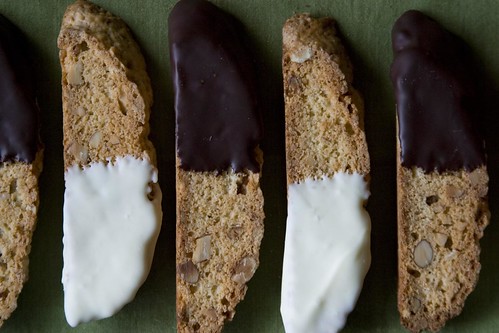
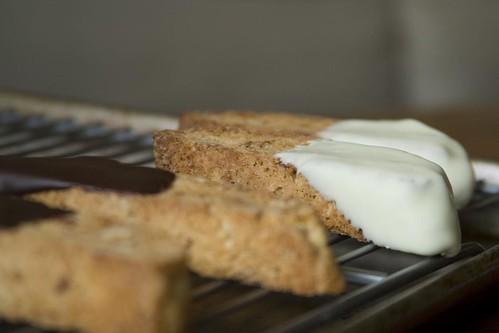
These little Italian cookies are light and crisp, but not so hard that you need to fear for your teeth. They have a beautiful toasted almond flavor that is present, but in a subtle way that makes the cookies feel rather elegant. Biscotti are delicious unadorned, but for some extra fun, dip them in melted chocolate. Dark, milk, or even (perhaps especially) white chocolate all work wonderfully. It just depends on the taste you want. Recipe below!

Chocolate-covered almond biscotti (I)

Almond Biscotti

Adapted from Alice Waters' The Art of Simple Food
Makes about 3 dozen cookies

Ingredients

  • 1 1/2 cups whole almonds
  • 2 1/4 cups unbleached all-purpose flour
  • 1 teaspoon baking powder
  • pinch of salt
  • 3 eggs, room temperature
  • 1 cup sugar
  • 1 teaspoon lemon zest

Directions

  1. Place oven rack in middle position and preheat the oven to 350F/175C.
  2. Spread the almonds out on a baking sheet, and toast them in the oven until just fragrant, about 5 minutes. Let the almonds cool, then chop them coarsely.
  3. In a medium bowl, whisk together the flour, baking powder, and salt. Set aside.
  4. In a large bowl, combine the eggs, sugar, and zest and beat until the mixture falls in a nice ribbon.
  5. Stir in the flour until just combined, and gently fold the almonds into the dough (though it will really be more like a very stiff batter).
  6. Line a baking sheet with parchment paper. Divide the dough into two portions. Using moistened hands, form each portion of dough into a loaf about 3 inches wide, spacing the loaves 3-4 inches apart. Use re-moistened hands to smooth any lumps in the loaves.
  7. Bake until pale golden, about 25 minutes, then let cool for 10 minutes. Reduce the oven temperature to 300F/150C.
  8. Carefully remove each loaf from the parchment paper. Using a serrated knife, cut each loaf into diagonal slices about 1/2 inch thick and place the slices cut-side-down on the baking sheet. Use two baking sheets, if necessary, or work in batches.
  9. Bake cut biscotti for 10 minutes, then turn the cookies and bake until golden and crisp, another 10-15 minutes.

Notes

  • Biscotti keep in an airtight container for several days, or even a couple of weeks (but don't expect them to last that long).
  • Feel free to adjust the flavors as desired: substituting different kinds of nuts or dried fruit, reducing the lemon zest in favor of ground spices such as anise or fennel, and so on.


Chocolate-covered almond biscotti (II)


There's more...

Friday, May 1, 2009

More berries, and something to do with them

Strawberry panna cotta (I)

Baking cakes to go with fresh berries is fun and delicious and all, but around the Beyond Ramen household we need more baked goods like we need a hole in the head. And since eating berries with cakes doesn't actually go through very many berries, I still had a couple of baskets in search of a purpose. Of course, I could (and will) just eat them out of hand, but why limit myself to that when I could make another mess in the kitchen?

But what kind of a mess? Not more baked goods--I still have some of those chocolate crinkle cookies and ginger cakes hanging around--and not something terribly sweet. Maybe something that would use up the milk and cream that was waiting patiently in the fridge. And hey, look at that forgotten box of gelatin in the pantry!

Perhaps you've guessed where I'm going with this: panna cotta. The sort of thing that always makes me a little nervous, because texture in these things strikes me as tricky. I'm ace at custard sauce, such as creme anglaise, but the firm custards seem more difficult. Whatever. I had strawberries, gelatin, and dairy, and I was going to give it a go.

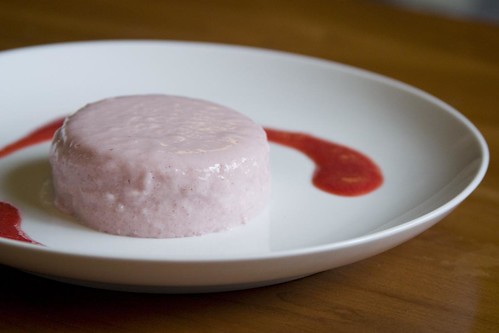
All things considered, it turned out pretty well. The surface was a little runny when it came out of the mold, but it was well set on the inside, and jiggled appropriately when wiggled. And it tasted like strawberry ice cream, which is to say very tasty indeed. Recipe below!

This panna cotta is mild and velvety, and goes brilliantly with even more berries. It is not a super firm panna cotta, so if you like it very firm, you might want to increase the amount of gelatin a bit.

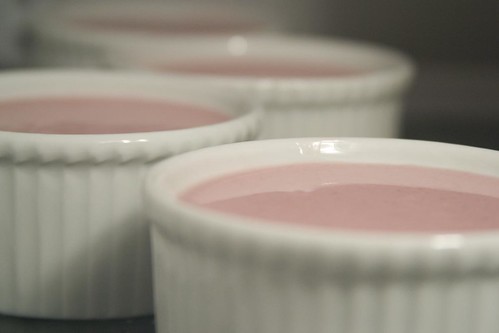
Filling ramekins

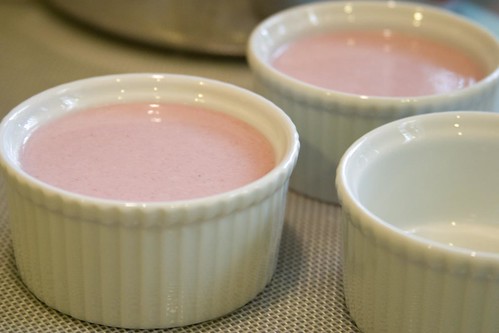
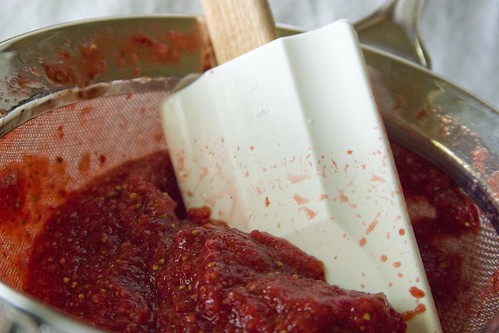
The start-to-finish time for this recipe is quite long, but only because it takes a while for the panna cotta to do its thing in the fridge. The actual active time is quite short, and the the hardest part is pushing the berry puree through the sieve. It's a pain, and it can seem interminable if you're working with a large amount of puree, but the smoothness of the final product makes it worth the effort.

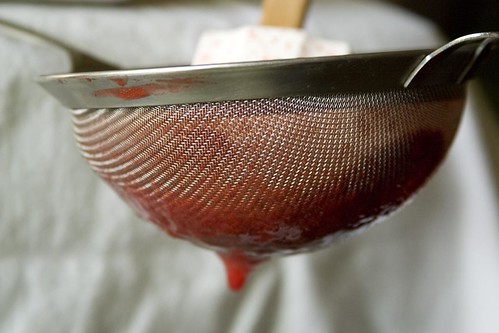
Strawberry pulpStraining strawberry puree

Strawberry Panna Cotta

Makes 6 servings

Ingredients

  • 2 cups strawberries, hulled and halved
  • 1 1/2 cups milk
  • 1/2 cup heavy cream
  • 1/3 cup sugar, see note
  • 1 tablespoon unflavored powdered gelatin (from one envelope)
  • 1/2 teaspoon vanilla extract
  • additional strawberries for serving

Directions

  1. Puree halved strawberries in food processor or blender until smooth. Pour the puree through a fine mesh strainer and, pressing and scraping solids to extract as much liquid as possible. Discard the solids in the strainer and set aside the strained puree.
  2. Set out six small ramekins or molds.
  3. In a medium saucepan, whisk together the milk, cream, and sugar. Sprinkle the gelatin over the mixture and let stand 10 minutes, or until the gelatin softens.
  4. Set the pan over low heat and whisk the mixture until the sugar and gelatin dissolve and the mixture is warm, but not boiling, 5-10 minutes. Remove from heat.
  5. Add vanilla extract and strawberry puree and whisk until well combined.
  6. Divide mixture among ramekins and refrigerate, covered and undisturbed, until panna cotta is set, at least 6 hours or (ideally) overnight.
  7. When nearly ready to serve, prepare additional strawberries as desired. I think that some strawberry puree works well, but you could also slice or halve the berries and toss them with sugar and perhaps some sort of flavoring.
  8. Run a paring knife around the edge of each panna cotta to loosen. Dip the bottom of each ramekin into hot water for 10-30 seconds, depending on the thickness and heat capacity of your ramekin or mold. Invert each ramekin onto a serving dish and shake it gently to unmold the panna cotta.
  9. Spoon strawberries or puree over panna cotta and serve.

Notes

  • Adjust the amount of sugar to suit the sweetness of your berries. If your berries are very ripe, reduce the sugar accordingly.
  • Panna cotta keeps,, covered and refrigerated in ramekins, for up to two days.


Panna cotta chilling


There's more...

Monday, May 5, 2008

A fresh, satisfying salad for a spring or summer* day

I forget how I came across this recipe, as I don't often look through Cooking Light. It's a delightful salad of black beans, wild rice, mango, herbs, and citrus. I've made it twice now, once measuring the ingredients (more or less) carefully and once just throwing a bunch of stuff together without much regard for proportions, and even omitting a couple of ingredients. The latter version came out better, so that's what I'm posting here. The original recipe can be found here. I think it's best served at room temperature or slightly chilled, and with the herbs not-too-finely chopped. Like many salads of this type, it improves with a day or two in the fridge.

Mango, Black Bean, and Wild Rice Salad
Serves 5-6 as a side dish.

1 15-ounce can black beans, rinsed and drained
1-2 cups cooked wild or brown rice
1 mango, peeled, pitted, and chopped into 1/2" pieces
zest and juice of one lime
2-3 scallions, finely chopped
1 medium handful cilantro, chopped
6-7 medium mint leaves, chopped
salt and freshly ground pepper to taste

Combine all ingredients in a bowl and toss to combine. Season to taste with salt and pepper, but be sure to taste it before you begin seasoning it. If your beans and/or rice already have salt in them, you probably won't need much (if any). Serve immediately or chill until (just before) needed.

* Or whenever you can get good fresh mango.

There's more...

Sunday, February 3, 2008

Lentil soup

I've been meaning to post this wonderful recipe for a few weeks. I made it during a brief period of wellness before I got sick again, and having it on hand while I was sick made for some easy, delicious meals. It's a slightly modified version of an Ina Garten recipe, and it's very tasty. As with so many soups, it improves with age and freezes well. A vegetarian version would also be great, without the sausage and with vegetable broth instead of chicken broth.

Lentil Soup

1 pound de Puy lentils (or other small green lentils)
1/4 cup olive oil, plus extra for drizzling
3 medium onions, diced (about 2 cups)
2 leeks, white and light green parts only, chopped (about 1 cup)
3 large garlic cloves, minced
1/2 tablespoon kosher salt
1 teaspoon freshly ground black pepper
1 tablespoon fresh thyme leaves, minced
1 teaspoon ground cumin
4 stalks celery, chopped (about 1.5 cups)
3 medium carrots, chopped (about 1.5 cups)
2 quarts low-sodium chicken broth
1/4 cup tomato paste
1 pound kielbasa, cut in half lengthwise and sliced 1/3 inch thick.
Parmigiano Reggiano, grated, for serving.

Pick over the lentils for stones. Place lentils in a large bowl and cover with 2 quarts boiling water. Allow to sit for 15 minutes, then drain.

Meanwhile, heat the olive oil in a large pot over medium heat. Add the onions and leeks and sauté for 10-15 minutes, until translucent and tender. Add the celery and carrots and sauté for a further 10 minutes, until tender. Add the garlic, salt, pepper, thyme, and cumin and sauté for 1-2 minutes.

Add the chicken stock, tomato paste, and drained lentils. Cover and bring to a boil. Reduce heat and simmer gently, uncovered, for 1 - 1.5 hours, or until the lentils are tender and cooked through. Check the seasonings, and add salt and pepper to taste. Add the kielbasa and simmer until the sausage is heated through. Serve drizzled with olive oil and sprinkled with Parmigiano.

There's more...

Tuesday, October 23, 2007

Chicken soup from start to finish

Adapted from the Cook's Illustrated Best New Recipe cookbook. That recipe called for noodles, but I prefer wild rice in my homemade chicken soup. I had recently fallen out of the habit of making soup with my roasted chicken carcasses, since the stock recipe that I was using, while an excellent stock, was a bit of an undertaking. This one uses vegetables and herbs that I almost always have sitting in my fridge and, despite being very simple, comes out just as robust as the more elaborate stock recipe I used to use. Consider this a starter recipe: you could add mushrooms or whatever other vegetables you like (a friend of mine had great success with adding minced red and orange bell pepper). I've made this soup as written twice now, and gotten excellent results both times. I like to make a full batch and stick some in the freezer for when I'm sick or in a time crunch and need some comfort food.

Chicken and Wild Rice Soup
Makes about 3 1/2 quarts

For the stock:

1 whole chicken carcass (from a roasted chicken), plus saved drippings from the roasting pan (fat skimmed and discarded)
1-2 T. olive oil
1 onion, chopped
2-3 carrots, chopped
3 ribs celery, chopped
fresh parsley
fresh thyme
fresh sage
2 t. salt
water

Heat the oil in a large stock pot or Dutch oven. Add the onion, carrots, and celery and saute for 5-10 minutes, until tender. Add herbs (no need to chop them) and continue to cook for a few minutes. Add 2 1/2 quarts water, the salt, and the chicken carcass (plus drippings). Cover and bring to a boil, then reduce heat and simmer for 60-90 minutes, or until you're satisfied with how it tastes. Cool and strain the broth, discarding the solids.

For the soup:

2 T olive oil
1 medium onion, diced
3 carrots, diced
3 ribs celery, diced
Chicken stock (above)
at least 2 cups cubed or shredded cooked chicken (I usually use the leg meat from the roasted chicken, plus the meat of two legs that I roast while I make the stock)
1 cup wild rice, cooked until almost tender
additional salt and pepper as desired

Heat oil in large soup pot. Add vegetables and saute until softened, 5-10 minutes. Add the stock and chicken and simmer 10-15 minutes, then add the rice and cook until the rice is tender and the soup is seasoned to your liking. Serve with grated Parmesan cheese for sprinkling and good bread for mopping up.

There's more...

Sunday, October 21, 2007

Baked Apple French Toast

This is loosely based on a recipe for Lemon-Raspberry French Toast Strata that appeared in Bon Appetit in March 2007, as well as a couple of other recipes that turned up in some googling. I had some good, crusty bread that was going stale and needed to be used up, so I thought first of French toast (which I love). But since I was going to be making an omelet for someone at the same time, I wanted to do something that could be made ahead and stuck in the oven at the appropriate time. Hence the French toast strata recipe. Raspberries being out of season, and apples being very much in season, I thought I'd tweak things a bit. Or a lot. One of the best things about this recipe is that you put it together the night before you want to eat it, and in the morning, all you have to do is stick it in a preheated oven. If you prepare it the same morning you bake it, it should still be fine, but do let it rest as long as possible before baking--you want to allow the bread to soak up the egg-milk mixture.

A note about the ratio of liquid to bread. Because this recipe is something of a mishmash of a few recipes, and because the dish I used was a different size from what was used in the other recipes, I estimated when figuring out how much milk, egg, and bread to use. The ratio I used (I did, in fact measure the quantities I actually used) makes for a slightly dry, crunchy top. I like the contrast between the crunchy top and the custardy interior, but if you prefer it more uniform, you could add an extra egg yolk and/or some more milk.

Baked Apple French Toast
Serves 3-4

1 medium-sized apple, peeled, cored, and cut into 1" pieces (about 3/4 cup)
1 T butter, plus more to spread in baking dish
1 cinnamon stick, broken into two pieces.
6-8 whole cloves
4-6 whole allspice
2-3 T raisins, as desired
4 cups slightly stale bread, cut into 1" cubes
2 whole eggs
1 egg yolk
1 cup milk (I used skim)
1/4 tsp. salt
3 T maple syrup, or enough to coat the bottom of the dish, plus extra for serving.


Heat butter in a small skillet over medium-high heat and when foam subsides, add the cinnamon stick pieces, the cloves, and the allspice. Cook them until they become very fragrant, about 30-60 seconds, and add the apple pieces. Mix and/or toss to coat them with the butter. After a minute or so over medium-high heat, turn the heat down to low and cook until they are very tender. The amount of time this takes will depend on the variety of apple you used, so pay attention to them. When they're done,turn off the heat, remove the spices, and stir in the raisins. Combine in a large bowl with the bread cubes, and set aside.

Combine milk, eggs, egg yolk, and salt in a small bowl, and whisk to blend. Pour it all over the bread cubes and apple mixture, stirring or tossing to moisten the bread evenly. Butter a one-quart baking dish, and pour in the maple syrup, tilting the dish so that the syrup coats the bottom. Dump the bread mixture into the dish, pressing on it lightly. Cover with plastic wrap and refrigerate overnight to allow the bread to soak up the milk-egg mixture.

When you're ready to bake, preheat the oven to 350. Bake the pudding until golden brown and slightly puffed, 45 minutes. Let cool for 5 minutes, and serve with extra maple syrup on the side.

There's more...

Sunday, October 15, 2006

Chili for a (small) crowd

There are few meals that say "comfort food" to me like chili and rice. I love chili, be it vegetarian, meat chili with beans, or meat chili with not much other than meat; and I particularly love it spooned over (and then mixed up with) a bowl of basmati rice. I almost always have some on hand in the freezer for evenings when I'm too tired or busy to cook, and usually I have both vegetarian black bean chili and a decidedly non-vegetarian chili based on the "Chili for a crowd" recipe from the Silver Palate Good Times cookbook. It's the latter, or my version of it, that I'm posting here.

2 tbsp. olive oil
1/2 lb. diced yellow onions
3/4 lb. bulk Italian sausage--mild or hot, depending on your preference
2 lb. ground beef (I like Central Market's "chili beef," which is a very coarse grind about 1/2" in diameter)
4-5 medium cloves garlic, minced
1 x 6 oz. can tomato paste
1 oz. ground cumin
1 oz. chili powder
3 tbsp. Dijon mustard
1 tsp. crushed red pepper
1 tbsp. dried basil
1 tbsp. dried oregano
24 oz. canned diced tomatoes
1 1/2 c. dry red wine
1 x 15 oz. can black beans
1 x 15 oz. can kidney beans
1 1/2 tbsp. salt, or to taste
freshly ground black pepper to taste

Heat the olive oil in a large soup pot, and cook the onions over medium heat until they are tender and translucent. Add the ground beef and sausage and cook over medium-high heat until browned, breaking up large chunks and stirring often. Reduce heat to medium, add the garlic, cumin, chili powder, oregano, basil, salt, mustard, and tomato paste, and cook for a few minutes. Add the tomatoes, beans, and wine, bring to a boil, and simmer, uncovered, for 30 to 45 minutes. Adjust seasoning to taste and simmer longer if necessary to achieve the desired consistency. This chili freezes well, so make a big batch and stick most of it in the freezer for later.

Makes 8 - 10 servings.

There's more...

Saturday, October 7, 2006

Great fall soup

I've had a bunch of farro on hand for several months now, and haven't quite known what to do with it. I bought it on a whim, thinking it sounded interesting and full of good nutrients (which it is), but it's almost entirely absent from most of my usual recipe sources. But yesterday I found a recipe on Whole Foods' website for a soup involving farro (as well as sausage, mushrooms, and leafy green escarole--yum!), so this evening I gave it a try. I've written it up here as I made it, based on a couple of minor changes that I made: I didn't have any garlic on hand (I know, I know--I thought I did, but it turned out that I'd used it all up), or beef stock, and so on.

Rustic farro soup with sausage, mushrooms, and escarole
Makes a little less than 6 quarts

14 oz. farro
1/2 cup extra virgin olive oil
1 cup carrots, cut into small dice
1 cup celery, cut into small dice
1 1/4 cup yellow onions, cut into small dice
1 1/2 lb. mild Italian sausage
~8 oz. mushrooms, either mixed or of one variety (I used cremini, oyster, and shiitake), chopped
1 14-oz can diced tomatoes, with juice
2 cups red wine (chianti would be a good choice here)
5 cups chicken broth (I recommend Better than Boullion if you don't have homemade on hand)
5 cups mushroom broth (again, I recommend Better than Boullion)
1 1/2 tsp. crushed red pepper
1/2 tsp. freshly ground black pepper
3 tbsp. fresh thyme leaves, chopped
Parmigiano Reggiano cheese

Pick over the farro, put it in a bowl, and cover it with cool or lukewarm water. Let it soak for several hours--four was plenty for the farro that I had, but soaking times may vary.

Set a large soup pot over medium-high heat and add the EVOO. When the oil shimmers, add the carrot, celery, and onion and saute until the onions are translucent and tender, 10-15 minutes. Add the sausage to the vegetables and cook, breaking up with a fork or spatula into small pieces. When the sausage has browned, add the mushrooms and cook, stirring frequently, until the mushrooms release most of hteir liquid. Add the tomatoes and juice, wine, chicken and mushroom stocks, and crushed red pepper, bring to a boil, and simmer for 30 minutes. Add the drained farro and simmer, stirring occasionally, approximately 45 minutes. When the farro is sufficiently tender, add the escarole and chopped thyme, and simmer a few more minutes until the escarole is cooked.

I served this soup very hot, with grated Parmigiano on top, with slices of crusty bread and a glass of the wine I used in the soup. Delicioso.

Enjoy!

There's more...