


I am not a natural at yeasted doughs. The bread usually turns out tasty enough, but the dough is often heavy, dense, and almost pebbly. It is most definitely not the smooth, supple, stretchable dough that I see in professional bakers' pictures. I have tried reducing my flour-to-liquid ratio, using bread flour, letting the dough rest between bouts of kneading, and so on. Sometimes these tactics helped, but they never quite got me there.
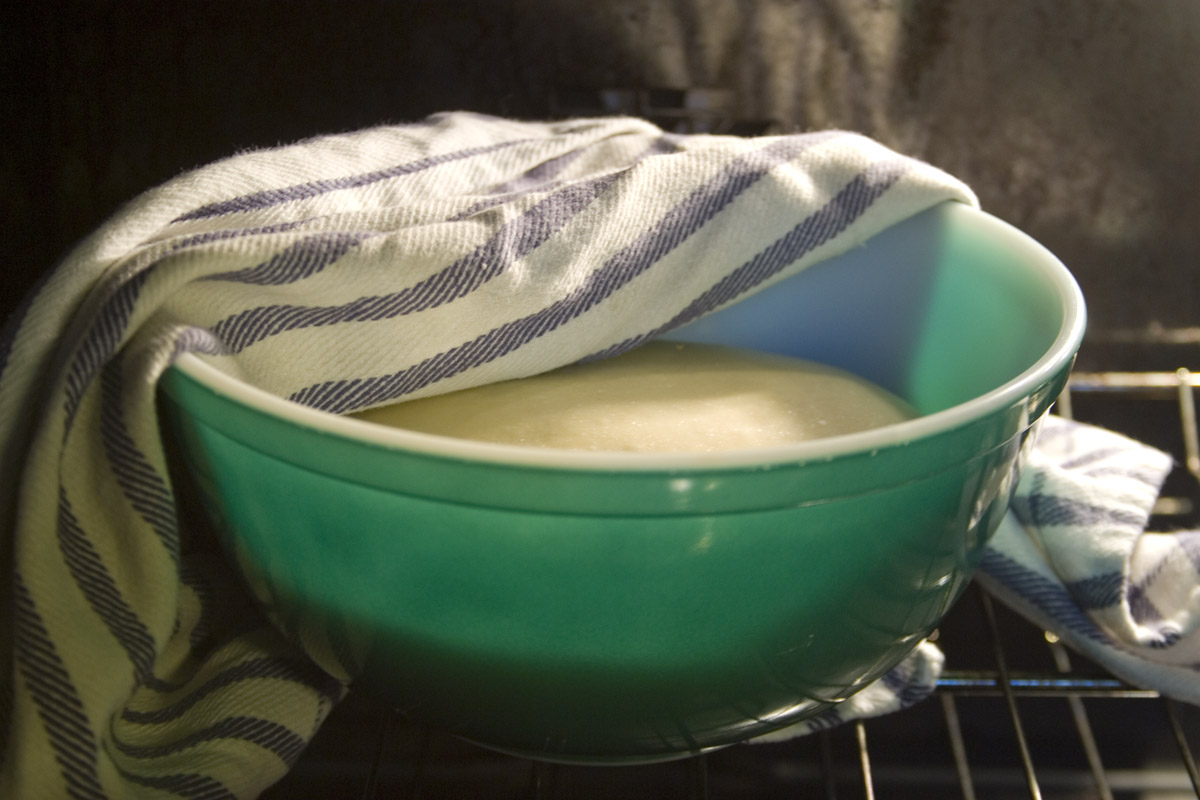
Then it all came together, naturally, when I least expected it. I don't know if it was the recipe I used, the ratio of flour(s) to liquid(s), the precise way in which I kneaded (and, at times, didn't knead) the dough, the alignment of the planets, or all of the above. Whatever it was, it worked. That "smooth, elastic" quality that recipes are always instructing you to achieve? I had it. Finally. It's a crying shame that the pictures--and I took several--can't convey the feel of this dough. It was luscious.

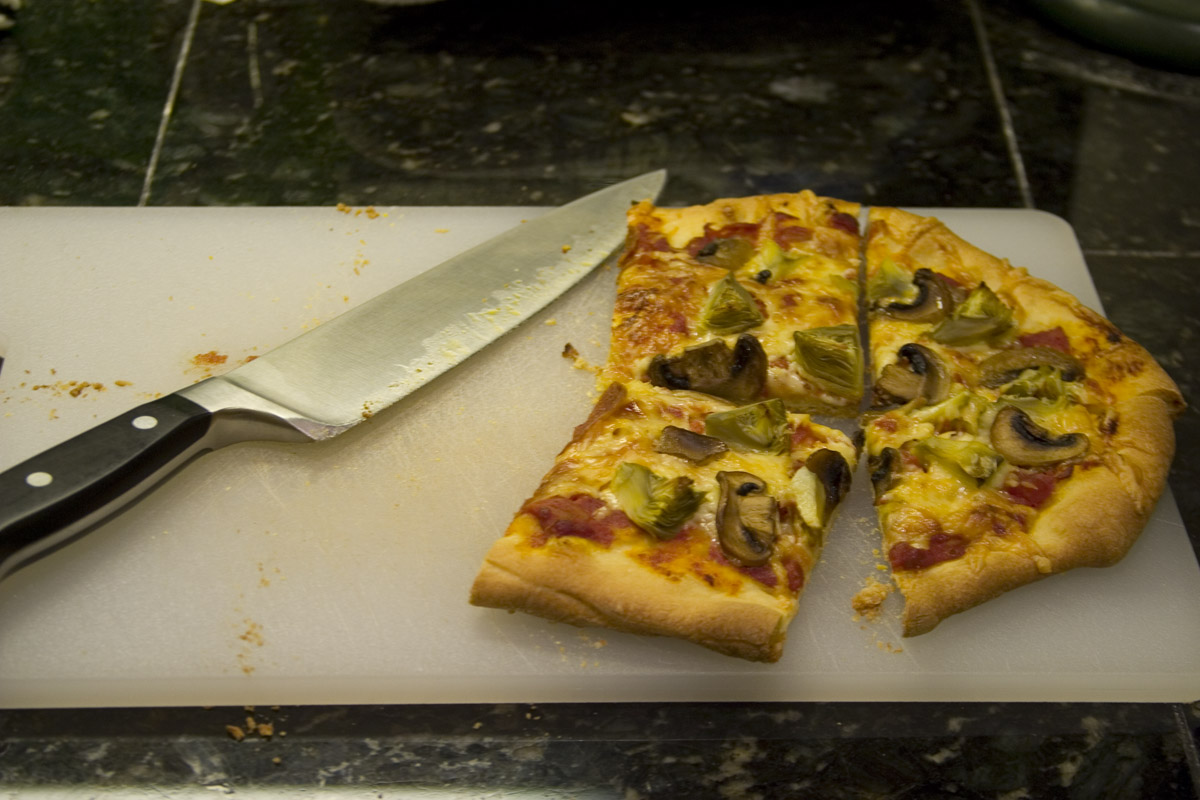
This dough, as it happened, was not for bread but for pizza. Homemade pizza is a staple in my family, the perfect thing for a large family or group of people: make a big batch of dough, set out a bunch of toppings, and let everyone make exactly the pizza that he or she wants. Squabbling is kept to a minimum, unless someone hoards the pepperoni, and even the most disparate tastes are satisfied. It's also just a lot of fun, and hey, who doesn't like pizza?
It's difficult to replicate at home the high temperatures of a proper pizza oven (unless you happen to have one, in which case where do you live and may I visit you?) but it's not that difficult to make pizza that tastes good even if you can't get quite the same texture in the crust. You can buy pizza dough, and in some cases you can actually buy very good pizza dough, but it's less expensive and (I think) much more satisfying to make it yourself. And it's easy. Follow me below the fold for the recipe.

Pizza dough
Adapted from Emily Weinstein/New York Times
Makes dough for 2-3 medium pizzas
Ingredients
- 1 1/2 cups all-purpose flour, plus extra for kneading
- 1 1/2 cups bread flour
- 2 teaspoons kosher salt
- 1 cup water (see note)
- 2 teaspoons active dry yeast (a little more than half a packet)
- 3 tablespoons plus 1 teaspoon olive oil
- pinch of sugar
Directions
- Proof the yeast. Heat about half of the water up to 100-115F. Mix in the pinch of sugar and the yeast, and let sit. You should start to see small bubbles on top within 5-10 minutes. If you don't, try again with more water and new yeast (see note).
- Meanwhile, mix together flours and salt in a large bowl until well combined. When the yeast mixture is bubbly, add it to the flour and give it a few stirs. Add the 3 tablespoons oil and the rest of the water, and continue mixing. Before long, you should wind up with a slightly sticky ball of dough.
- Flour a work surface and dump the dough out onto it. Knead the dough, resting periodically if it tightens up, until it is soft, smooth, and elastic. At this point the dough may cling somewhat to the work surface and your hands, but shouldn't stick so much that it leaves bits of dough on whatever it touches.
- Grease a large bowl with the remaining oil, and turn the dough around in it so that it is coated on all sides with the oil. Cover the bowl with plastic wrap and/or a clean cloth, and place it in a warm, draft-free area to rise. If your kitchen isn't very warm, I recommend placing the bowl in the oven with the light on. Let the dough rise for an hour or two, until it has doubled in size.
- About an hour before you want to start baking the pizzas, place a baking stone (if you have one) on the lowest rack of the oven, and preheat the oven to as high a temperature as it can safely manage.
- Refresh the flouring on your work surface (see note). Punch the dough down gently, and turn it out onto the floured work surface. Divide it into two or three portions, as needed, and form into pizzas. You can use a rolling pin for this, and you might get more consistently well shaped results that way, but I find that it's more fun to toss the dough.
- Sprinkle a pizza peel with flour (or cornmeal) and lay rolled/tossed dough on it. Jerk the peel back and forth to ensure that the dough moves freely--you don't want to get your toppings nicely arranged only to find that the dough has stuck to the peel. Top the pizza however you like, then slide it onto the baking stone and bake for 8-20 minutes, depending on your oven temperature, until crust has browned and cheese is bubbling. If you don't have a pizza peel, use a baking sheet: sprinkle the sheet with flour or cornmeal, arrange dough and toppings, and just lay the sheet directly on the baking stone.
Notes
- You might need to adjust the amount of water based on how humid (or not) your kitchen is. 1 cup is probably on the lower end, so increase by a few tablespoons if you live in a dry climate or have the air conditioning running.
- Your yeast might be old (check the expiration date on the packet, if you have it), or your water might be too hot or too cold. I recommend using a thermometer to ensure that you've got the right temperature range, at least the first few times or until you get a sense of what that temperature feels like.
- I've seen recommendations for using rice flour or semolina flour at this stage, but don't feel that you have to rush out and buy some just for this recipe. Regular flour is fine.
- The dough keeps for several days in the fridge, wrapped tightly in plastic, so you can make it ahead of time or just make a large batch and save some for later.
4 comments:
:)
Looks perfect!
And the photos are as luscious as you made the dough sound.
I'm so psyched for this recipe! The perfect pizza crust is one of my perpetual quests.
I've been using Jamie Oliver's recipe lately -- which is good, but a bit too ciabatta-like. BTW, your dough really does look both silky and elastic.
Thank you both!
I think that a pizza on ciabatta-like crust could be delicious, but it's generally not what I'm going for when I think of pizza. This crust didn't have quite the chew to it that I like my pizza crust to have, but it's still very good.
It's really hard to get that "chew," isn't it? I haven't found one yet.
Post a Comment